Step 37 Thread the fuel control solenoid as-
sembly into the hydraulic head hand tight.
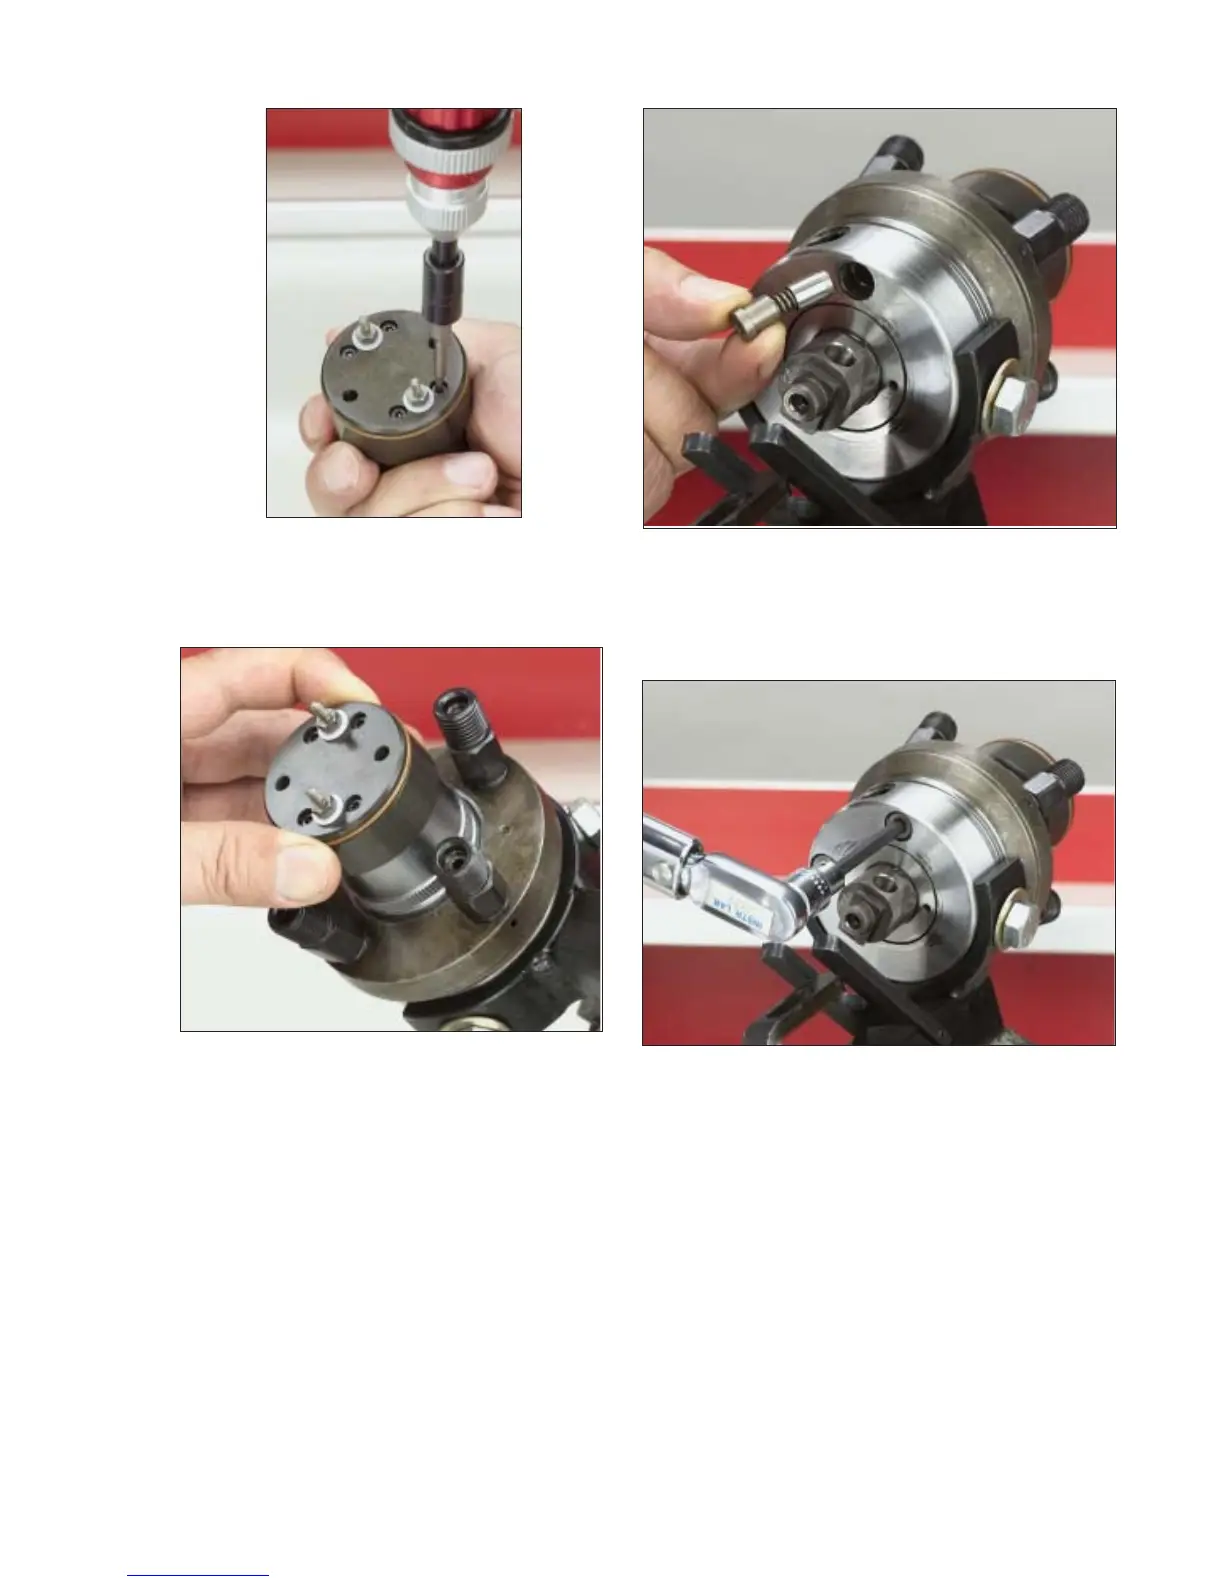
Step 38 Reposition the poppet valve setting
fixture in the vise horizontally. Locate the two
accumulator springs noting the difference in wire
diameter of the springs. Install one accumula-
tor piston, open end out, the spill accumulator
spring (larger wire diameter) and stop into the
bore adjacent to the vent wire bore. Install charg-
ing accumulator piston, spring (smaller wire di-
ameter) and stop into the accumulator bore.
Step 39 Install accumulator retaining screw
plugs to bores and tighten to 90-110 lbf-inches
(10-12 N-m) using a 3/16” hex bit.
Step 40 Install dial indicator to the 31204 fix-
ture and slide indicator in the bracket until it
contacts the rotor and deflects the dial approxi-
mately 0.010”.Tighten indicator mounting screw.
Rotate dial indicator face to “zero” indicator and
tighten the face clamping screw.
Fig. 4.36b
Fig. 4.37
Fig. 4.38
Fig. 4.39
38