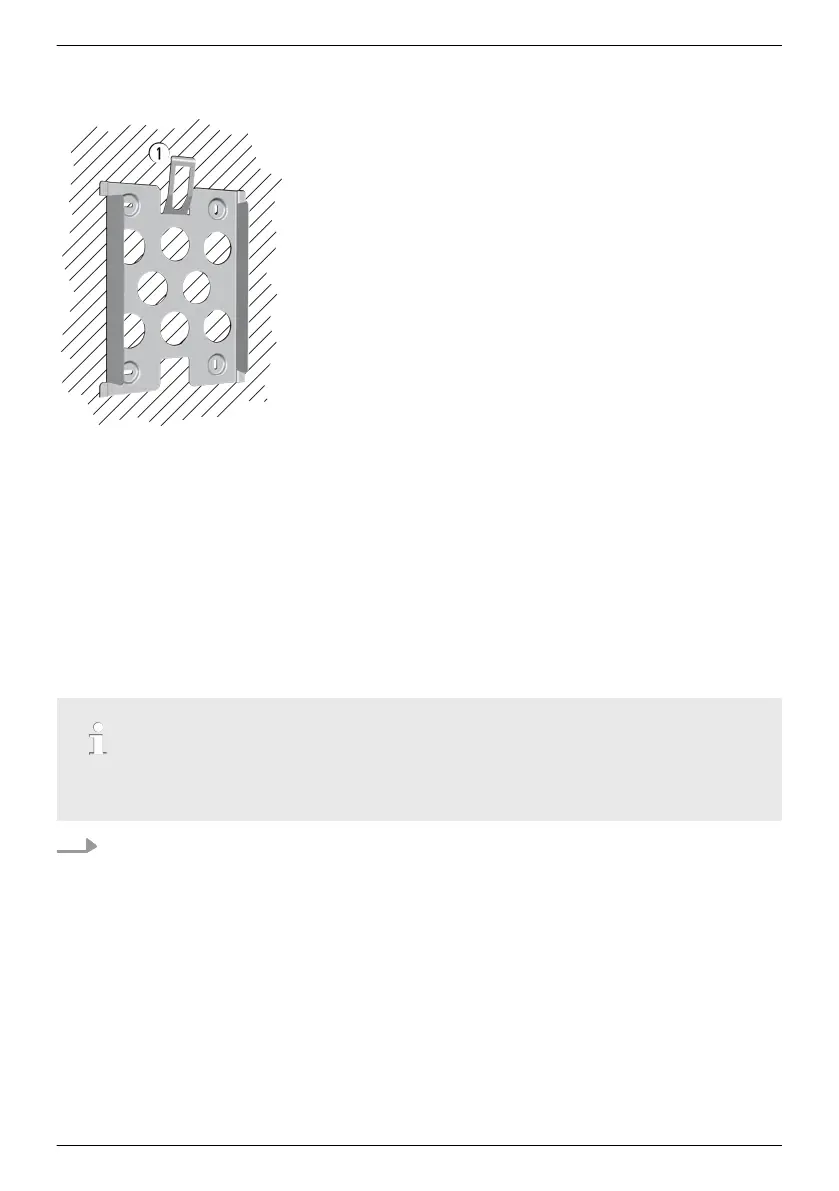
4.2 Mount the inverter
Fastening the mounting plate
u
Screw the mounting plate to the mounting surface using 4
screws:
n Use screws (and dowels etc.) appropriate for the weight of
the inverter.
n The mounting plate must lie flat on the mounting surface
and the metal strips at the sides must point forwards (Fig.
left).
n Install the mounting plate vertically with the retaining plate
① at the top (example in Fig. left).
—————————————————————————
Note
With coolcept-x, you can secure the inverter with a padlock against
theft or unauthorized removal. The padlock is inserted in a shackle
which will lock into the retaining plate during mounting. Now, it is
no longer possible to unlock the retaining plate.
—————————————————————————
—————————————————————————
Note
For more information on determining the optimum position for the
mounting plate, refer to the Brief Installation Instructions comprised
in the delivery, and to the Appendix under Mounting.
—————————————————————————
For Australia only: Mask off the Protection Class II symbol on the type plate.
Note
When the inverter is used in Australia, the national regulations do not permit the
Protection
Class II symbol to be displayed on the type plate.
Completely cover the Protection Class II symbol using the small sticker provided, as shown in
Fig. 11
.
EN
747,431 | Z09 | 2015-09-30
35