Service Information
17
SIDERAIL ASSEMBLY REMOVAL AND REPLACEMENT (CONTINUED)
11. Slide the side of the stretcher with the remaining siderail next to a wall to brace it or support it with bungee
cords before starting to install the new siderail.
12. Lift the new siderail into position.
13. Insert the foot end jack support into the hole in the support tube bracket on the siderail. Insert the head
end jack support tube into the slot in the Trend slide block.
14. Install the three bolts at the foot end litter weldment. Tighten to 13 foot−pounds torque.
15. Install the two bolts at the frame tie weldment.
16. Install the three bolts at the head end litter weldment.
17. Install the two bolts at the Fowler drop seat bracket. Tighten to 13 foot−pounds torque.
18. Install the litter corner covers, the slider board tray, the O2 holder and the monitor tray.
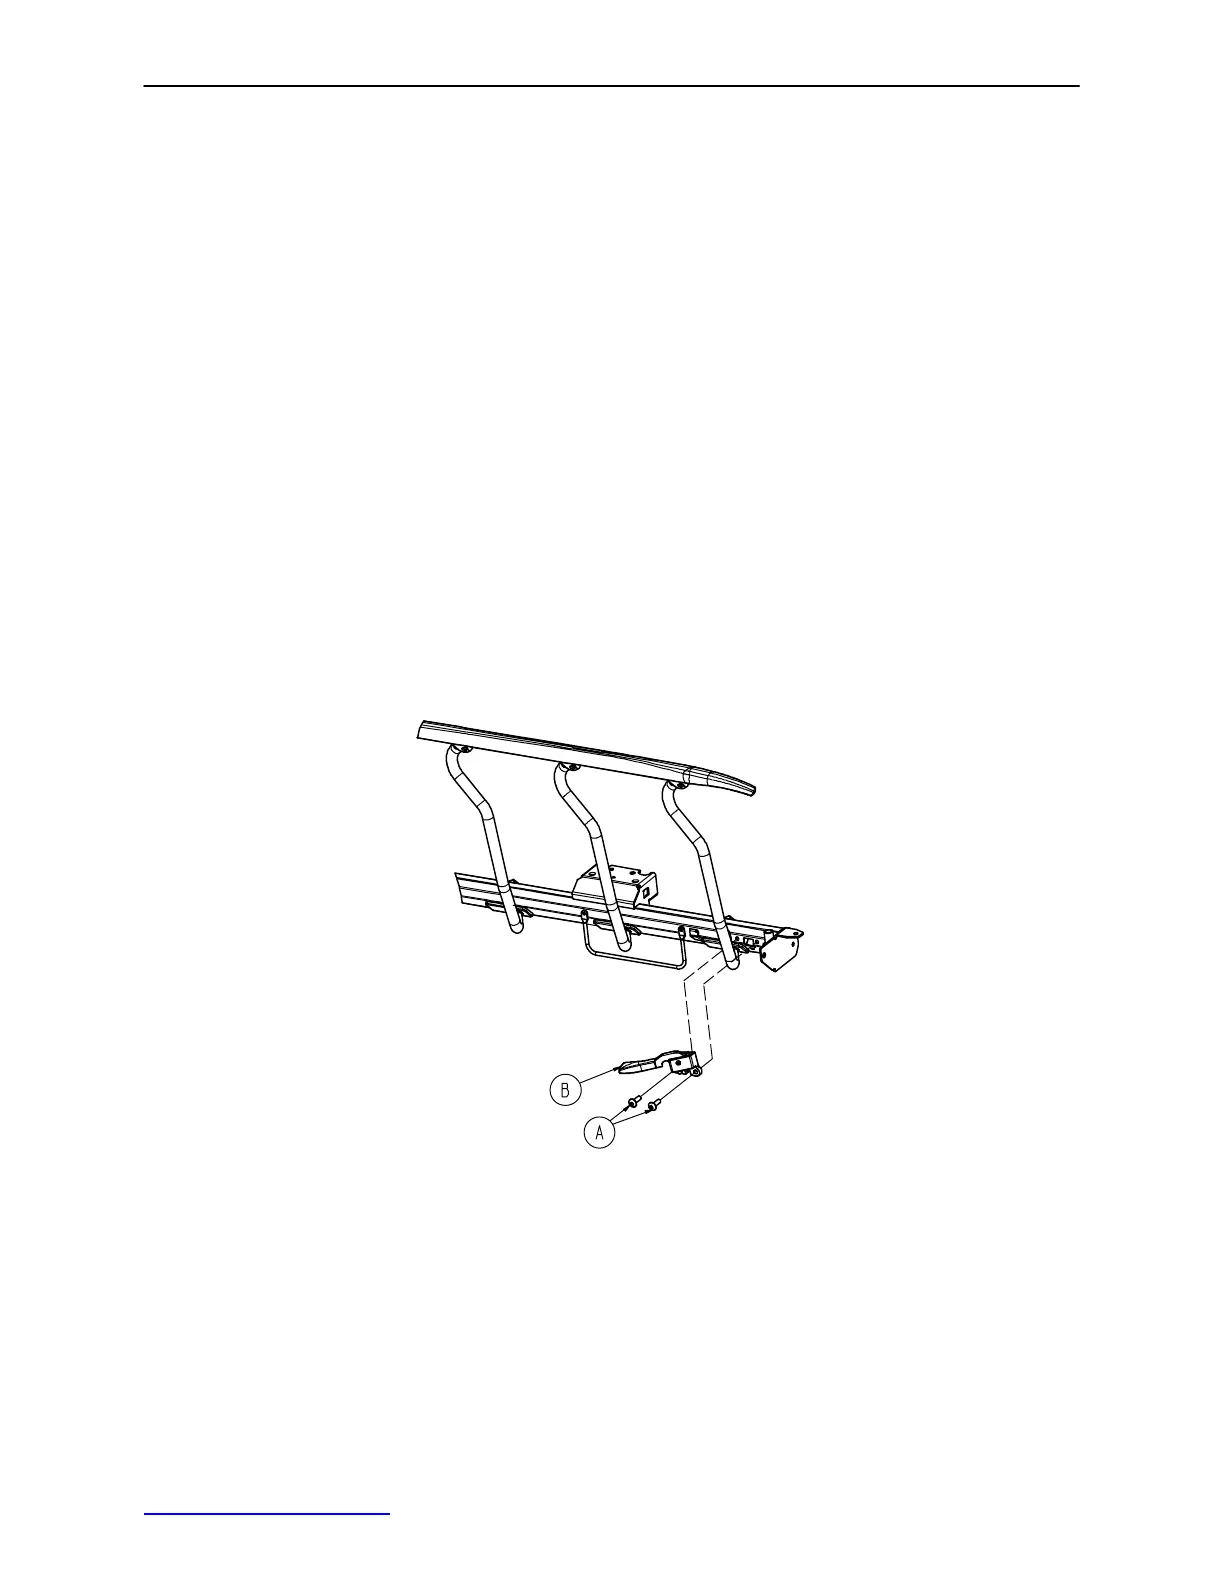
SIDERAIL LATCH REPLACEMENT
Required Tools:
3/8” Drive Ratchet T40 Torx Bit
1. Using the foot pedal, raise the litter to maximum height.
2. Remove the two bolts (A) holding the siderail latch (B) to the litter frame and discard the bolts and latch.
3. Using the new bolts provided in the kit, install the new siderail latch.
4. Verify proper latching and unlatching of the siderail before returning the stretcher to service.
Return to Table of Contents
 Loading...