27
CCaauuttiioonn
66
HOW TO REPAIR THE MACHINE
The machine is set to be the best condition at the factory. Do not make any discrete adjustments on the
machine and replace genuine parts approved by the company only.
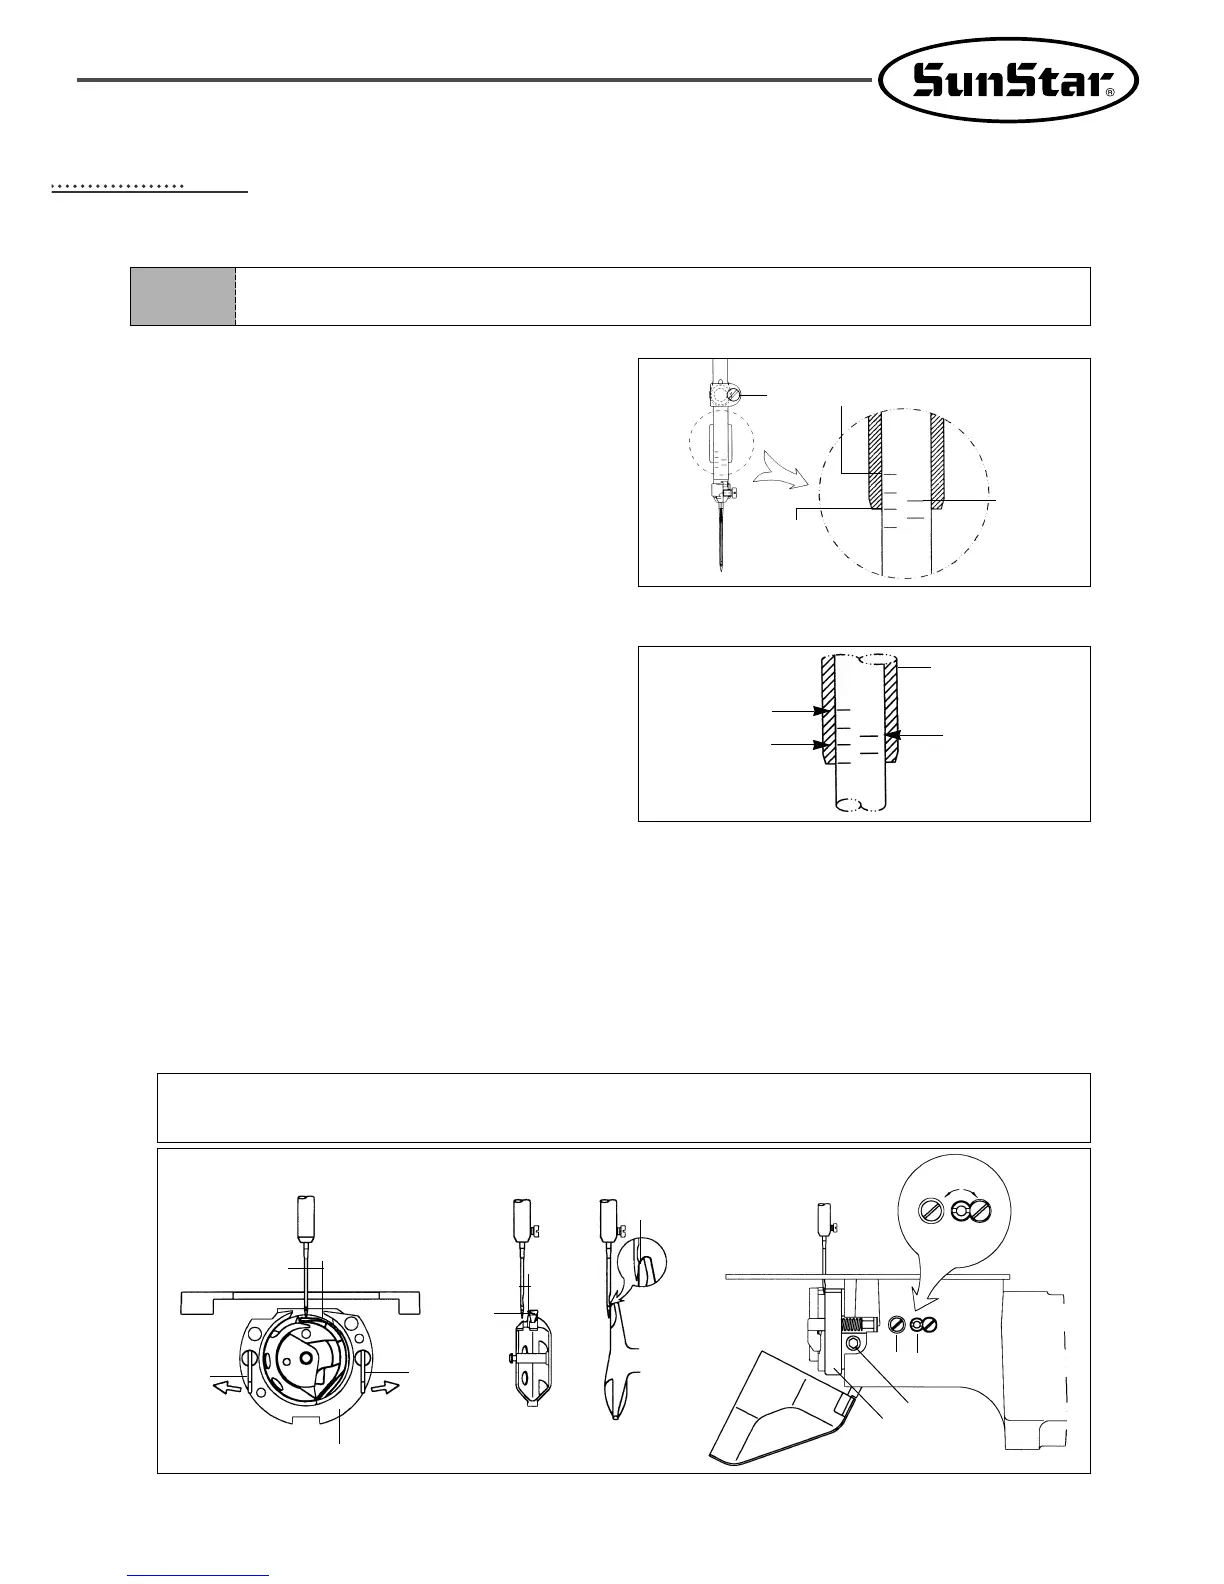
1) Adjusting the Height of the Needle Bar
When the needle bar is at its lowest position, unfasten
the needle bar holder screw ①. Adjust the desired
height by making the specified upper carving line fit in
with the needle bar bushing. Then, tighten the needle
bar holder screw back on firmly.
2) Adjusting the Needle and the Shuttle
B. After unfastening the shuttle drive screw ①, open the inner hook pressure bar ② left to right and remove the
shuttle Race ring ③ from the (large) shuttle ④.
C. Make the shuttle hook point accord with the center of the needle. And make the needle and the front face of the
shuttle drive connect each other to prevent the needle from curving. Then, tighten the drive screw ① firmly.
D. After unfastening the (large) shuttle screw ⑤, turn the large hook adjustment shaft ⑥ to the left to right and adjust
the (large) shuttle ④ so that the needle and the shuttle hook point is 0.05~0.1mm apart from each other.
E. After adjusting the (large) shuttle ④ in place, adjust the rotary direction of the (large) shuttle ④ so the needle and
the (large) shuttle ④ is 7.5mm apart from each other. Then, tighten the (large) shuttle screw ①.
A. Have the lower carving line for the needle that is
applied when the needle bar goes up fit in with the
lower side of the needle bar bushing as shown in the
picture.
[ Fig. 35 ]
[ Caution ]
For safety, make sure all the screws are tightened firmly after adjusting the (large) shuttle.
[ Fig. 33 ]
[ Fig. 34 ]
①
DP×5
DP×17
#21 and
Below
DP×17
#22 and
Above
Needle Bar
Lower Bushing
DP×5
DP×17
#21 and
Below
DP×17
#22 and Above
7.5mm
②
②
⑥
③
→
→
0.05~0.1mm
→
→
⑤
①
④
0mm
 Loading...

