29
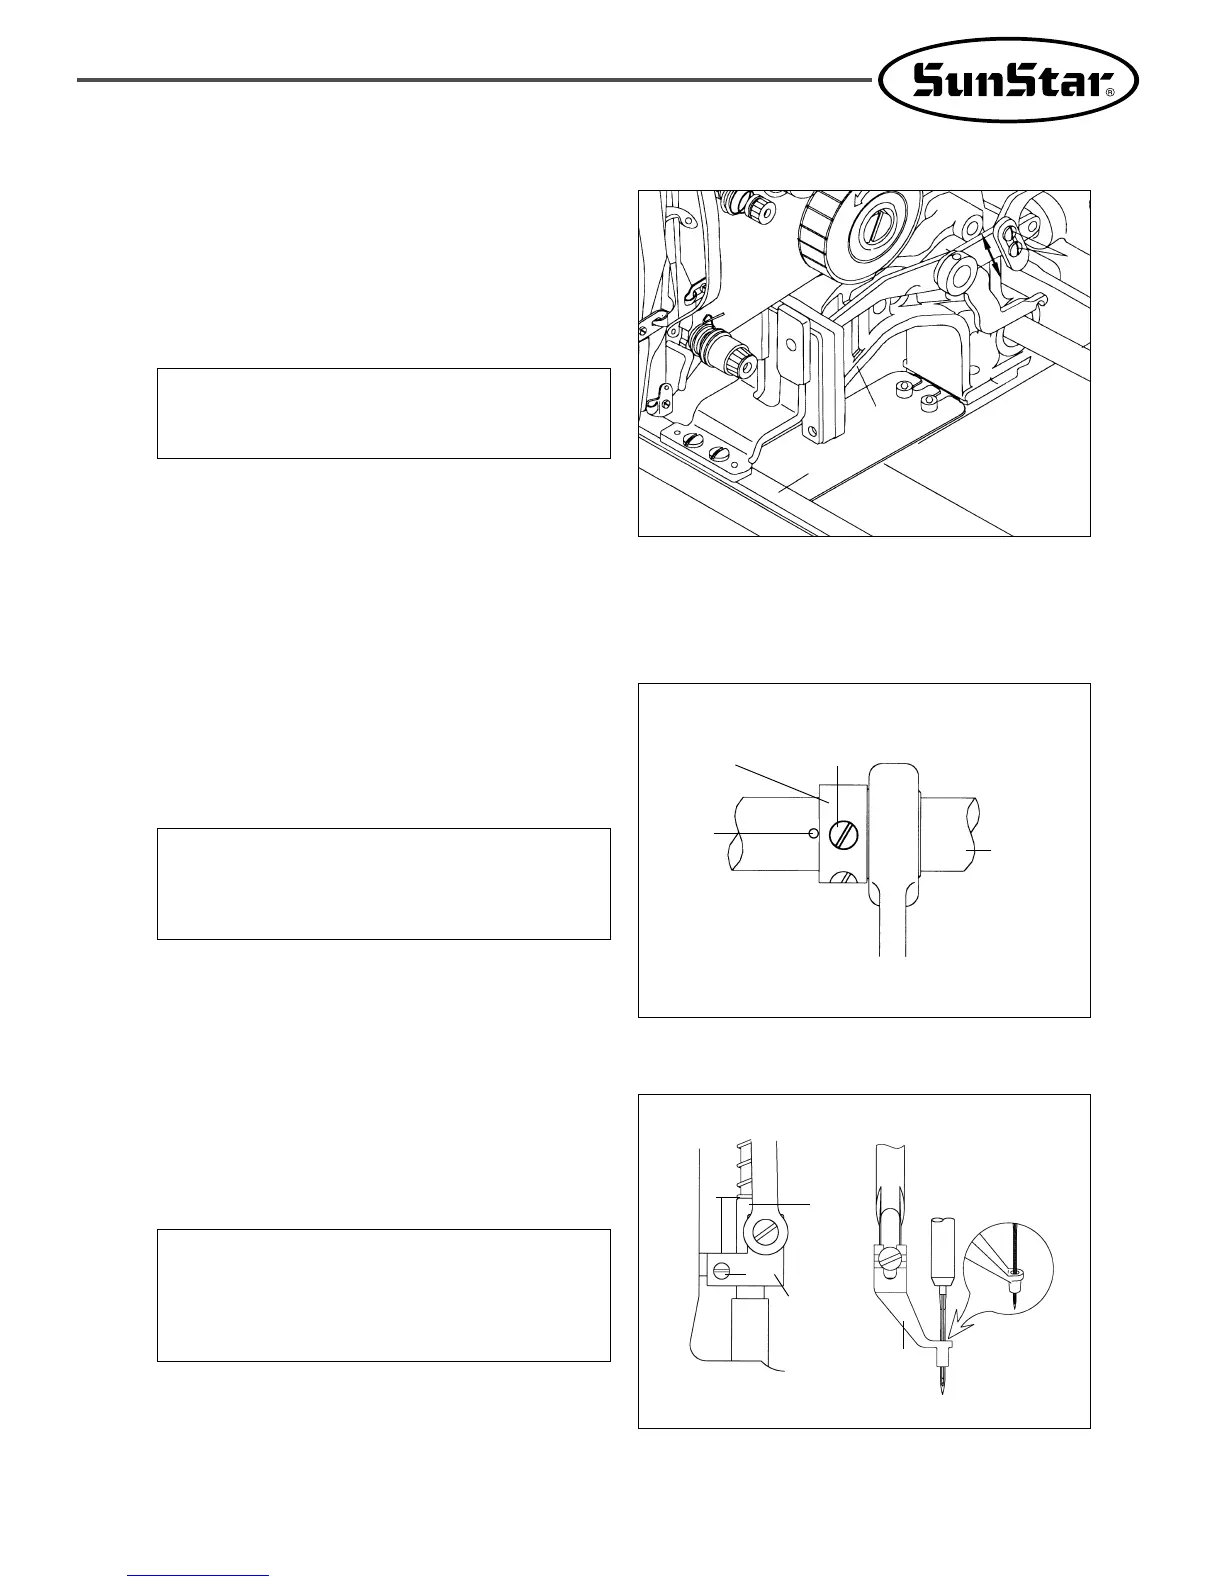
5) Adjusting the Height of the Feed Plate
After unfastening the lifting lever control plate screws ② on
each side of the feed bracket ①, raise the control plate in
direction A to lower the upper feed plate ③ and lower the
control plate in direction B to heighten. Tighten the lifting lever
control plate screws ② back on firmly after adjusting the height
of the upper feed plate ③.
[ Fig. 38 ]
[ Caution ]
Tighten all the screws back on completely after adjusting
the feed plate height.
[ Caution ]
If the presser foot drive cam is not in the right position,
the presser foot may not move vertically in time and run
into the needle bar.
[ Caution ]
Fasten joint screw① of presser bar with the pressure
about 40-45kgf/㎠. If connection pressure is excessive, it
becomes cause of deformation of presser bar and cause
trouble to machine operation.
6) Adjusting the Presser Foot Devices
A. Have the end of the presser foot drive cam accord
with the carving point center of the upper shaft, and
the line of the cam accord with the carving point.
Tighten screw ①.
[ Fig. 39 ]
B. Height Adjustment of Presser Bar
Adjust the presser bar that end of presser bar should
come out about 17mm from presser bar handle and
check if the needle passes through center of presser
bar. If checking ends, fasten joint screw ①.
[ Fig. 40 ]
①
Upper
Shaft
Presser
Bar
Presser
Foot
①
17mm
Presser
Bar
Holder
→
→
Carving
Point
①
A
B
③
②
Presser
Foot Drving
Cam
 Loading...

