50
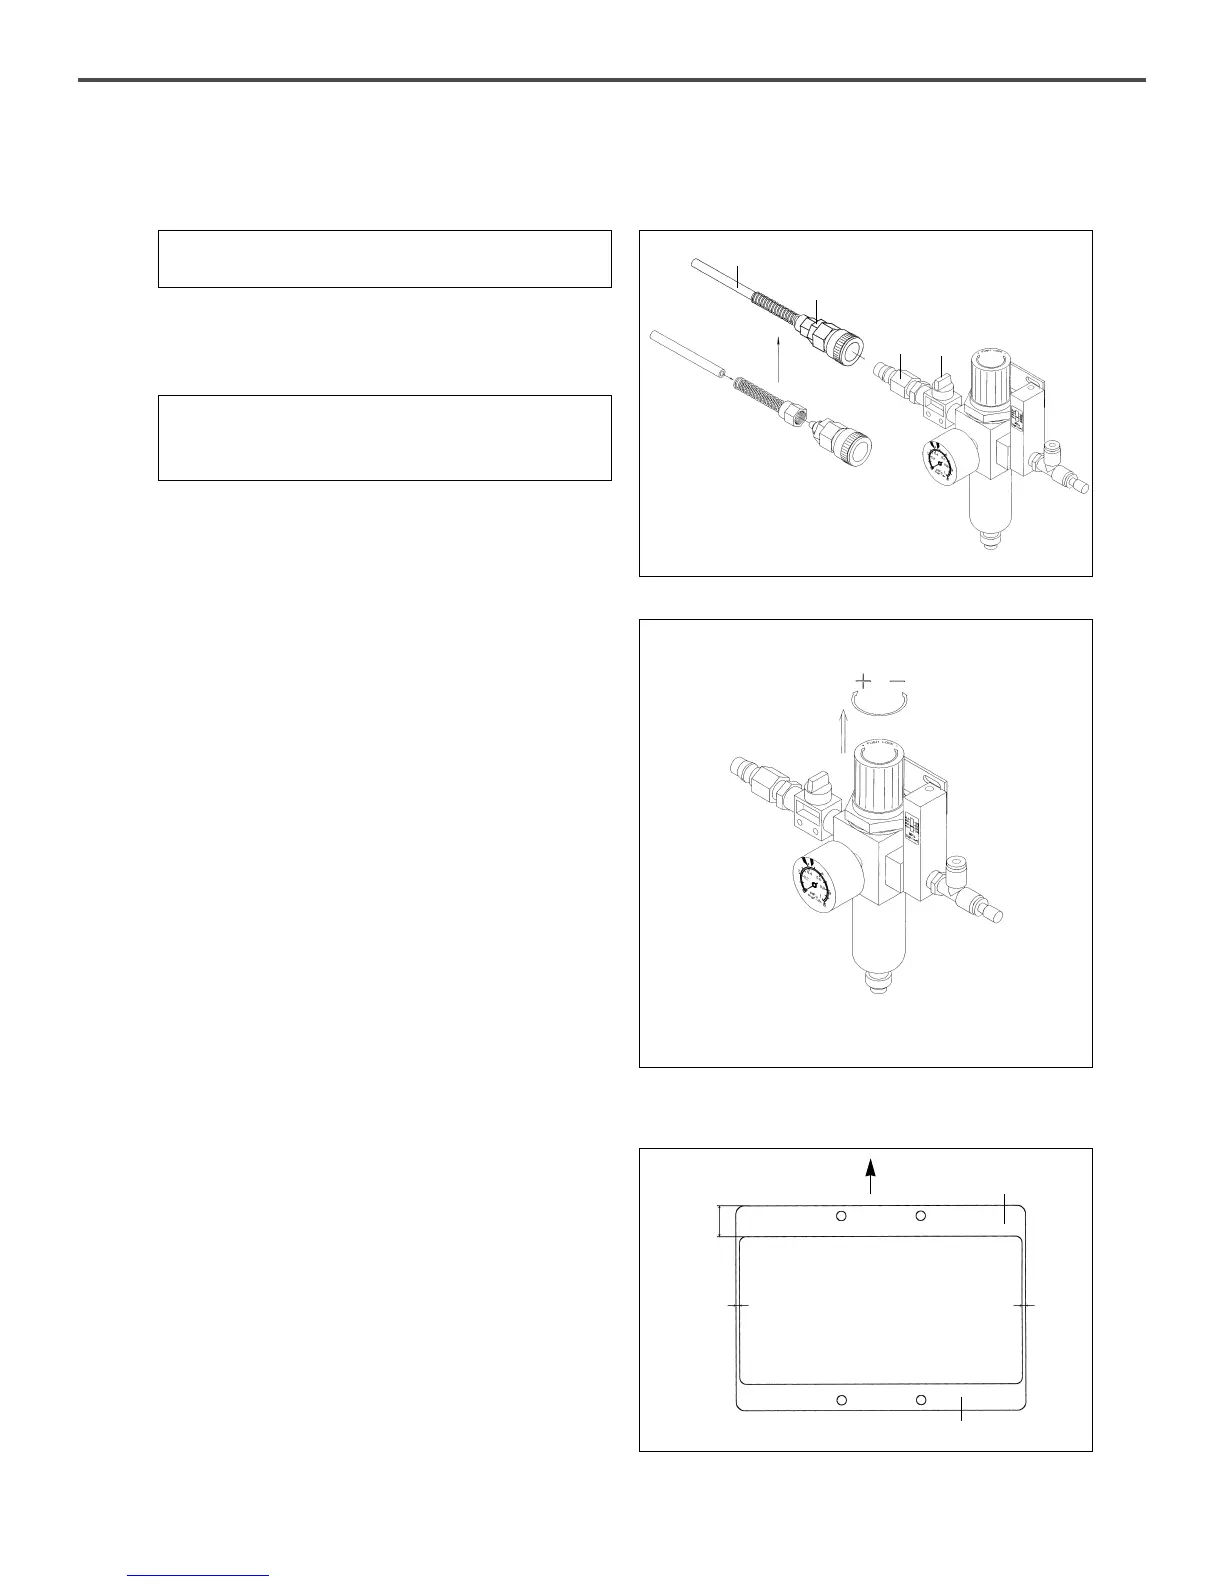
2) How to Attach the Parts for Air Pressure Control
A. Connect air hose ② to quick joint socket ①.
B. Contract quick joint socket ① and quick joint plug ③.
C. Open finger valve ④ and flow air in. Then, adjust the
air pressure to 0.39~0.44 MPa(4~4.5kgf/cm²).
3) How to Adjust the Air Pressure
Pull the adjustment handle ① on the upper part of the
filter controller, which is attached to the back of the
table, up as shown in the picture.
When the handle is turned clockwise the pressure goes
up and goes down when the handle is turned in the
opposite direction.
Adjust to the appropriate pressure 0.39~0.44MPa
(4~4.5kgf/㎠) indicated in the pressure gauge, then
press and fix the adjustment handle into its place.
[ Note ]
When the finger valve is closed after use, the remaining
air is rejected and the pressure is adjusted to
0 MPa(0kgf/cm²).
[ Fig. 76 ]
[ Fig. 77 ]
[ Caution ]
When the air pressure goes down (under 3kgf/cm²), an error
is indicated and the machine operation is stopped.
[ Caution ]
For safety, work with the power cut off.
②
①
③
④
4) Attaching the Pressure Plate Sheet and
Adjusting the Height of the Slider Base
A. How to attach the pressure plate sheet
Attach the pressure plate sheet where the slider base
and the pressure plate meet as shown in the picture.
[ Fig. 78 ]
Direction of
Face Plate
17.8mm
2mm
2mm
Presser Plate
Presser Plate Sheet
 Loading...

