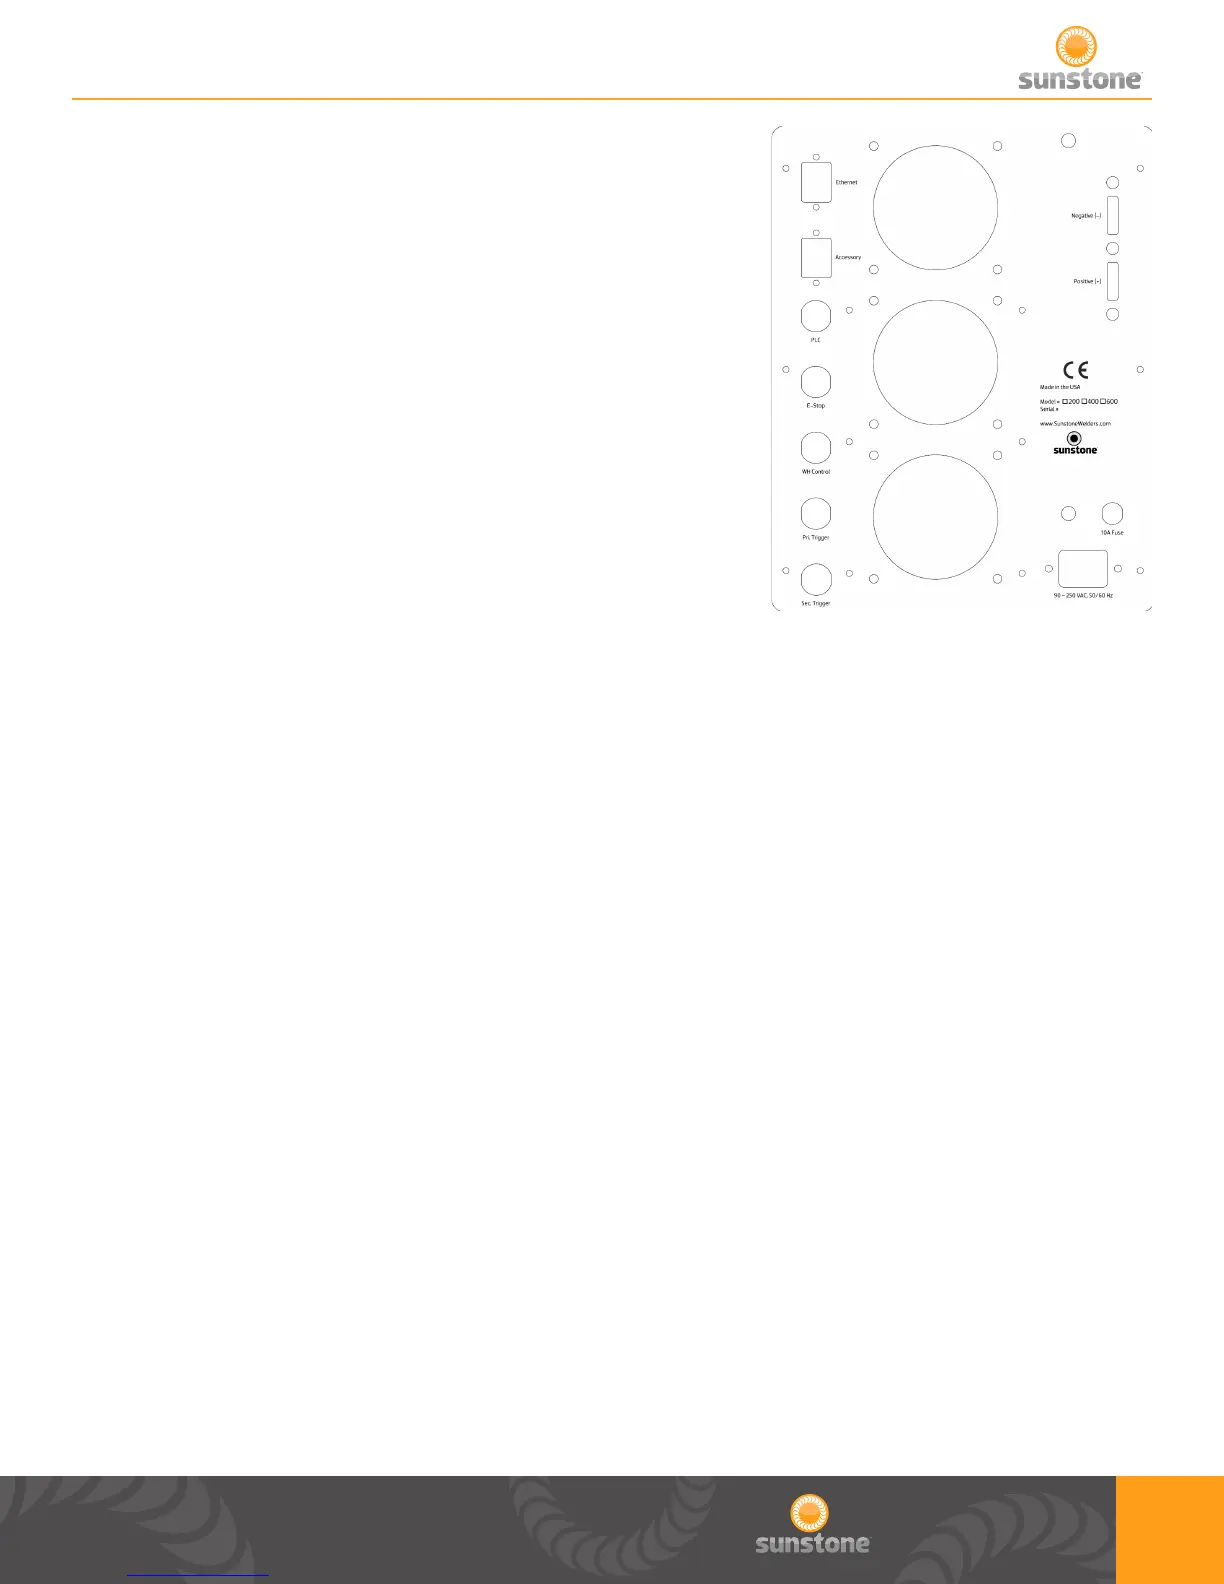
11
NEGATIVE : Negative weld terminal. Connect weld cable
using ¼-20 x ¾” bolt and nut. Make sure your total weld cable
resistance is greater or equal to 1 milliohm of resistance.
POSITIVE +: Positive weld terminal. Connect weld cable using
¼-20 x ¾” bolt and nut. Make sure your weld cable resistance is
greater or equal to 1 milliohm of resistance.
FUSE: 10A fuse rated for up to 250VAC
90-250 VAC, 60Hz
POWER INLET: Plug wall power into this port. Can accept voltage
from 90-250VAC at a frequency of 50/60Hz.
FIGURE 14: Back Panel
Welder to Weld Head Setup
There are 3 possible congurations when using a weld head or hand attachment.
CONFIGURATION 1: Using manual weld head and driven separately from the CDDP-A welder.
1. Remove the welder from the box and place it on a secure work surface.
2. Connect the female end of the power cord into the back of the welder and the male end into an AC
power outlet.
3. Attach weld head or hand attachment cables to negative and positive terminals.
4. Ensure either E-STOP bypass plug in plugged in or an E-STOP switch is plugged into the 6 DIN
E-STOP connector labeled “E-STOP”on back panel.
5. Attach a foot pedal to secondary trigger on back panel.
6. Turn the welder on by pressing in Power button on front panel.
7. On main screen adjust you Total Stored Energy, Pulse 1 energy, and Pulse 2 energy.
8. On the control screen adjust your weld head control scheme to “Fully Manual”.
9. Enable welder, by pressing in Weld On button on front panel.
10. Trigger a weld with foot pedal.
CONFIGURATION 2: Using with weld head actuated manually and driven with the CDDP-A welder.
1. Remove the welder from the box and place it on a secure work surface.
2. Connect the female end of the power cord into the back of the welder and the male end into an AC