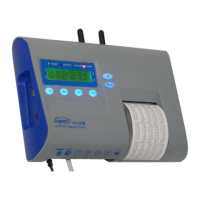
Temperature recorder and printer
19
8. After selecting “special” DC sensors, such as 0-10V, 0-5V, 0-20mA, 4-20mA, which measure
low voltage or current, an adjustment of measured value limits to displayed limits should be
set by scaling, enter a minimum and a maximum value, respectively, and select one mark
for the units. When Sensor No.1 scaling, max value: appears, select with / to
change the number to be displayed when a maximum value is measured. For confirmation,
press . When Sensor No.1 scaling, min value: appears, select with / to
change the number to be displayed when a minimum value is measured. For confirmation,
press . When Sensor No.1, measurement unit: appears, select with / to
change the unit to be displayed. For confirmation, press , and a confirmation such as
Channel No. 1 set will appear. To select another channel number for configuring a sensor,
press / or to exit.
On/off (dry) Contact opening sensor: connect the white wire (Pin6-Data) to the blue
wire (Pin1+5V).
DC sensors (analog) such as 0-10V, 0-5V, 0-20mA, 4-20mA. Connect
the black wire (Pin1-GND) to the white (Pin6-Data).
Please note: do not use a power supply of voltage higher than 24V.
Analog DC sensors may be connected to the contact sensor cable.
Note: the sensor sockets (RJ11) have 6 pins, as in the diagram below.
The left pin, no. 1 in the socket, is a blue wire in the plug.
The * character in the settings screens indicate an option (not yet selected).
To exit the menu and revert to readings mode, press [x} twice. Please wait, saving
setting will be displayed, then several seconds later, the readings screen. At the same time,
Settings saved will be printed.
Notes: any change in the sensor type will boot the statistics in all the channels, will rename
the channel and change the channel’s alarm settings to the default value.
SENSOR CALIBRATION / TEMPERATURE CHANNEL
To calibrate the sensors/temperature:
1. Press / until the Settings Submenu is displayed.
4. Press to confirm entry into the settings menu. The display will show Enter
password:
5. Enter a password (4 keys in a row). If you have not yet changed your password, use the
default password: , , , .
6. Go to the Set Calibration menu using the / keys, and press .
7. Select Channel No. 1 will appear, the channel number will flash. To change the channel
number (1-4), press / and confirm with .
8. The current calibration value in the channel will flash, for example Value: 0.0.
9. Press / to change the magnitude of the calibration deviation for the channel, in
0.1 increments. The measurement deviation can be change in the range of from +8 to -8.
10. Press to confirm. Select channel No. 1 will appear again.
11. Press / to calibrate another channel or twice to complete and save the changes.
Please wait, Saving Setting will appear for a few seconds followed by the readings
screen. At the same time, Settings saved will also be printed.
 Loading...