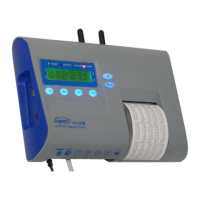
Temperature recorder and printer
34
CHAPTER 6 SOLVING PROBLEMS
Table 5 below lists the most common problem and the ways to solve them.
• Make sure there power is supplied to the device.
• Wait 5 seconds after OK/On is pressed.
The device does not
turn on when OK/On
is pressed
• The device is working on the backup battery only, make sure there
power is supplied to the device.
• Replace the external power adaptor if connected. Should be 12V, 2A
The device display
turns on shortly when
OK/On is pressed and
the Power LED is
blinking
• Change the print mode from Disable to another style. See
“Printing”, page 11.
• Make sure you are using thermal printing paper.
• Replace the print side of the thermal paper or replace the paper roll
to thermal paper.
• Move the VLTS device to a place where the temperature is in the
range of -18ºC to 65ºC
No printing or weak
printing
• Change the printer to Disable mode. See “Printing”, page 11.
Paper waste/ Cancel
printing
• Change the date or time. See “Setting the Time and Date” on page
24.
• Make sure the date is in the correct format. See “Setting
Temperature Scale and Date Format": on page 24.
• Replace the CR2032 clock battery. See “Installing and Replacing the
Batteries” on page 9.
• Remove the batteries, the CR2032 3V and 9V and pull out the
power cord for 5 minutes, then reinstall them. See page 9.
• See “Changing the Sampling Rate”, page 26.
• See “Setting Sensor Types”, on page 18.
• To mute the buzzer one time, press on EXIT.
• To turn off the horn completely, see “Setting up Additional Alarm
Events”, set the buzzer to No, page 22.
• Check “Setting Alarm Limits to Sensor” and the delay time, page 21.
• Check that the buzzer is set to YES. See “Setting up Additional
Alarm Events”, page 22.
No alarm when the
temperature is out of
range
• See “Renaming the Device for Identification”, page 25.
• See “Renaming Channels for Sensor Identification”, page 20.
Incorrect device/
vehicle name or
sensor name
• To backspace and delete the last (flashing) character, press
Can't erase the last
character we'll
entering names
• Enter the factory default password: , , , .
• Update password. See “Changing the Password”, page 25.