33
Chapter 3: Maintenance and Component Installation
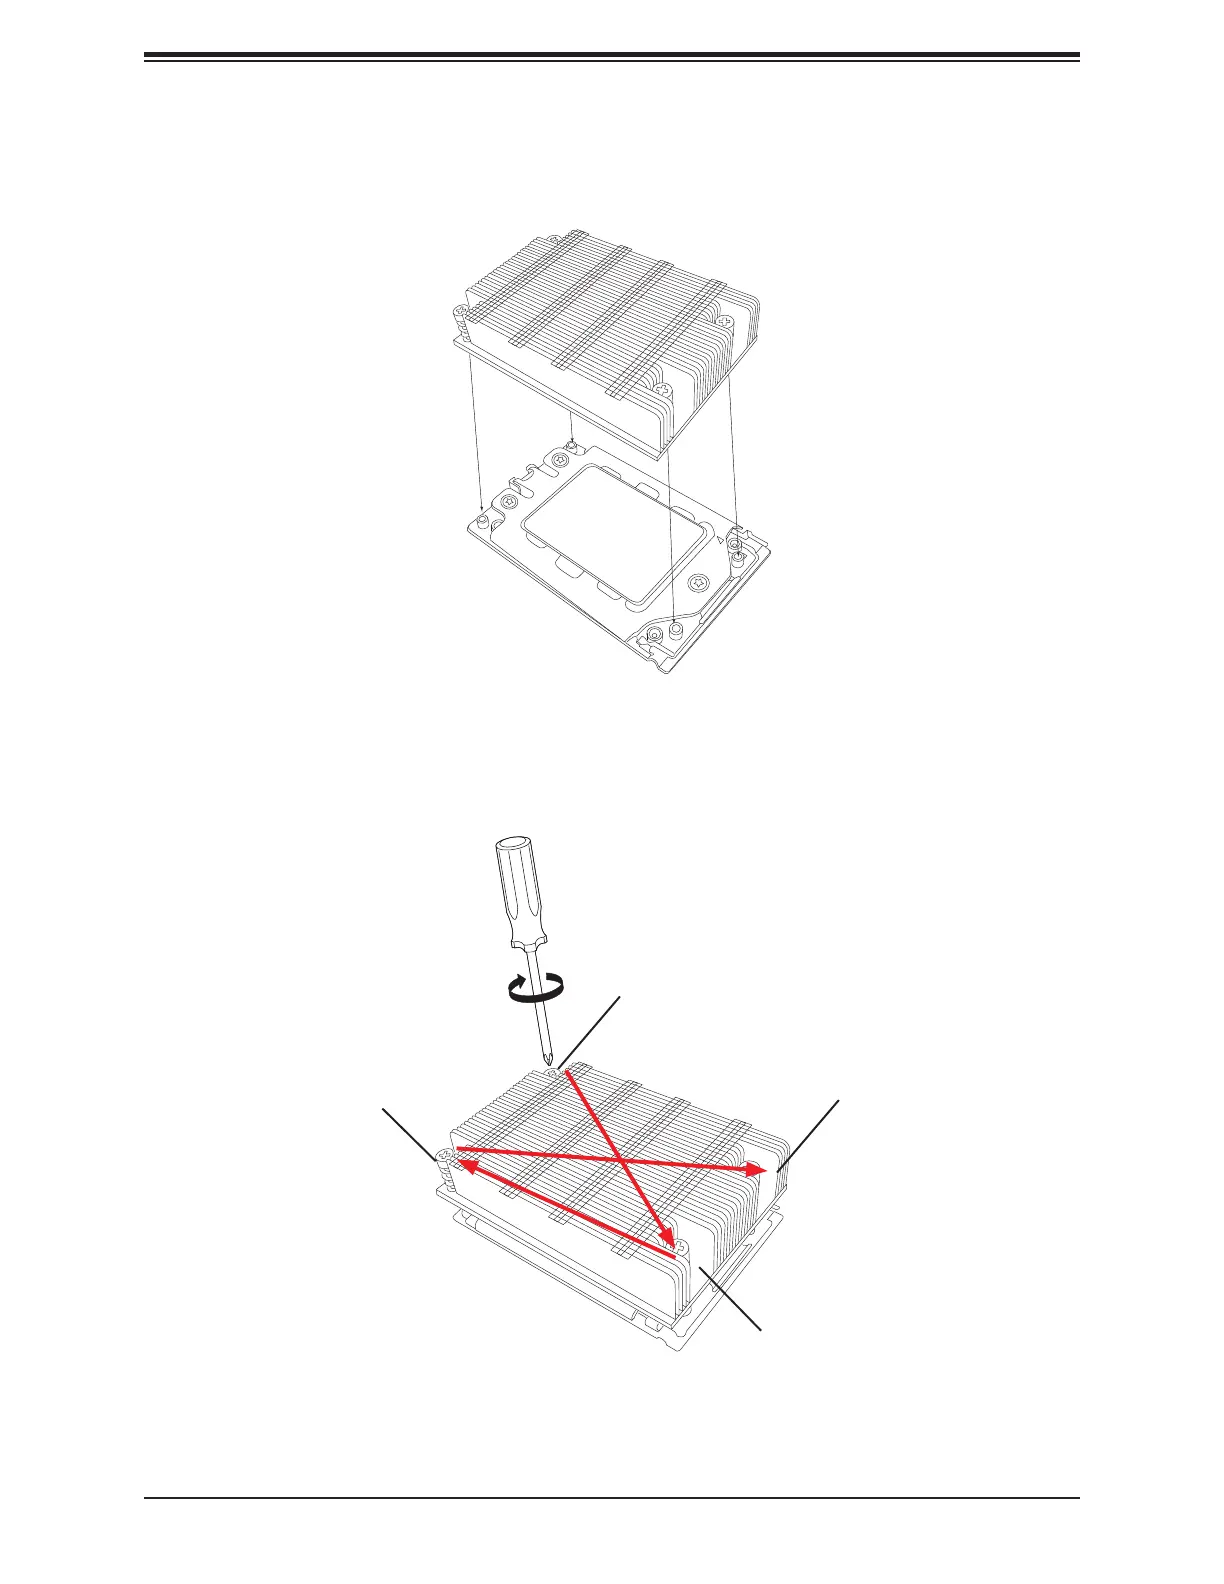
11. Lower the heatsink down till it rests securely on CPU Package over the four screw
holes on the socket frame.
12. Using a diagonal pattern, tighten the four screws down on the heatsink evenly till it is
secure.
The processor and heatsink installation is complete. Repeat this procedure for any remaining
CPU sockets on the motherboard.
Figure 3-10. Mounting the Heatsink
#1 Screw
#2 Screw
#3 Screw
#4 Screw
Figure 3-11. Securing the Heatsink
 Loading...