User
13
• When registering a face, maintain a distance of 40cm to 80cm between the device and the face.
• Be careful not to change the facial expression. (smiling face, drawn face, wink, etc.)
• If you do not follow the instructions on the screen, the face registration may take longer or may fail.
• Be careful not to cover the eyes or eyebrows.
• Do not wear hats, masks, sunglasses or eyeglasses.
• Be careful not to display two faces on the screen. Register one person at a time.
• It is recommended for a user wearing glasses to register both faces with and without glasses.
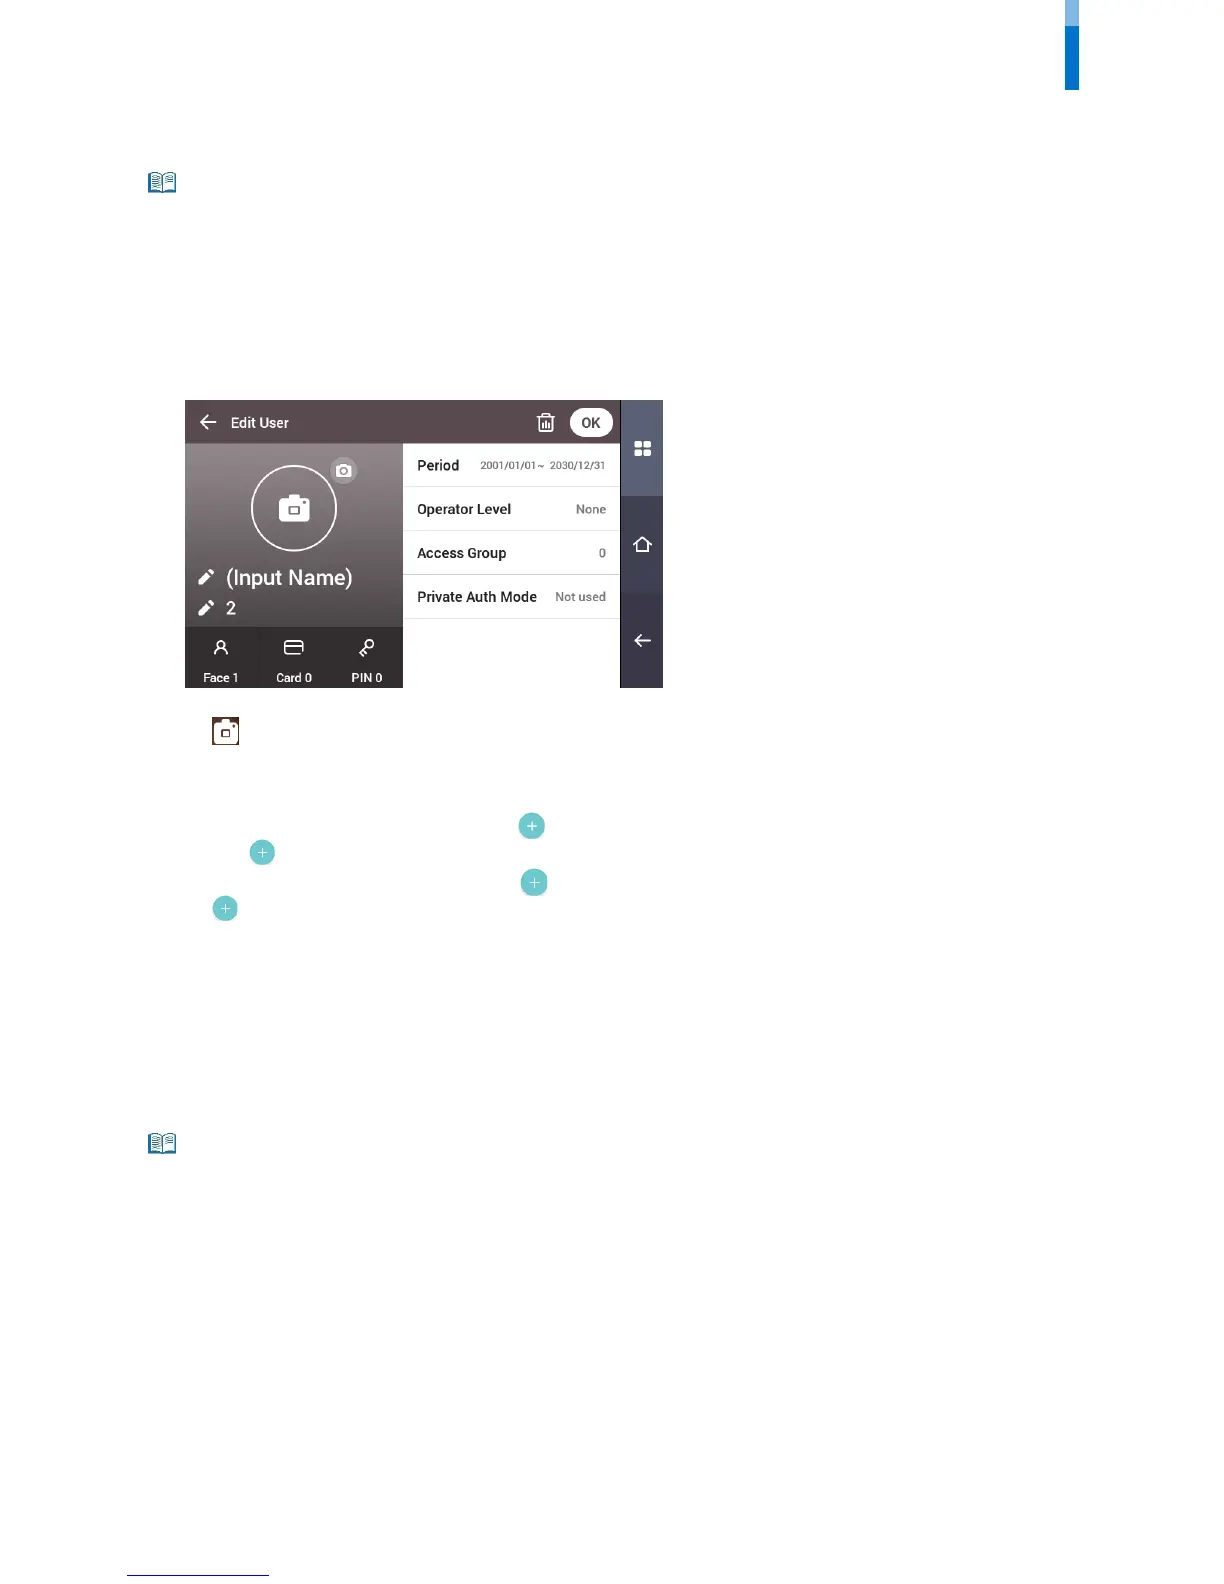
5 If you have pressed Skip, select and set the desired item.
• : Take a picture of a user with the built-in camera.
• Name: Enter the user name.
• ID: Enter the user ID you wish to register. Numbers between 1 and 4294967295 can be entered for ID. If you have changed User ID Type to
Alphanumeric, you can use a combination of alphabetic characters and numbers as ID.
• Face: Register a face for user authentication. Press
and register a face according to the instructions on the screen. To register another face,
press
again.
• Card: Register a card for user authentication. Press
and scan the card that will be assigned to the user. To register an additional card, press
again.
• PIN: Enter the PIN you wish to use. Enter the PIN you wish to use, and then reenter the same PIN for confirmation. Enter a number between 4 and
16 digits to prevent leaking.
• Validity period: Set a Start Date and End Date to use the user account. When you press the first date, you can set Start Date, and when you press
the second date, you can set End Date.
• Operator Level: Select the level you wish to assign to a user.
• Face Group: Select a face group for the user. Face groups can be used only when Group Matching is enabled, and these groups can be registered
only in BioStar 2.
• Access Group: Check an access group for the user. Access groups can only be registered in BioStar 2.
• Private Auth Mode: Change the authentication method according to the user.
Available menus vary according to the set operator level.
• None: This is the general user level; menus cannot be accessed.
• Full Administrator: All menus can be accessed.
• Configuration: AUTHENTICATION, DISPLAY & SOUND, DEVICE, NETWORK and EVENT LOG menus can be accessed.
• User Management: USER and EVENT LOG menu can be accessed.
6 When you press OK, settings will be saved.