RV125K7 (’07-MODEL) 49
5) Disconnect the ECM coupler.
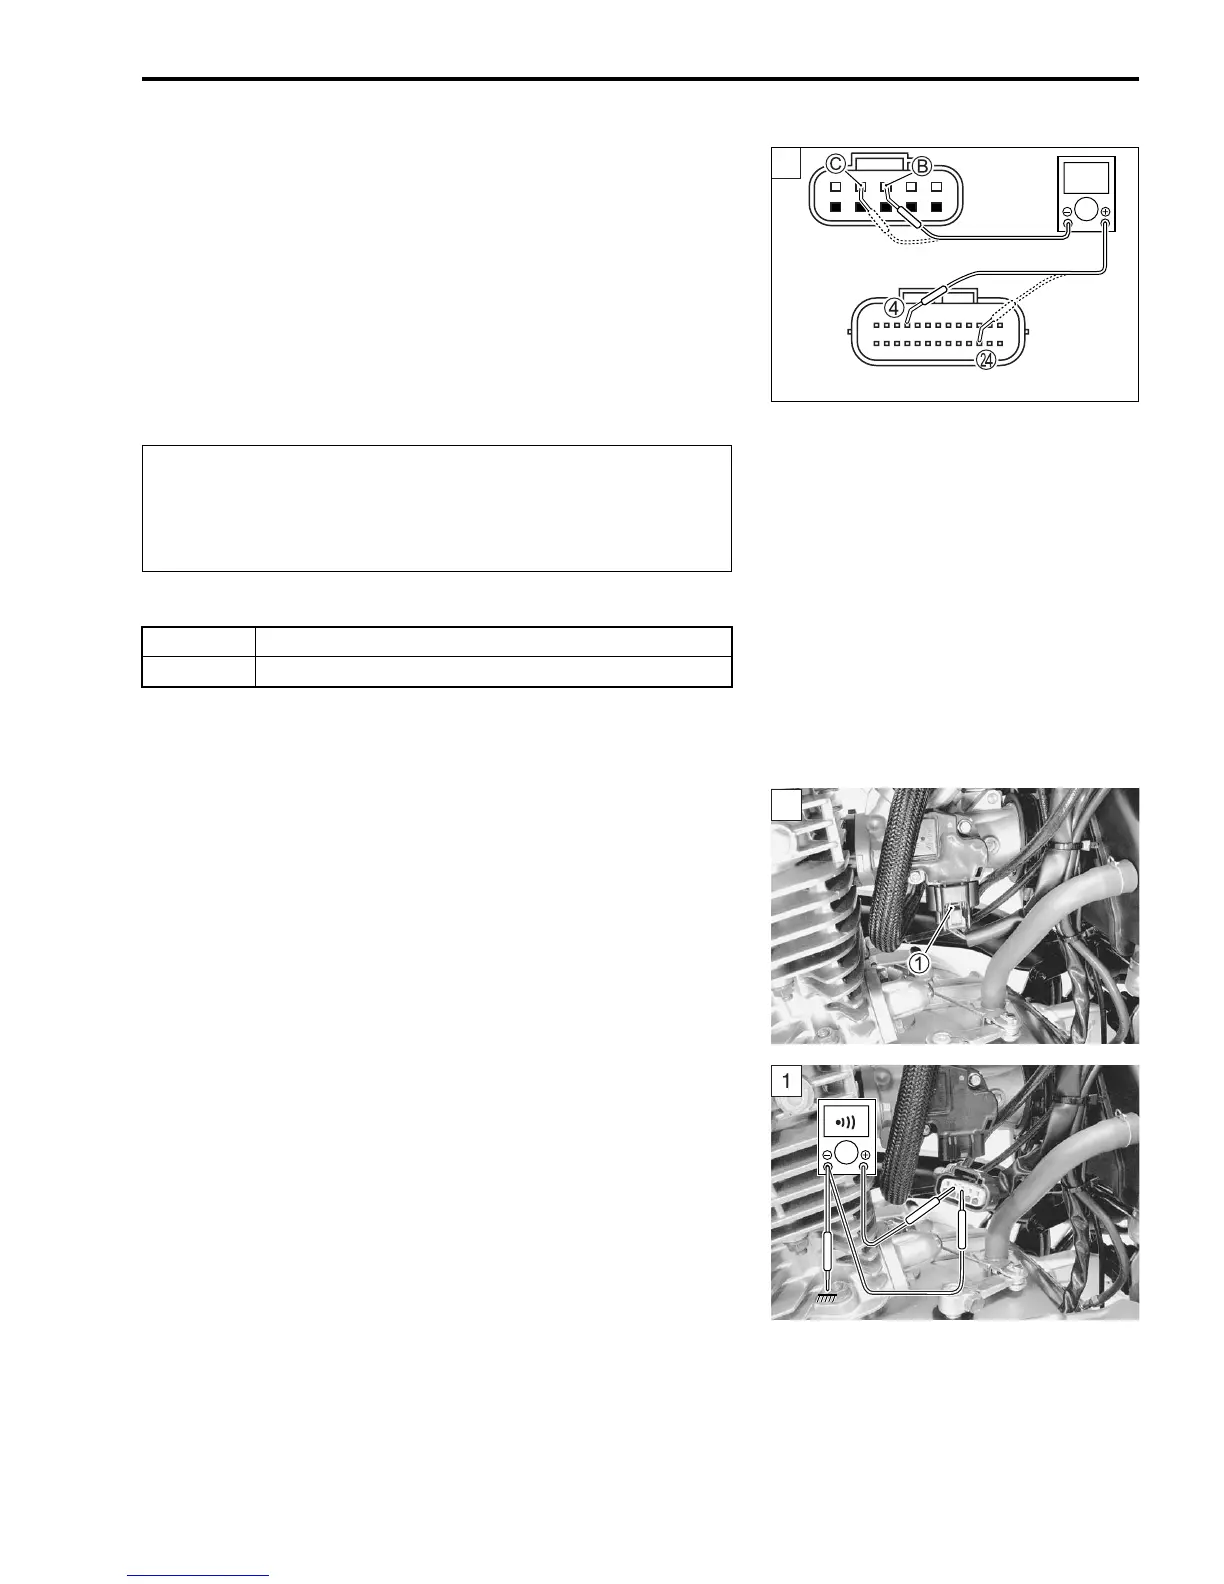
6) Check the continuity between G/B wire C and terminal N.
7) If OK, then check the continuity between B/Br wire B and ter-
minal 4.
IAP sensor lead wire continuity: Continuity ()
09900-25008: Multi-circuit tester set
09900-25009: Needle pointed probe set
Tester knob indication: Continuity test ()
Is the continuity OK?
8) After repairing the trouble, clear the DTC using SDS tool.
(Page 40)
Step 1 (When indicating P0105-L:)
1) Turn the ignition switch OFF.
2) Check the IAP sensor coupler 1 for loose or poor contacts.
If OK, then check the IAP sensor lead wire continuity.
3) Disconnect the IAP sensor coupler.
4) Check the continuity between G/B wire and ground.
5) Also, check the continuity between G/B wire and B/Br wire. If
the sound is not heard from the tester, the circuit condition is
OK.
When using the multi-circuit tester, do not strongly
touch the terminal of the ECM coupler with a needle
pointed tester probe to prevent the terminal damage
or terminal bend.
YES Go to Step 2.
NO G/B wire shorted to VCC, or B/Br wire open.
1
?
ECM coupler (Harness side)
1
]
1











 To Next Page