1G-19 Fuel System:
9) Remove the following parts.
• Main jet (20)
• Needle jet holder (21)
• Needle jet (22)
• Slow jet (23)
• Starter jet (24)
• Pilot screw (25)
NOTE
Before removing the pilot screw (25), its
setting must be determined.
Slowly turn the pilot screw clockwise and
count the number of turns until it is lightly
seated. Make a note of how many turns were
made.
When reassembling the pilot screw, you will
want to set it to its original position.
CAUTION
!
• Never remove the throttle valve (26).
• Never remove the jets (27), (28) and (29).
They are press fitted at the factory and
attempting to remove them will cause
damage.
Pilot Screw Removal (For Tampering Plug Type)
Because harsh cleaning solvents can damage the O-ring
seals in the pilot system, the pilot system components
should be removed before cleaning.
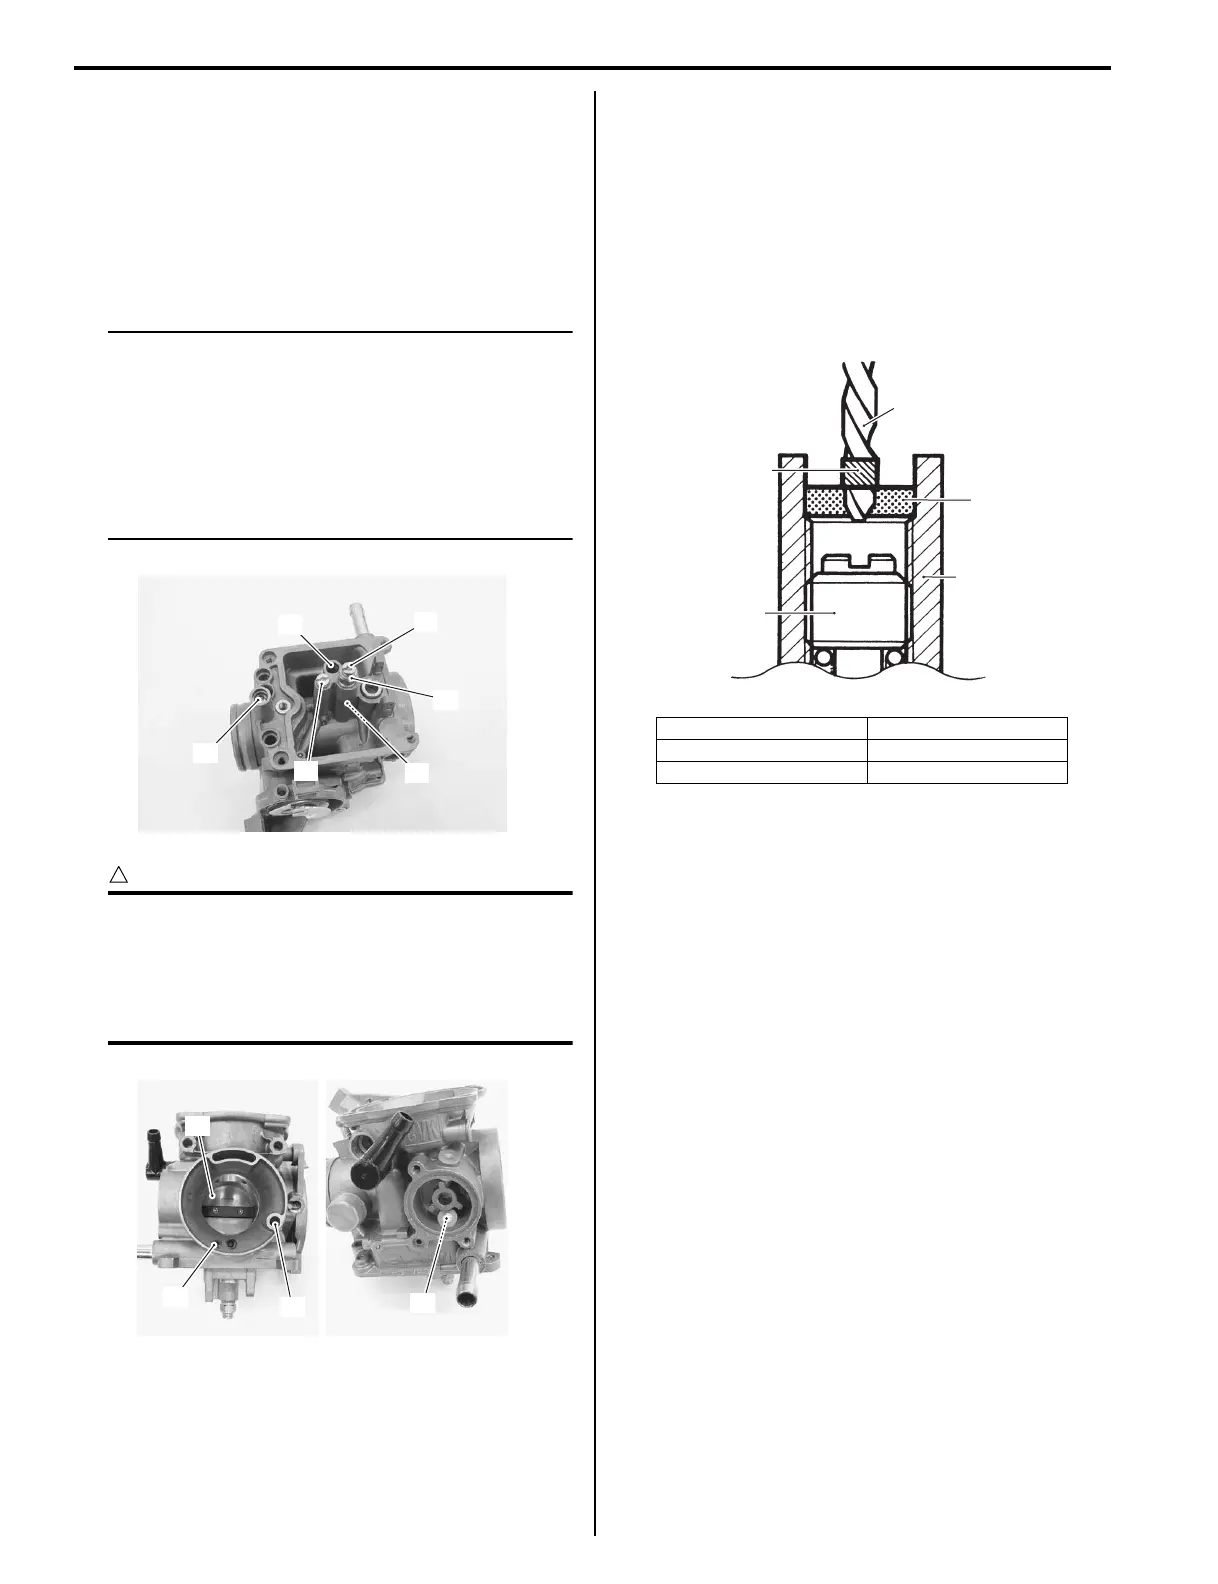
1) Use a 1/8 size drill bit (1) with a drill-stop “A” to
remove the pilot screw plug (2).
2) Set the drill-stop “A” 4 mm (0.16 mm) from the end of
the bit to prevent drilling into the pilot screw (3).
3) Carefully drill through the plug (2).
4) Thread a self-tapping sheet metal screw into the
plug (2).
5) Pull on the screw head with pliers to remove the
plug.
6) Carefully clean any metal shavings from the area.
7) Slowly turn the pilot screw clockwise and count the
number of turns until the screw is lightly seated.
Make a note of how many turns were made so the
screw can be reset correctly after cleaning.
8) Remove the pilot screw along with the spring,
washer, and O-ring.
21
20
24
23
25
22
I827H1170008-02
26
29
28
27
I827H1170009-02
1. Drill bit 4. Carburetor body
2. Tampering plug “A”: Drill-stop
3. Pilot screw
2
3
4
“A”
1
I649G1170046-02

 Loading...


