Synology DiskStation User's Guide
Based on DSM 3.1
112 Chapter 9: Back Up Data
Manage Sync Tasks
After Shared Folder Sync service is enabled on the server (destination DiskStation), you can log in to a client
(source DiskStation) to perform Shared Folder Sync with the server.
To create a sync task:
1 On the client (source DiskStation), log in to DSM with the credentials of admin or a user belonging to the
administrators group.
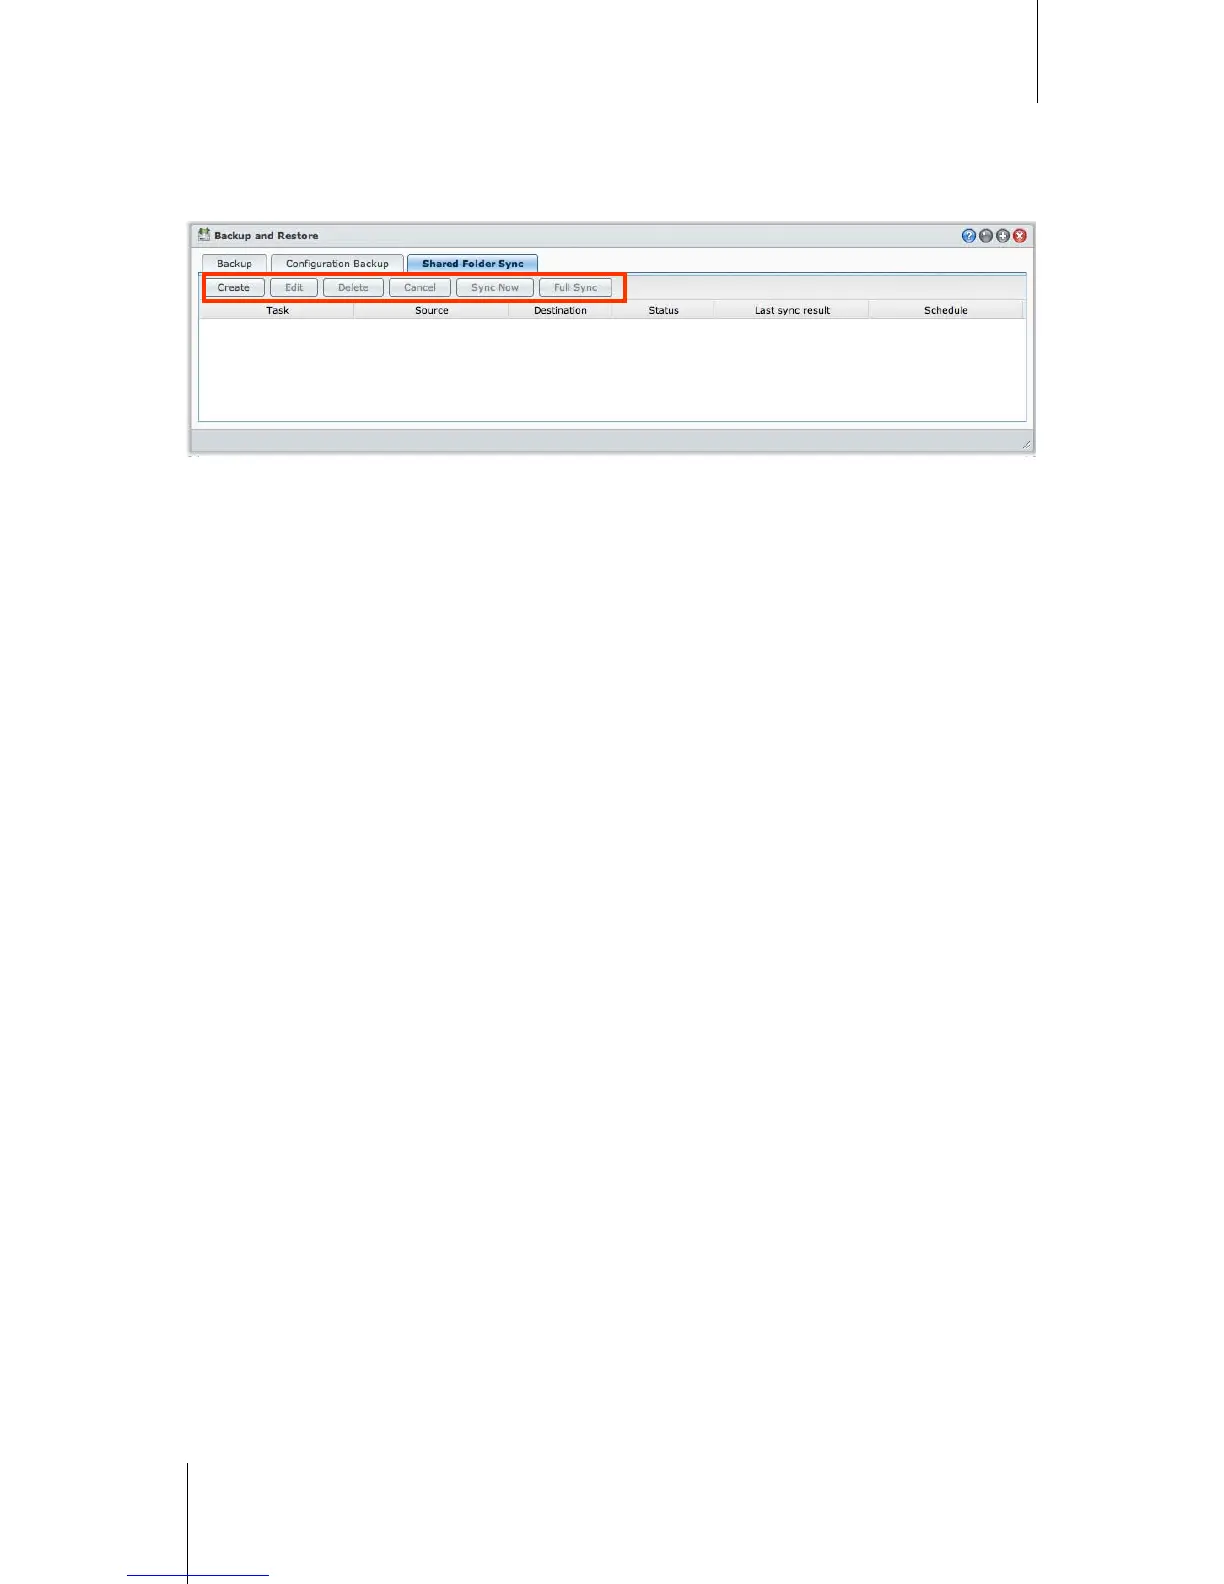
2 Go to Main Menu > Backup and Restore, and then click the Shared Folder Sync tab.
3 Click Create.
4 Enter a name for the task.
5 Select the shared folder you want to sync to the destination.
6 Set up the destination and the following transfer options of this sync task:
Enable transfer encryption: Encrypt data during transfer. Encrypted transfer provides better security, while
non-encrypted transfer provides better performance.
Enable transfer compression: Compress data during transfer. It will save network bandwidth but increase
CPU loading.
Enable block-level synchronization: Transfer only differential data instead of whole files. It will save
network bandwidth but increase CPU loading. Set up the destination and transfer options of this sync task.
7 Set up schedule for the task. There are 3 schedule modes:
Periodically: Run sync task by specific interval of hours. The time starts counting from midnight. And the
interval cannot exceed 24 hours.
Manually: Only run sync when manually performed.
Daily: Run sync task daily at specific time.
8 Click Apply.
To edit or delete a sync task:
Select the task and click Edit or Delete.
To cancel an ongoing sync task:
Select the task and click Cancel.
To perform immediate syncing:
Select the task and click Sync Now.