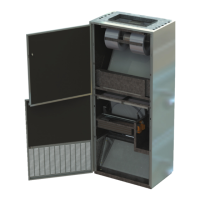
Installation of steel roof in the sizes 10 – 31 |
8-1
Annex 8 Installation of steel roof in the sizes 10 – 31
8.1 Overview
• Mount rails A1, B2, C3, D4, E5 on the unit for support of trapezoidal roof plates (mount also rails Y and Z on units of
the size 30 and on units that are larger than size 30 longitudinally at the centre- line of the units).
• Place foam bands – P – on the horizontal rails A1, B2, C3 and D4 for support of roof plates.
• Calculate overhang of the roof at both ends of the unit and mount roof overhang profile – G1 on the first trapezoidal
roof plate – F1 before the roof plate is mounted.
• Place and mount roof plates F1, F2, F3 and so on.
• Remember foam bands on the side laps between roof plates to prevent rainwater from passing through.
• Place roof overhang profile – G5 at the other end of the unit before the last roof plate is mounted.
• Mount sides and corners on the roof.
• Apply sealing where plates are joined to ensure water resistance - even in stormy weather.
8.1.1 Mount rails. Units of size 10, 11, 12, and 14
Squeeze sealant in sufficient quantity between the underside of the rails A1, B2, C3, D4, E5 and the horizontal top side
of the unit before the rails are mounted. This means that the rails are standing on sealant to achieve the tightest
connection between rails and unit to prevent rainwater from passing under the rails and into the unit. Mount the rails
A1 and B2 on the front side (the side with the inspection doors) – use the simple self-drilling screws without the sealing
washer – see the illustration of the screw below.
Note:
Rail B2 fits into the rail A1, and this offers the advantage that the rail B2 can be slid inside the rail A1 to
adjust the length of rail B2 accurately to the length of the unit. In this way it is not necessary to spend time
and effort cutting the rail B2
Mount the lower rails C3 and D4 on the back side of the unit.
Note:
Rail D4 fits into the rail C3, and this offers the advantage that the rail D4 can be slid inside the rail C3 to
adjust the length of rail D4 accurately to the length of the unit. In this way it is not necessary to spend time
and effort on cutting the rail D4.
Mount vertical rail – E5 - with the roof slope at each end of the unit
Caution
It is important to place a screw in each hole – even though the number of holes for screws seems to be
very large, a screw in each hole is necessary as the stress on the roof during stormy weather is extremely
high.
8.1.2 Mount rails. Units of size 16 and units larger than size 16.
On units of size 16 and on units that are larger than size 16, rails A1, B2, C3, D4, E5 must be mounted on the unit for
support of trapezoidal roof plates, but also rails Y and Z must be mounted longitudinally at the centre-line of the units
to hold the trapezoidal roof plates.
Squeeze sealant in sufficient quantity between the underside of the rails A1, B2, C3, D4, E5 and the horizontal top side
of the unit before the rails are mounted. This means that the rails are standing on sealant to achieve the tightest
connection between rails and unit to prevent rainwater from passing under the rails and into the unit. Mount the rails
A1 and B2 on the front side (the side with the inspection doors) – use the simple self drilling screws without the sealing
washer – see the illustration of the screw below.
Note:
Rail B2 fits into the rail A1, and this offers the advantage that the rail B2 can be slid inside the rail A1 to
adjust the length of rail B2 accurately to the length of the unit. In this way it is not necessary to spend time
and effort cutting the rail B2.
Mount the lower rails C3 and D4 on the back side of the unit.
output |
 Loading...
