Installing the TGA 2050
2–14 TA I
NSTRUMENTS
TGA 2050
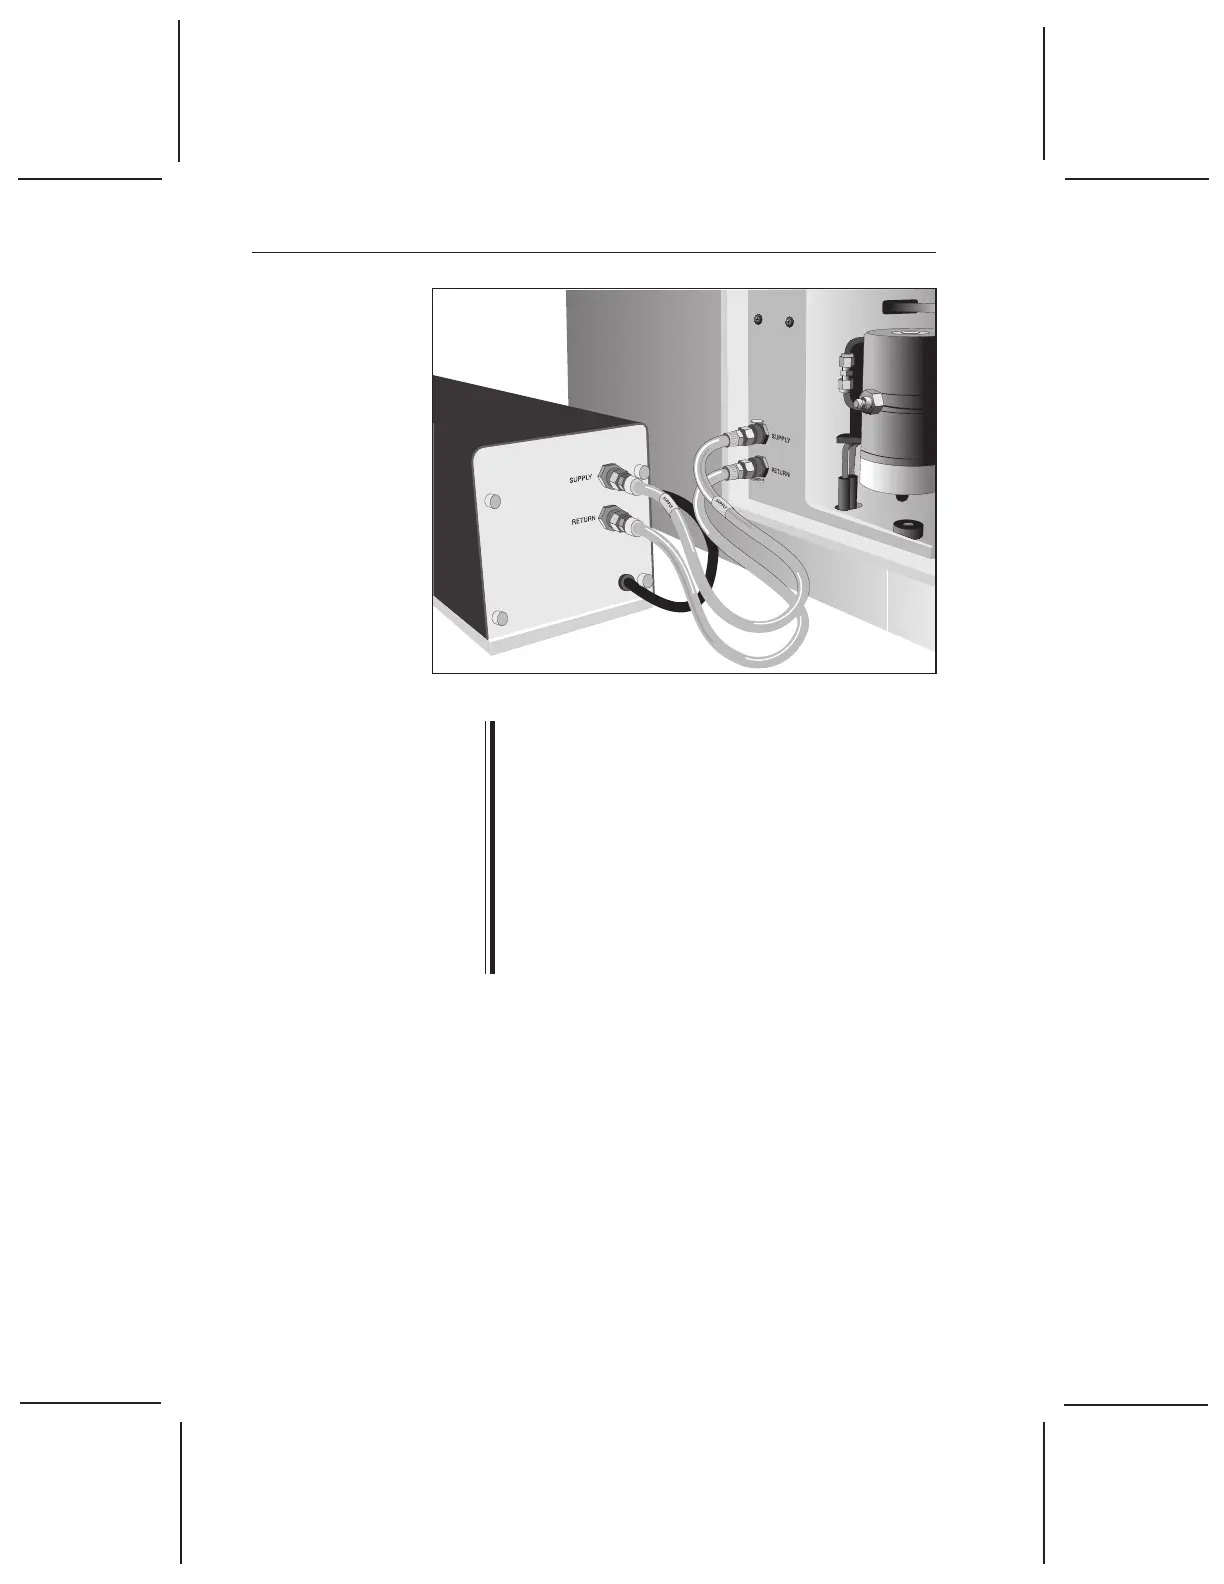
Figure 2.7
Heat Exchanger
Water Line
Connections
Air trapped in the heat exchanger system must be
purged before starting the first run. After installa-
tion of the TGA is complete, turn on the instru-
ment by placing the HEATER and POWER switches
in the ON position. Then start the heat exchanger
pump by turning on Air Cool from the controller.
Refill the coolant reservoir as needed. Repeat this
process untill all of the air has been purged from
the system and the instrument stops reporting an
“Err 119.”
GPIB Cable
1. Locate the GPIB connector on the right rear
of the TGA instrument (See Figure 2.9).
2. Connect the GPIB cable to the connector.
The GPIB cable is the only cable that fits
into the connector.
3. Tighten the hold-down screws on the
connector.
NOTE:
 Loading...