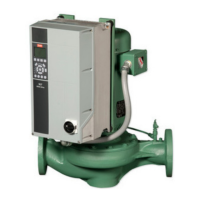
Taco® SKV
3
• Check discharge gauge reading and confirm that it is
normal. If gauge readings are abnormal find out why.
NOTE: Suction and discharge gauges
should read the same with pump stopped.
3.2 Close Coupled Pumps
The pump section is attached directly to the motor shaft
and does not contain bearings.
3.3 Close Coupled Motors
The motor must be lubricated in accordance with the
manufacturer’s recommendations. Do not over lubricate
the motor bearings as this could cause premature bear-
ing failure.
3.4 Mechanical Seal
The mechanical seal is the “John Crane” Type 21 Gen-
eral Purpose Seal for the 175 psig pressure rating.
A “John Crane” Type 2 General Purpose Seal is used for
the 300 psig pressure rating.
4 DIS-ASSEMBLY AND RE-
ASSEMBLY
4.1 General
If the pump has been maintained and serviced properly,
breakdowns requiring pump disassembly should occur
only rarely.
• If a problem occurs, the cause should be determined,
if possible, before dis-assembling. (See “Problem
Analysis”)
• If the pump is being dis-assembled, all parts must be
carefully handled, avoid heavy blows and shocks.
• All parts must be carefully cleaned and inspected for
wear. Recondition or replace parts where necessary.
4.2 Dis-Assembly
Drain liquid from casing by removing drain plug.
CAUTION: Allow pump to cool and secure
suction and discharge valves before working
on pump!
Remove re-circulation line.
Remove bolts holding cover/adapter to casing, pry cover/
adapter and motor assembly from casing.
302-365, Effective: June 5, 2017
© 2017 Taco, Inc.
Remove impeller bolt in a counterclockwise direction.
Remove impeller and key.
In all cases of mechanical seal arrangement, after
removing the sleeve and its seal assembly, the seal rotat-
ing element may be drawn off the shaft sleeve.
NOTE: Apply silicone grease on the OD of
the sleeve in the area between the seal and
the end of the sleeve. This will help removal
of the old seal. The stationary element is to
be removed from the cover.
All parts must be cleaned and inspected for wear.
Replace parts where necessary.
4.3 Re-Assembly
Be certain that all parts to be replaced are free from
burrs, with screw threads and connecting faces clear and
free from damage.
Insert stationary element of seal into cover adapter, slip
cover-adapter over shaft and engage rabbit of motor.
Note: Do not touch the seal surfaces
because this may result in leakage. Do not
contaminate seal faces with fingerprints.
Lubricate smaller OD of shaft sleeve with silicone grease.
Do not use petroleum oil or grease.
Place spring on shaft sleeve to abut against sleeve
shoulder. Slide rotary seal on sleeve until it contacts
spring.
Slide the shaft sleeve on the shaft, larger bore first. Be
certain the O-ring is correctly seated in the groove.
Assemble impeller key and impeller on shaft. Refit with
new impeller washer on impeller bolt and tighten care-
fully. Be certain that the impeller rotates freely by hand.
Apply a few spots of gasket adhesive to gasket surface of
cover. Place a new casing gasket against gasket surface
and press against adhesive.
Assemble cover-adapter complete with motor into cas-
ing. Insure that gasket is seated correctly. Install hex-
headed cap screws into casing tapings and tighten uni-
formly.
Reconnect re-circulation line and drain plug.