Taco® SKV
37
302-365, Effective: June 5, 2017
© 2017 Taco, Inc.
11 START-UP PROCEDURE
11.1 Check Points Before First Start
Verify that motor is correctly wired for voltage available.
Verify that the pump has been primed. The pump should
never be run dry.
NOTE: Extra effort may be required to get
the air out of the seal chamber.
WARNING: Make sure power supply to
pump motor is locked out before touching
motor shaft.
Verify that all rotating parts turn freely.
11.2 Check Motor Rotation
Before running the frequency converter, check the motor
rotation. The motor will run briefly at 20Hz or the mini-
mum frequency set in 4-12 Motor Speed Low Limit [Hz].
1.Check Motor rotation.
a.Press [Quick Menu].
b.Scroll to Q2 Quick Set-up.
c. Press [OK].
d.Scroll to 1-28 Motor Rotation Check.
e.Press [OK].
f. Scroll to Enable.
g.The following text appears: “Note! Motor may run
in wrong direction.”
h.Press [OK].
i. Follow the on-screen instructions.
NOTE: To change the direction of rotation,
remove power to the frequency converter
and wait for power to discharge. Reverse the
connection of any two of the three motor
cables on the motor or frequency converter
side of the connection.
11.3 Start Pump
CAUTION: MOTOR START! Ensure that the
motor, system, and any attached equipment
is ready for start. It is the responsibility of the
user to ensure safe operation under any con-
dition. Failure to ensure that the motor, sys-
tem, and any attached equipment is ready
for start could result in personal injury or
equipment damage.
The pump should be stopped if any of the following
occur:
• No discharge.
• Insufficient discharge.
• Insufficient pressure.
• Loss of suction.
• Excessive power consumption.
• Vibration.
See “16 SKS Pump Problem Analysis” on page 74 for
help in troubleshooting.
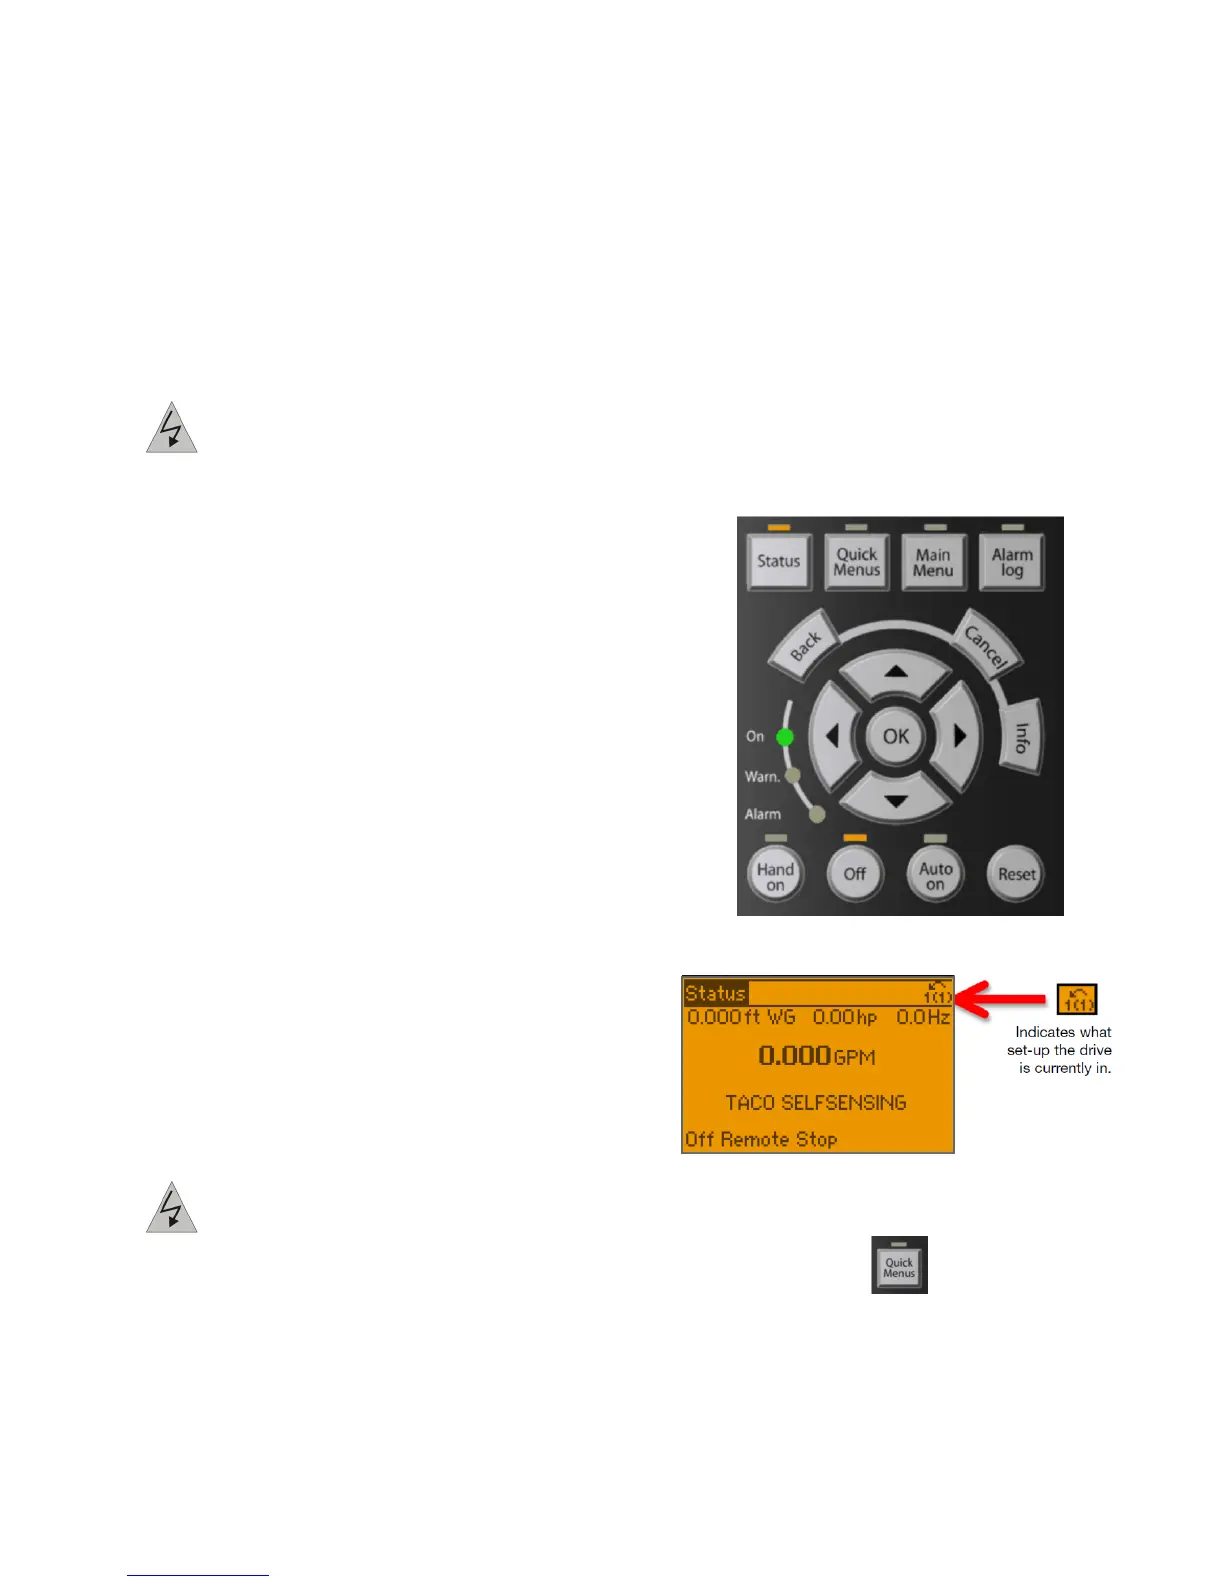
2.To navigate on the keypad, use the [OK] and
[ARROW] buttons shown below.
3.Ensure the drive is in Set-up 1.
4.To change to Set-up 1, press the [Quick Menus]
button.
5.Press the [OK] button to enter “My Personal