24
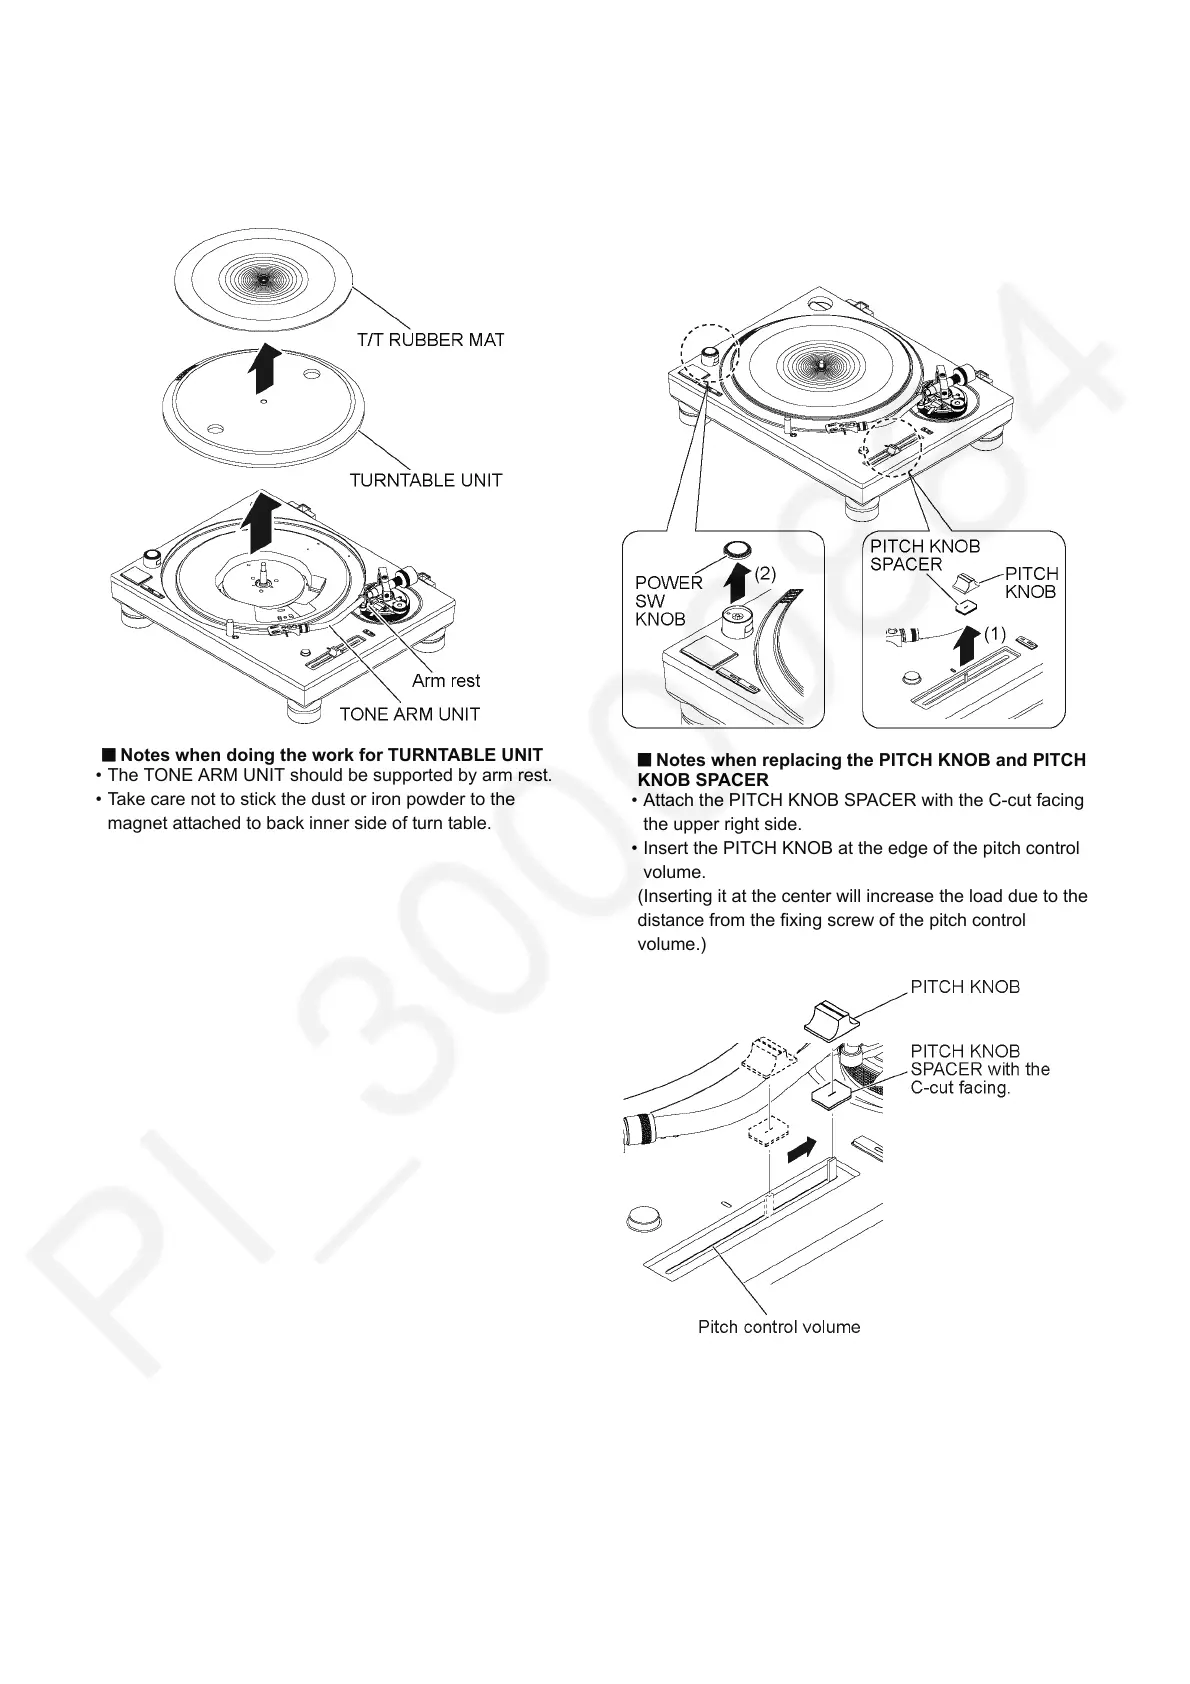
6.3. T/T RUBBER MAT, TURNTABLE
UNIT
1. Remove the T/T RUBBER MAT and TURNTABLE UNIT
in the direction of arrow.
Notes when doing the work for TURNTABLE UNIT
• The TONE ARM UNIT should be supported by arm rest.
• Take care not to stick the dust or iron powder to the
magnet attached to back inner side of turn table.
6.4. PITCH KNOB, PITCH KNOB
SPACER, POWER SW KNOB
1. Remove the PITCH KNOB and PITCH KNOB SPACER in
the direction of arrow (1).
2. Remove the POWER SW KNOB in the direction of arrow
(2).
Notes when replacing the PITCH KNOB and PITCH
KNOB SPACER
• Attach the PITCH KNOB SPACER with the C-cut facing
the upper right side.
• Insert the PITCH KNOB at the edge of the pitch control
volume.
(Inserting it at the center will increase the load due to the
distance from the fixing screw of the pitch control
volume.)