36
7.3. Automatic Adjustment
This adjustment is automatically performed based on the learning function of the microcomputer.
The following items of measurement/adjustment are automatically performed.
• The reference voltage value
• Start-up time
• FG Wow and flutter
• Stop time
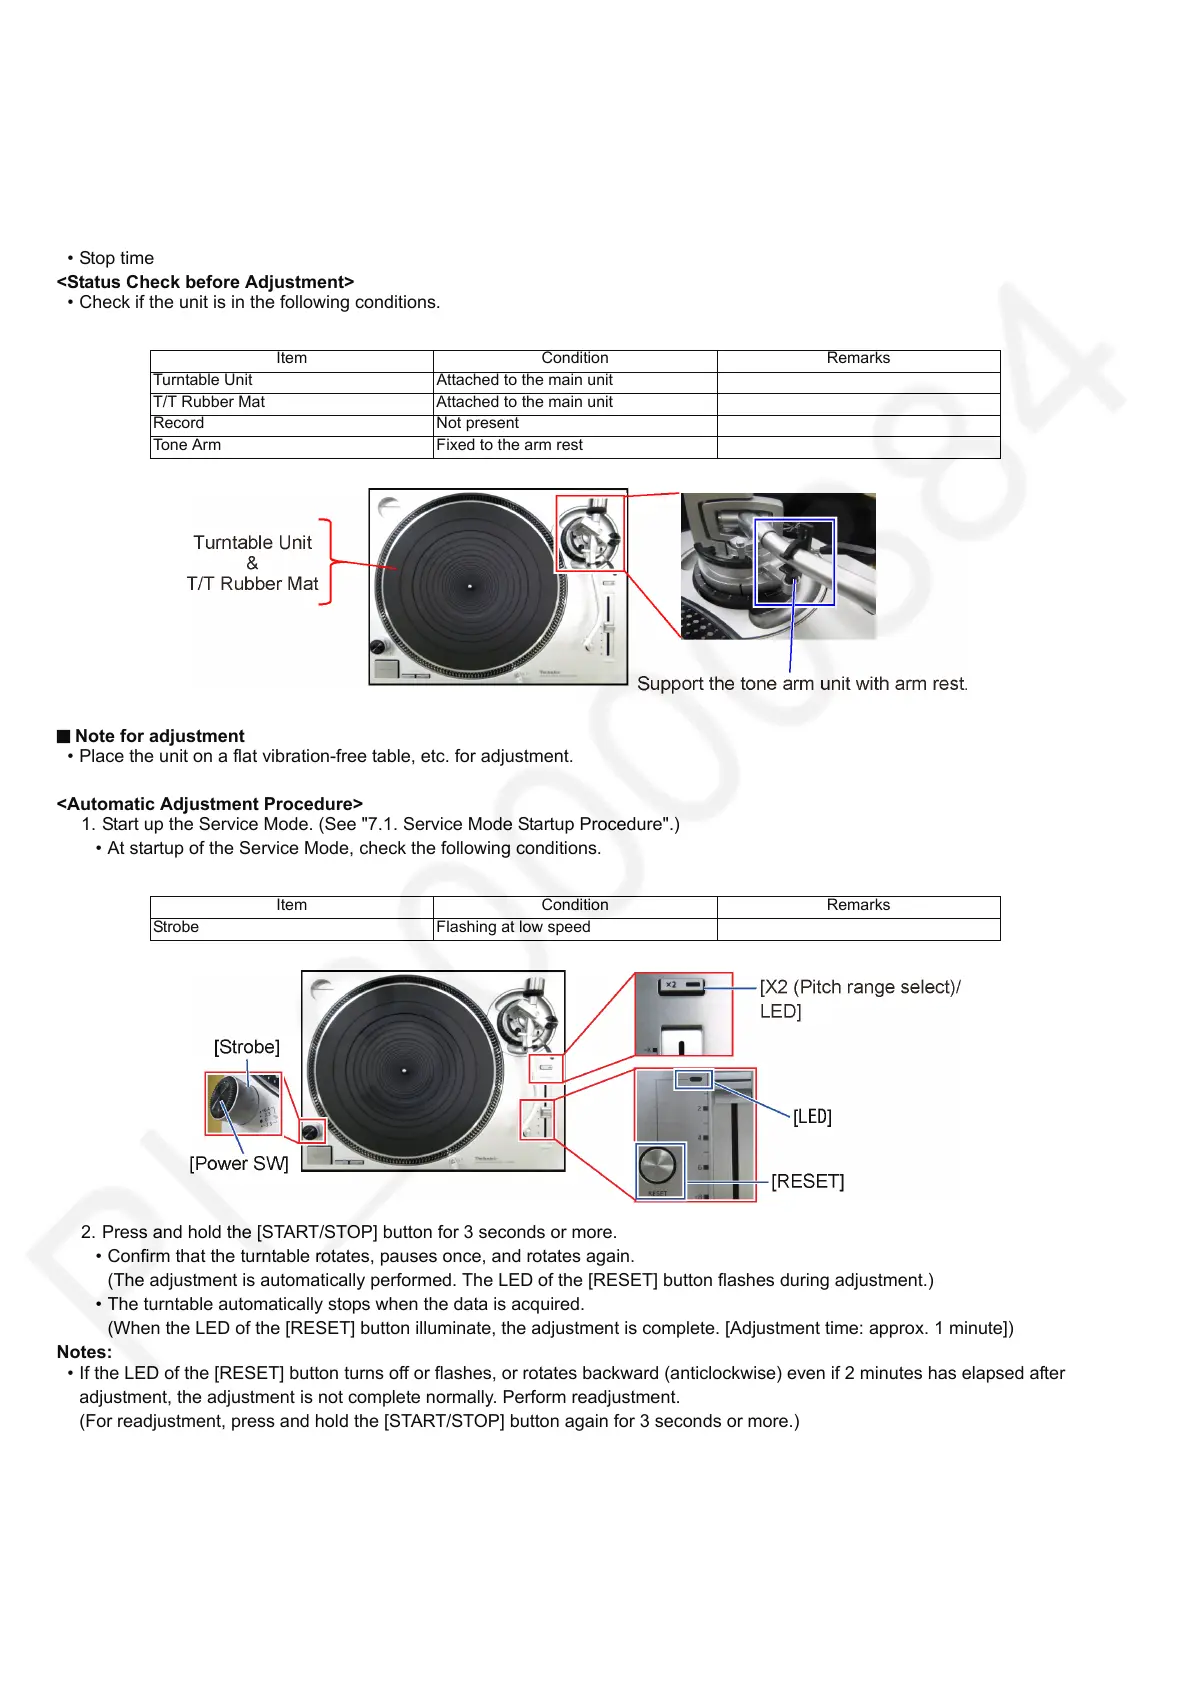
<Status Check before Adjustment>
• Check if the unit is in the following conditions.
Note for adjustment
• Place the unit on a flat vibration-free table, etc. for adjustment.
<Automatic Adjustment Procedure>
1. Start up the Service Mode. (See "7.1. Service Mode Startup Procedure".)
• At startup of the Service Mode, check the following conditions.
2. Press and hold the [START/STOP] button for 3 seconds or more.
• Confirm that the turntable rotates, pauses once, and rotates again.
(The adjustment is automatically performed. The LED of the [RESET] button flashes during adjustment.)
• The turntable automatically stops when the data is acquired.
(When the LED of the [RESET] button illuminate, the adjustment is complete. [Adjustment time: approx. 1 minute])
Notes:
• If the LED of the [RESET] button turns off or flashes, or rotates backward (anticlockwise) even if 2 minutes has elapsed after
adjustment, the adjustment is not complete normally. Perform readjustment.
(For readjustment, press and hold the [START/STOP] button again for 3 seconds or more.)
• Do not touch the main unit while rotating.
• Do not press and hold the [45] button for 3 seconds or more in the Service Mode.
(Doing so will erase the result.)
Item Condition Remarks
Turntable Unit Attached to the main unit
T/T Rubber Mat Attached to the main unit
Record Not present
Tone Arm Fixed to the arm rest
Item Condition Remarks
Strobe Flashing at low speed