50
3. Operation & Setting
49
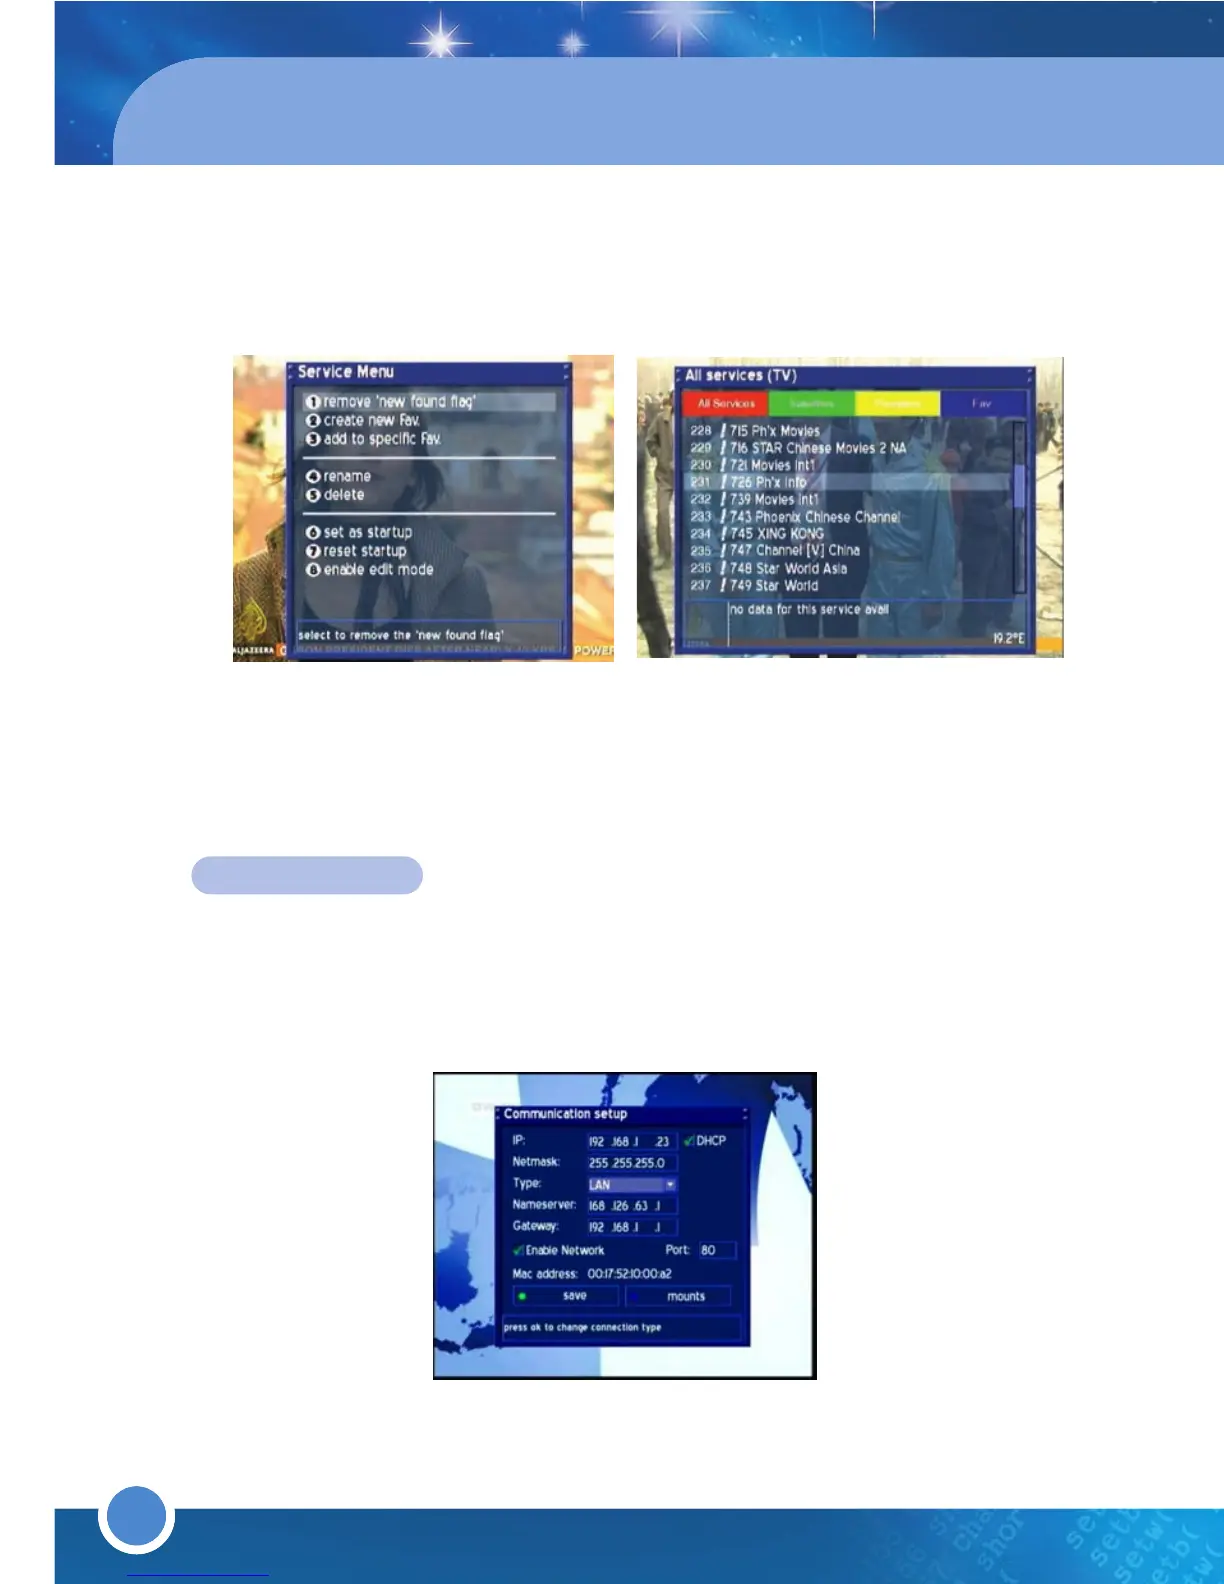
Go to lock/unlock and press the [OK] button to lock/unlock the selected
channel/service. For a locked channel/service, a padlock symbol will
appear. If you want to view a locked channel/service, you will be asked to
enter the PIN.
EXPERT SETUP
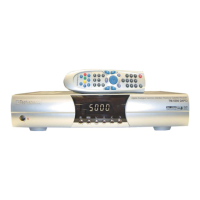
* COMMUNICATION Setup (Network & LAN Setup)
Press the [MENU] button to go to the Main Menu. Go to - (6)Setup
(5)Expert Setup (1)Communication Setup.
To automatically detect an IP Address: Ensure there is a check/tick next
to DHCP. If there is not, go to DHCP and press the [OK] button. To save,
press the [
GREEN] button or go to save and press the [OK] button. The menu
will automatically exit. To view the updated IP Address, press [OK] on
Communication setup.
To manually enter an IP Address: Ensure there is no check/tick next to DHCP.
If there is, go to DHCP and press the [OK] button. Use the [LEFT/RIGHT]
Navigation-Buttons and the Numeric-Buttons to set the Values.
IP: Enter the IP-Address here. The IP-Address is used to specify the Host IP-
Address.
Netmask: Enter the Netmask here. The Netmask is used to find a Host IP-
Address in its Subnet.
Type:
LAN
(Local Area Network) Connection to the home Network. Default is LAN.
Nameserver:Enter the DNS-Server IP-Address here. DNS is used to translate
a Domain name to an IP-Address. Normally, if the Type is set to LAN, there is
no need for a DNS entry. If the receiver is connected to the Internet by a
Router, enter the Router’s IP-Address here.
Gateway: Enter the Router’s IP-Address here (only if the receiver is
connected to the Internet by a Router.
Enable Network: Press the [OK] button to enable the Network (A check/tick
will appear in the checkbox). Default is disabled.
Port 80: Enter a Port of your choice to configure the HTTP Port for the
receiver’s Web Interface. Default is Port 80.