115-0917-010 14
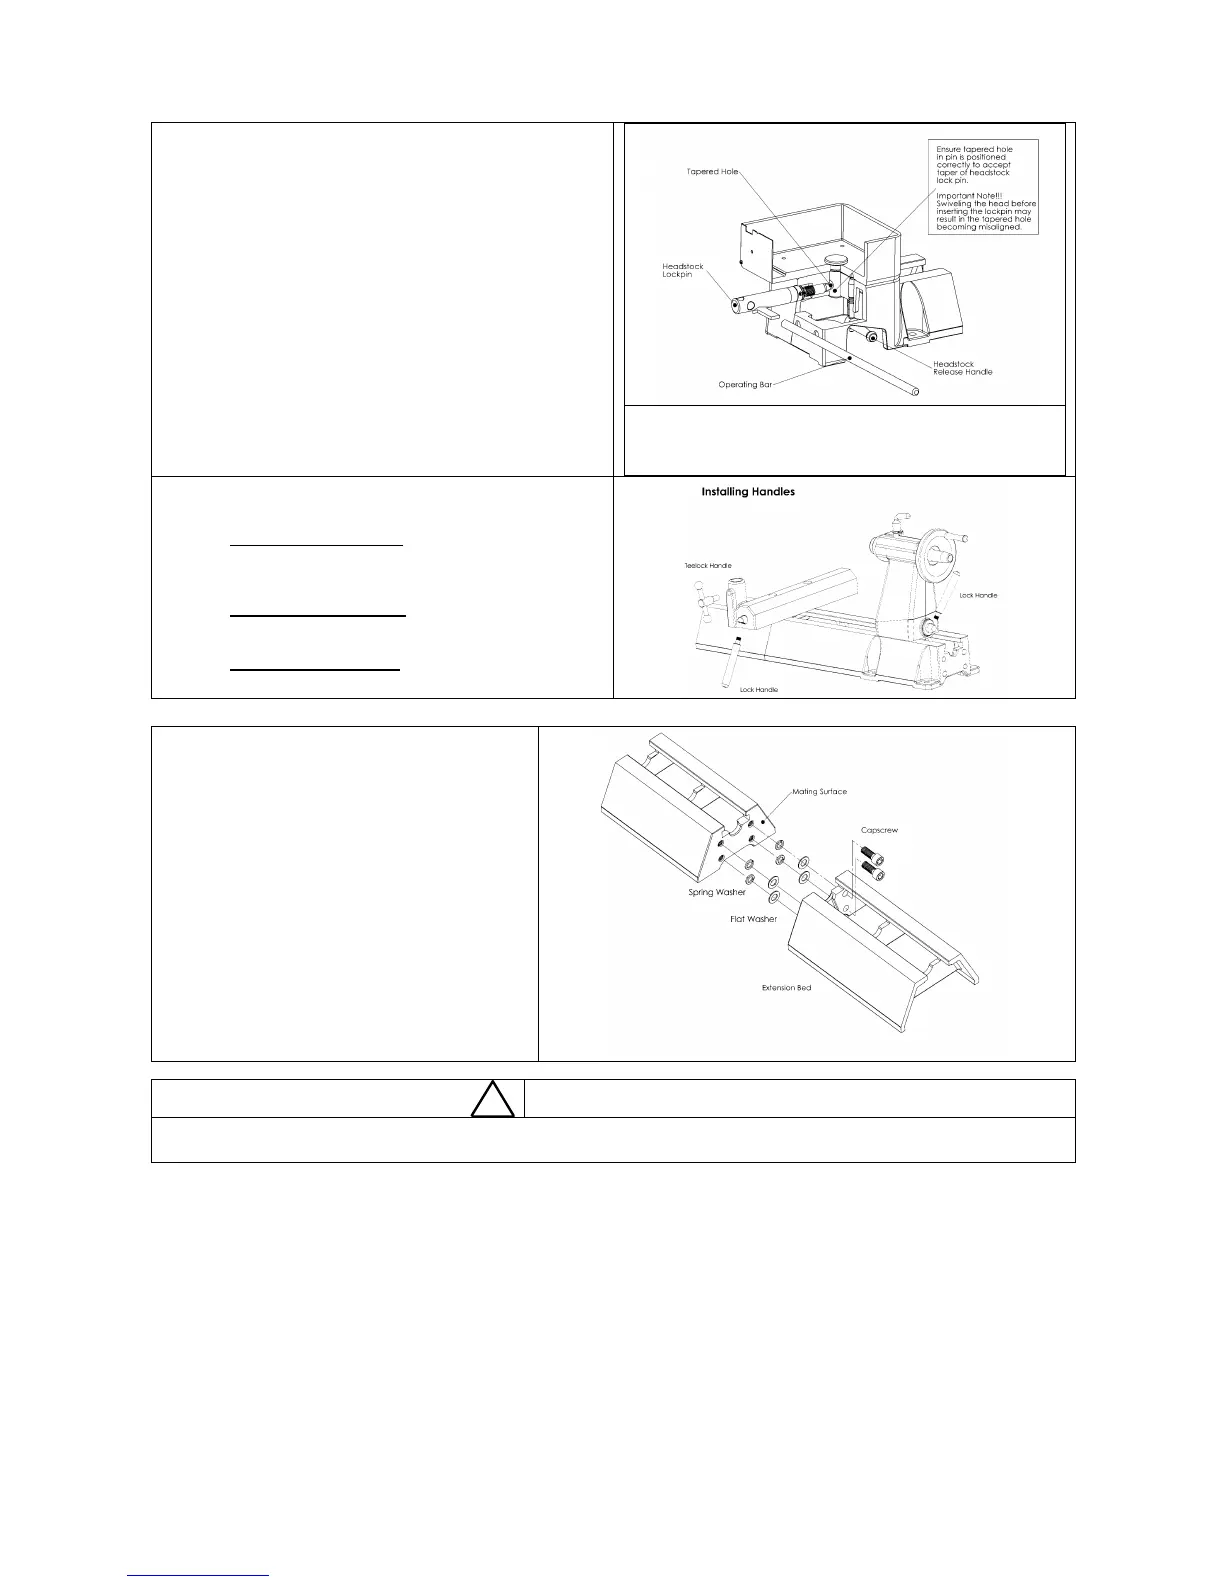
Installing the Headstock Lock Pin and Handles
5. Remove the plastic shipping tube from headstock base.
Immediately screw the Headstock Lock Pin into the
threaded hole at the bottom of the headstock. Insert the
operating bar into the hole in the Lock Pin and firmly tighten
the Lock Pin to lock the headstock in position; then remove
the operating bar.
Note: When the pin is fully engaged, the groove machined into
the pin furthest from the thread should line up with the edge
of the hole in the casting. By doing this the pin will be
engaged in the hole of the swivel pin.
6. Loosen the Lock Pin 1 – 2 turns. Push the Headstock
Release Handle down and rotate the Headstock so the
spindle points to the tailstock and lines up parallel to the
lathe bed. Tighten lock pin again.
Note: Do not use excessive force when tightening the Lock Pin.
Important note:
Swiveling the headstock before inserting the lock pin may
result in the tapped hole on the Swivel pin becoming
misaligned.
7. Assemble the handles:
Note: Some handles may come pre-assembled.
Tool Rest Clamp Handle -
Insert the rod through the handle and screw the ball
knobs onto each end of the rod.
Tool Slide Clamp Handle –
screw the lock handle into the tool slide.
Tailstock Clamp Handle –
screw the lock handle into the tailstock.
Each cast iron extension bed adds 510mm (20in.) to
the lathe’s capacity to turn between centers.
1. Clean the joining ends of both bed sections with a
petroleum-based solvent. Make sure there are no
dents or burrs on either mating surface. Remove
burrs and high spots with a smooth file.
2. Screw in cap screws tight.
3. Secure the bed sections together with four
M12x30 cap screws using a 10mm Allen wrench.
It may be necessary to move the lathe so the cap
screws can be reached with the wrench from the
bottom of the bed.
Do not use a metal hammer to pound on the extension bed. This may damage the bed, affect accuracy and
tailstock action, and may prevent you from adding another extension bed.
4. Bring the Tailstock along until it is on top of the join area where the bed extension face meets the lathe bed face. The bed extension
may require manipulations up-and-down and sideways in order for the Tailstock to fit.
5. Check that the tool slide and tailstock move freely over the mating joint and also over the full length of the add-on extension. If there
is a ridge between the two mating surfaces then repeat steps 1 - 4 again, use a smooth file to file the surfaces flush.
6. Follow the suggestions under "Mounting the Lathe to a Support Surface".