Installation and User Manual
Televic Conference Systems
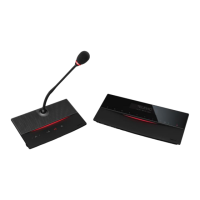
13.1.2. Step 2 – Cable setup
Connect your computer or smartphone (by means of
a router) to the LAN port using a straight-through
patch cable.
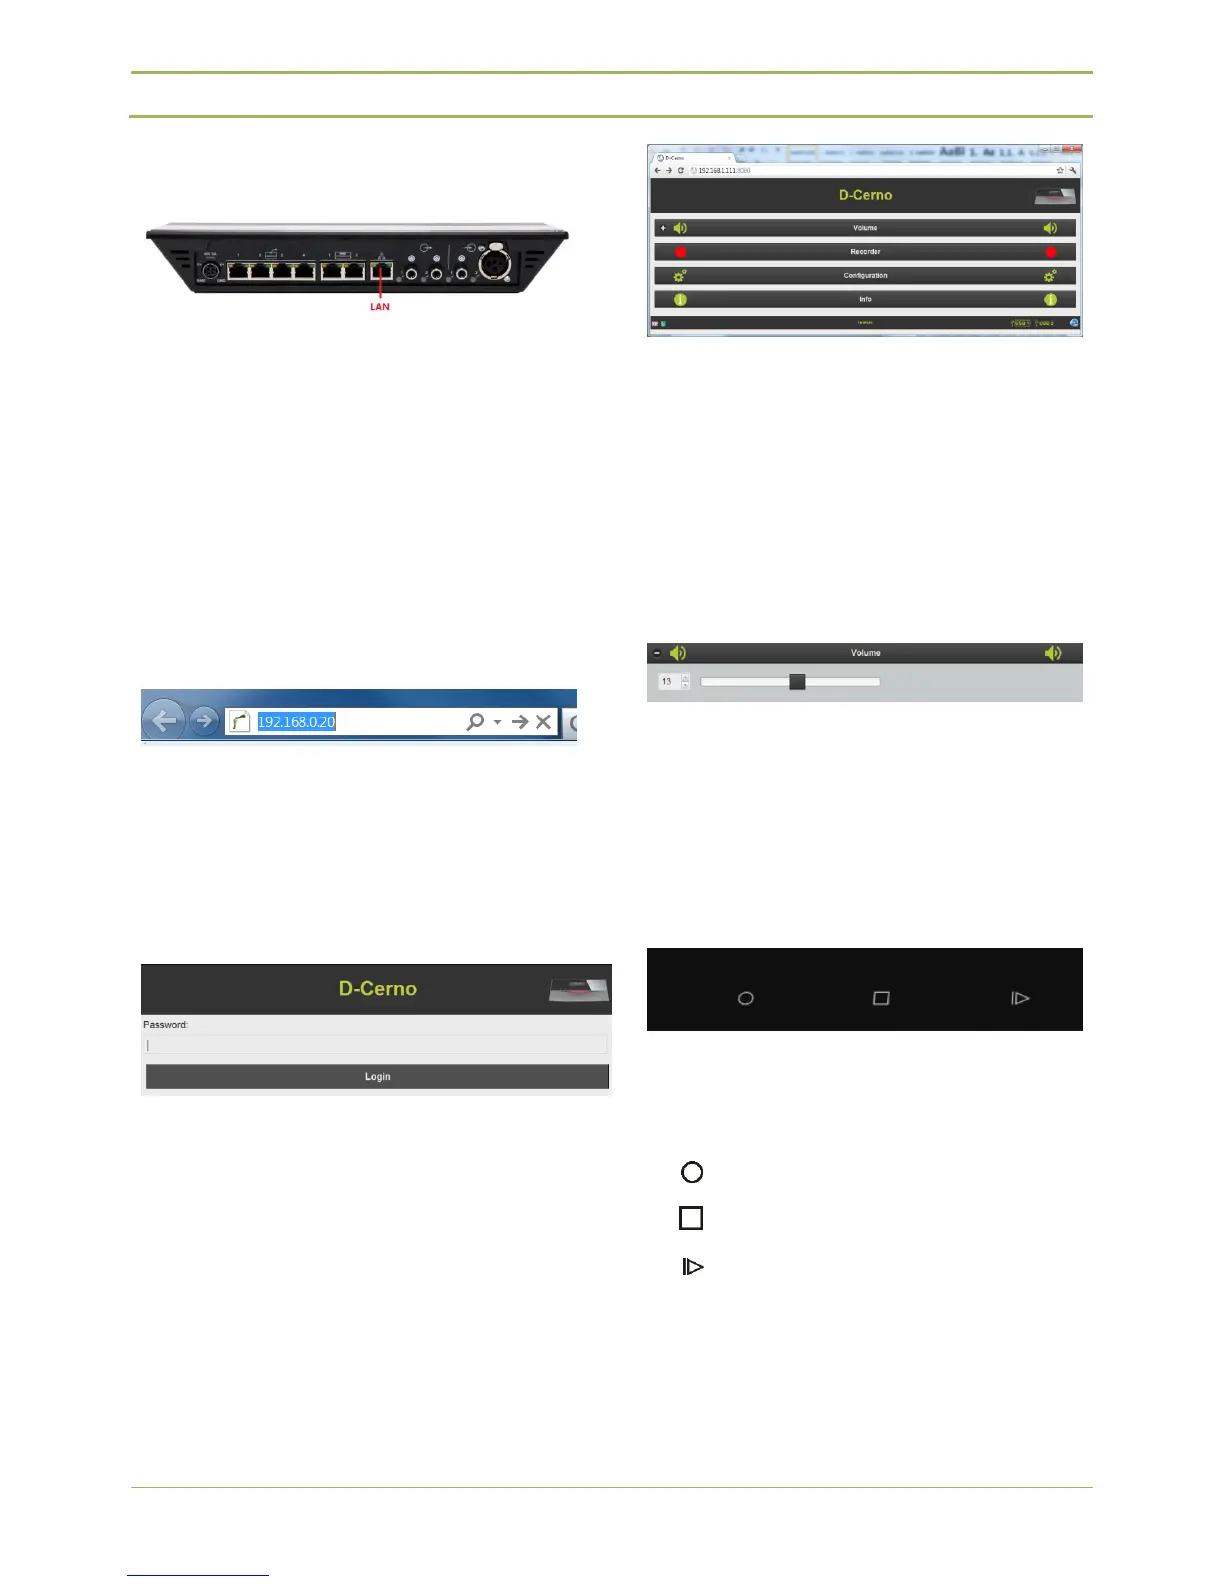
13.1.3. Step 3 – Accessing the
webserver
The webserver is HTML 5 based webserver, which is
compatible with mobile devices such as iPhone,
Android or Ipad.
Figure 13.9: Internet Explorer address bar
- Open Internet Explorer or any other
browser
- Enter 192.168.0.20 into the address bar,
push enter
Figure 13.10: Login screen
- The default password is “1234”
- Click “Login”
13.1.4. Step 4 – Default screen
After you successfully establishing a connection to
the D-Cerno webserver and passing the password
screen, the default D-Cerno screen appears.
Figure 13.11: Default screen
13.2. Volume
After you successfully access the D-Cerno
webbrowser for the first time (refer to 13.1‘How to
connect’) you can change the volume settings of the
central unit, directly from the webbrowser.
- The volume can directly be modified with
the slide bar.
Figure 13.12: Volume setting
13.3. Recorder
13.3.1. Central unit
Figure 13.13: Record buttons central unit
The D-Cerno CU-R has 3 extra record buttons. With
this buttons it is possible to start/stop or pause a
recording from the central unit.
Start recording
Stop recording
Listen/ pause recording
At the front of the central unit there is a possibility to
connect two USB storage devices for direct recording
of the meeting. For more information about the USB
storage devices, please refer to paragraph 7.3:
External connections.