67
Sidekick
®
Plus Test Set
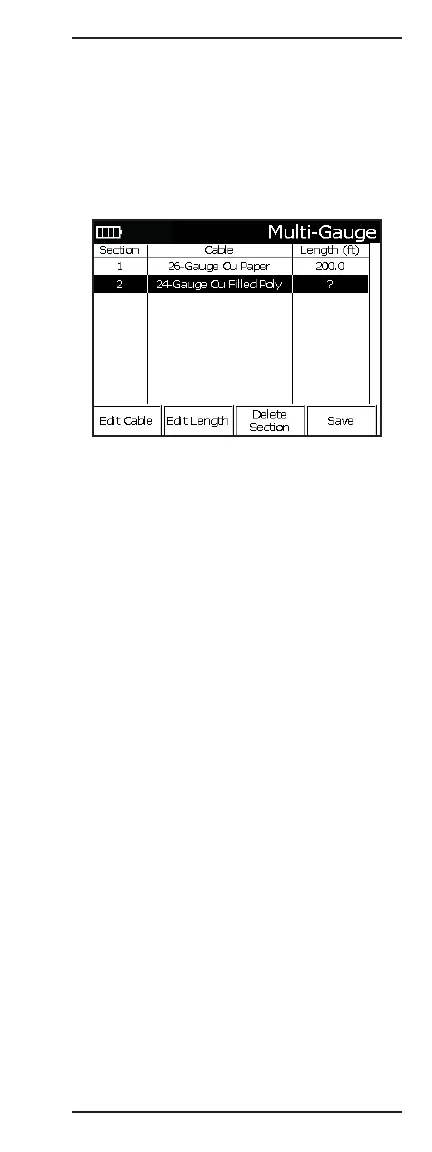
Multi-Gauge Cable
The cable being tested may be constructed of two or
more sections of different cable types. The test set will
use the Multi-Gauge cable table when computing the
distance results in the RFL test.
• F2 Multi-Gauge to display the cable section table.
Press up (2) or down (4) to highlight a section for
editing.
A new section in the Multi-Gauge table is created by
pressing the down (4) key.
For each known cable section, enter each cable’s type
and known length, beginning at the section connected
to the test set.
• F1 Edit Cable, to enter the highlighted section’s
cable type. Press the F1 Previous or F2 Next to
select the cable. Press F4 Done to return to the
Multi-Gauge table.
• F2 Edit Length, to enter the highlighted section’s
length. Enter the known length. Press # (Enter) when
complete.
• F3 Delete Section, to remove the highlighted section
from the Multi-Gauge table.
• F4 Save, to save the current Multi-Gauge table.
Press the O(Back) key to return to the previous menu.
To save the changes to the table, press F3 Save. To
exit, press the O(Back) key.
3 Autotest Config
Pressing 3 while on the MAIN MENU screen accesses
the Autotest configurations selection. Here the Autotest
configuration can be selected. (The same screen can
also be accessed on the Autotest menu screen by
pressing the F4 key.)