setting up the hardwarechapter 3 3-73-6
Preparing the printer
To load the printer paper into the Printer, follow these steps:
1 Make sure that the monitor is powered on.
2 Raise the printer cover.
3 Orient the paper roll so that when it’s on the paper roll axle, the free end of the
paper feeds from the bottom, toward the front of the monitor.
Follow the paper path label located on the printer bracket.
4 Disengage the free end of the printer paper axle and slide the paper roll into
position. Secure the open end of the axle in the paper axle clip.
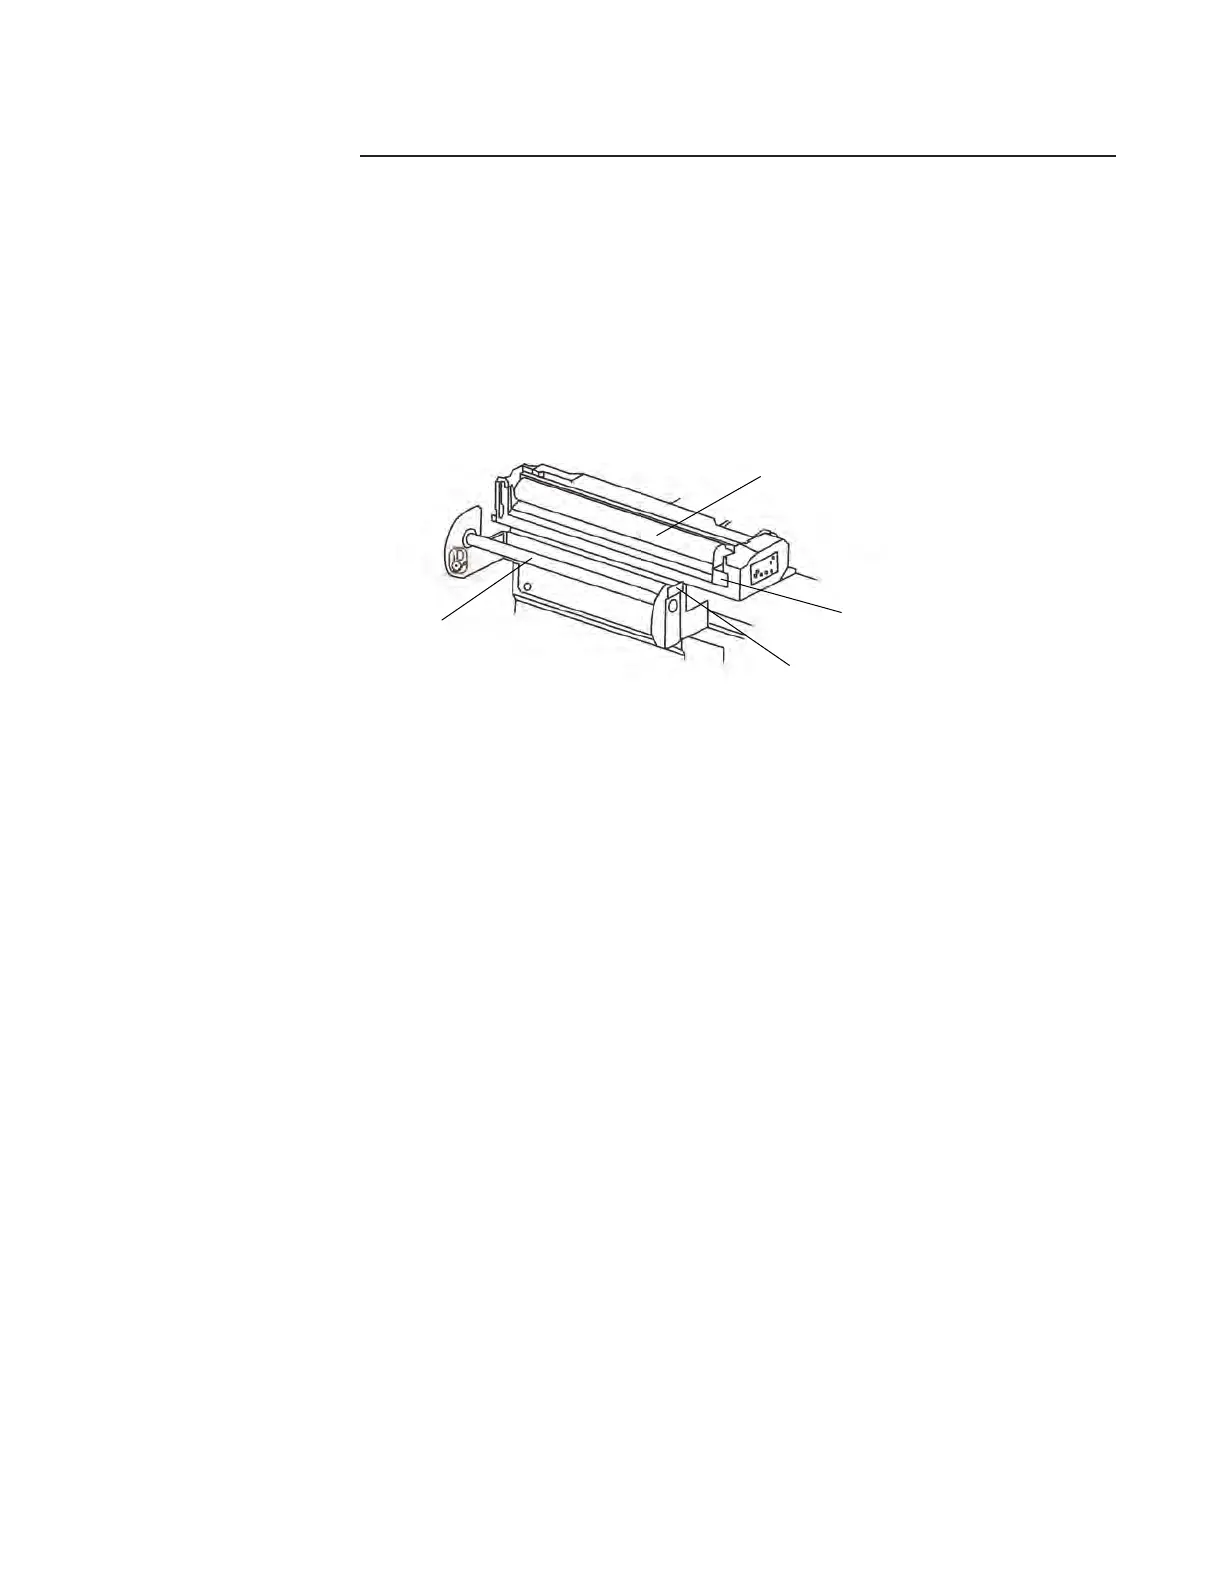
5 Guide the free end of the paper into the slot below the roller and push it forward.
The roller will sense the paper and advance it automatically a few inches. If the
paper does not advance, push down on the roller release lever to release the
roller and remove it. Align the paper so that it will be positioned under the roller
and place the roller on top of the paper. Press the roller down evenly to snap it
into place.
Note: The printer may sense the paper and try to automatically advance the paper
even when the roller is removed. If this happens, wait a few seconds for the motor to
stop before pressing the roller into place.
6 If necessary, you may enter operate mode and press the feed soft key several
times to advance the printer paper until it is long enough to pass through the
printer cover slot.
7 Place the free end of the paper through the printer cover slot and lower the
cover.
Note:
The printer cover must be securely closed for normal operation and for
cleaning.
Note: Thermal printer paper Terumo CDI Model 7310 is sensitive to heat, light,
chemical, and mechanical damage. The paper remains sensitive even after an image
has been printed on it. Used paper should be stored in the dark at an ambient tem-
perature below 25°C (77°F) and 65% relative humidity.
Roller
Roller Release Lever
Paper Axle Clip
Paper Axle
 Loading...