Chapter 4 – Temperature Controller
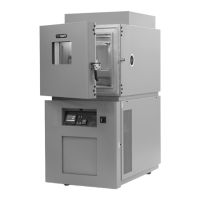
TestEquity 1007C Temperature Chamber Page 4-13
Digital Event Outputs
The Temperature Controller has digital outputs which can be configured as Event Outputs to turn
remote devices on and off. There are six Event Outputs which are available for customer use
(five if GN2 Purge option is installed). Output number eight is configured to control the
refrigeration compressors and is not available for customer use. The Event Outputs are accessed
from the Main Page.
To control the Event Outputs:
1. Press the ▲or ▼ key to position the Cursor next to the DigitalOut prompt.
2. Press the ► key once. You will see Choose Event Output prompt in the lower display.
3. Press the ▲or ▼ key to position the Cursor next to the EventOutput prompt which you
want to change. You will be able to select from EventOutput1 through EventOutput7.
4. Press the ► key once to select the desired EventOutput. Then, press the ▲or ▼ key to
select On or Off.
5. Press the ► key once to return to the Choose Event Output prompt.
6. Press the ◄ key once to return back to the Main Page.
Digital Output Connections
See page 12.9 of the “Series F4 User’s Manual” for details on how to connect to the Digital
Outputs.
Event Board Option
The event board option contains solid state relays to control AC operated devices, such as power
to a test sample. The solid state relays are rated for 24 to 240 VAC, 3.0 Amps. However,
TestEquity recommends derating the maximum current to 2.5 Amps. The solid state relay
mounting board is UL recognized/CSA certified for 120 VAC max. with the board-mounted
fuses; 250 VAC max. with a #22 solid copper jumper wire instead of the fuses.
Connecting to the Event Board
1. Turn the Main Disconnect switch to the OFF position.
2. Remove the lower door retaining screw located on the right side. Open the lower door.
3. The Event Board is located on the lower door. Connect to the event outputs as follows:
Event Output Event Board Terminals
Event 1 Not available
Event 2 3, 4 (Not available if GN2 Option is installed)
Event 3 5, 6
Event 4 7, 8
Event 5 9, 10
Event 6 11, 12
Event 7 13, 14
4. The event outputs are just switches. You must provide power from an external source.
5. A 1/2-inch conduit hole is provided on the left side of the lower door to route your wires
through. Use the appropriate wire/cable management fittings.