cutmaster 102
Manual 0-4998 5-17 SERVICE
B. SHORTED TORCH (OUTPUT) FAULT.
Fault indicator and 85 PSI Indicators are
flashing at 1 cycle per second.
This is a Latched Failure Mode. After START signal is
activated, gas flows for two (2) seconds then momen-
tarily shuts off then back on, FAULT INDICATOR
flashes, and 85 PSI LED flashes. To reset the machine,
turn the unit OFF, indentify and clear the problem
and turn back ON.
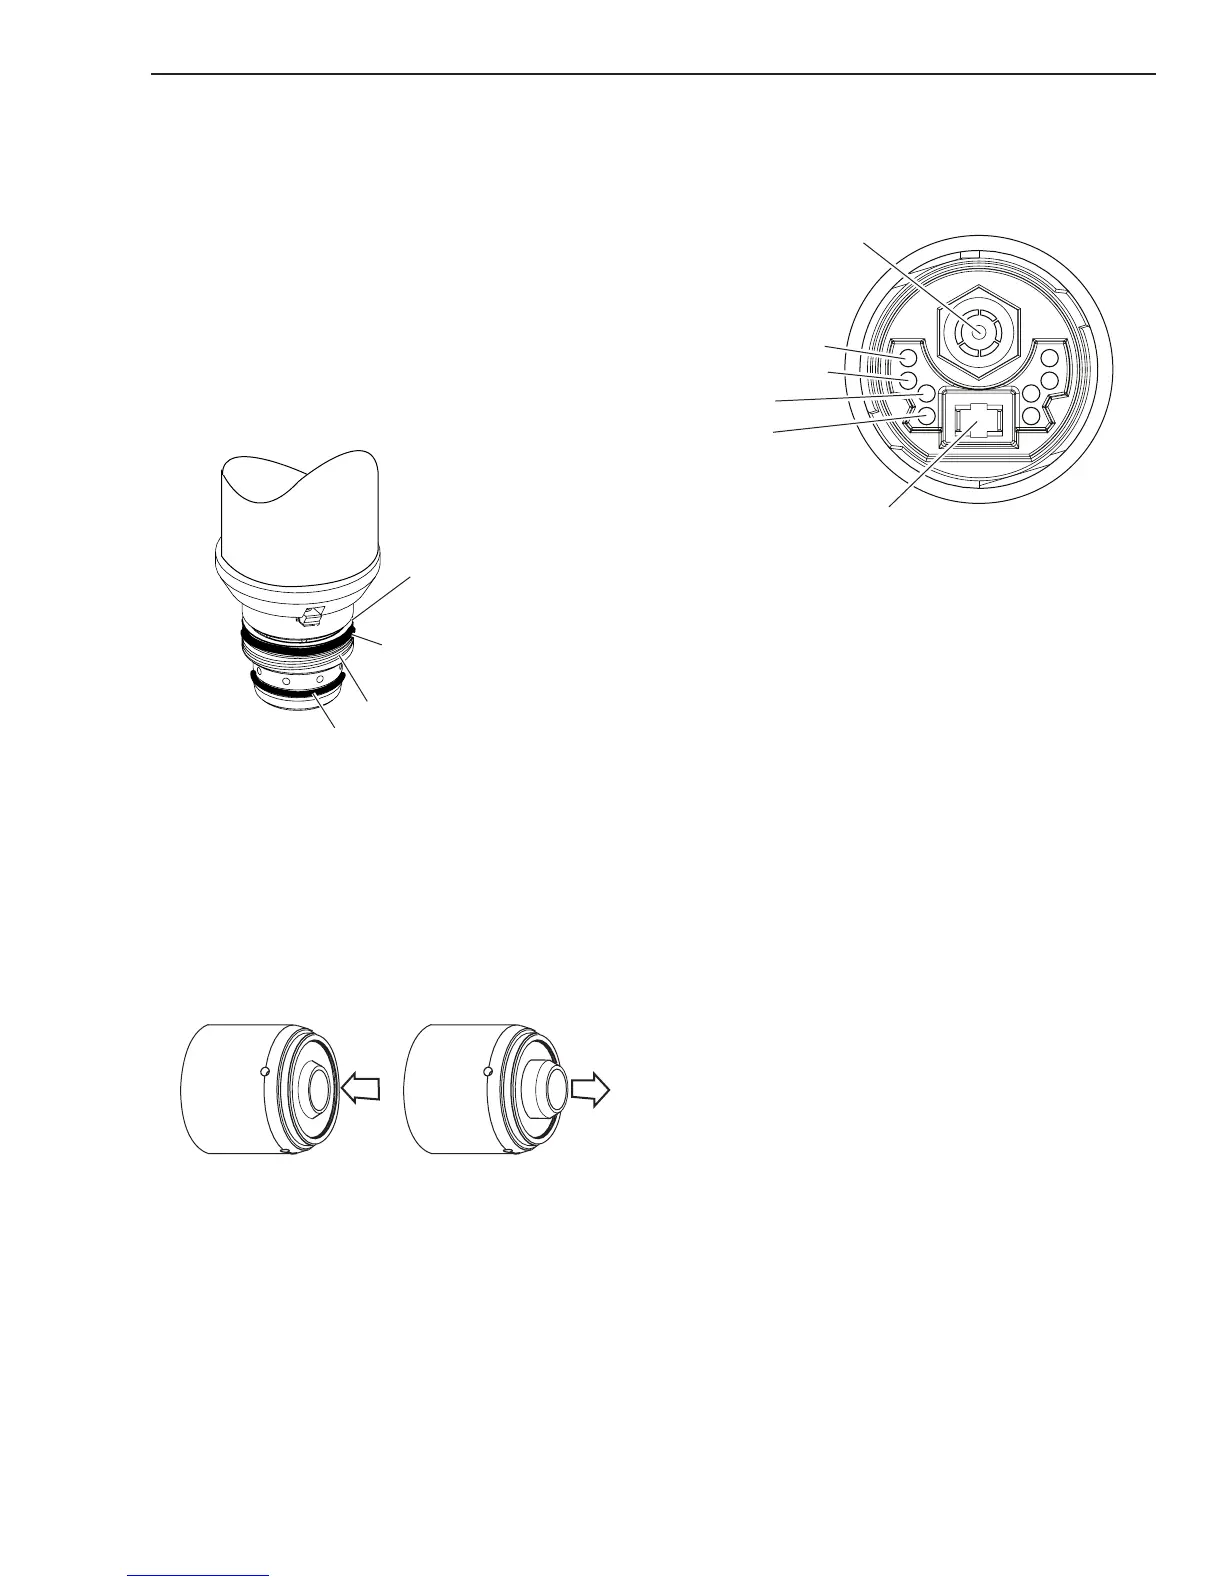
1. Upper O-Ring on torch head is in the wrong posi-
tion.
a) Remove shield cup from torch; check position
of the upper o-ring and correct if needed.
Upper Groove
with Vent Holes
Must Remain Open
Threads
Upper O-Ring
in Correct Groove
Lower O-Ring
Art # A-03725
2. Torch start cartridge is stuck.
a) Turn off power supply. Bleed down the system.
Remove the shield cup, tip,start cartridge and
electrode. Check the lower end unit of the
start cartridge for free movement. Replace
the cartridge if the lower end unit does not
move freely.
Art # A-08064
Spring-Loaded
Lower End Fitting
Full Compression 1/8”
Spring-Loaded
Lower End Fitting at Rest /
Full Extension
3. Worn or faulty torch parts
a) Inspect torch consumables parts. Replace if
necessary.
4. Shorted Torch/leads
a) Disconnect torch from unit. With consumables
removed from the torch, Check continuity of
torch at ATC, between negative/plasma lead
connection to pilot lead connection.
Negative / Plasma Lead
4 Torch Switch
3 Torch Switch
2 PIP
1 PIP
Pilot Lead
Art # A-08124
If a short is found, the problem is in the torch
and leads assembly. Remove the torch head
from the leads and check the leads and head
to determine which is defective.
5. Defective 40Amp PCB 5.
a) Disconnect and isolate the wire from the
CHOKE1 connection on the 40Amp PCB 5.
Supply a START signal. If the FAULT is not
present, replace the 40 AMP PCB 5.
6. Defective Main PCB 1.
a) Replace Main PCB 1.
C. SHORTED TORCH FAULT. Fault indicator
and 85 PSI Indicators are flashing at 5
cycles per second.
This mode is a non-latched mode.
1. While using an Automation Torch at current set-
tings above 45 amps, the tip has contacted the
work piece.
a) Check standoff height
2. Air restriction in torch resulting in low voltage
during pilot.
a) Check torch consumables for wear or debris.
3. Low voltage during cutting due to torch or con-
sumable problem.
a) Check torch consumables for wear or debris.
In all three cases, to reset the machine, remove the
START signal.