cutmaster 82
SERVICE 5-8 Manual 0-4980
Optional Two-Stage Filter Element
Replacement
The Two-Stage Air Filter has two Filter Elements. When
the Filter Elements become dirty the Power Supply will
continue to operate but cut quality may become unac-
ceptable. Refer to Section 6, Parts List, for replacement
filter element catalog number.
1. Shut off primary input power.
2. Shut off air supply and bleed down system.
WARNING
Always turn off the air supply and bleed the sys-
tem before disassembling the Filter Assembly as
injury could result.
3. Loosen the two bolts on the top of the Filter As-
sembly enough to allow the Filter Elements to
move freely.
4. Note the location and orientation of the old Filter
Elements.
5. Slide out the old Filter Elements.
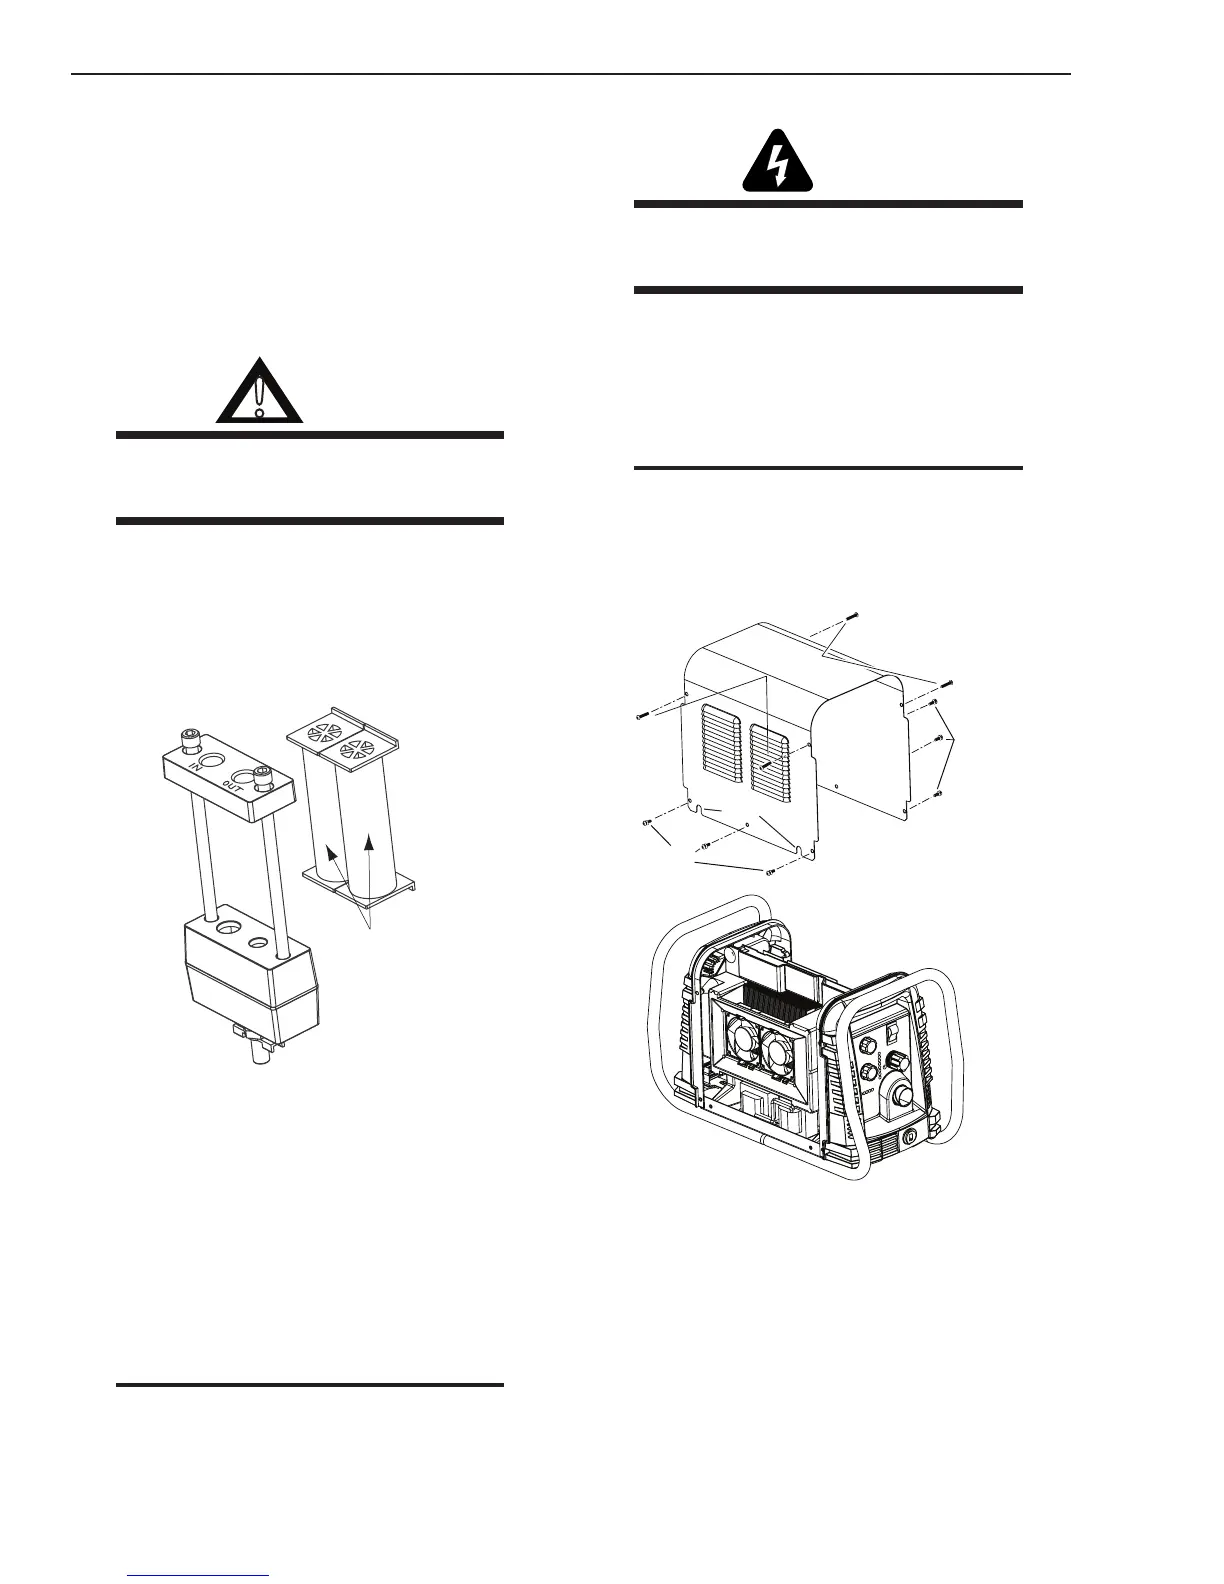
First & Second
Stage
Cartridges
(as marked)
Art # A-02942
Optional Two-Stage Filter Replacement
6. Slide the replacement Filter Elements into the
Filter Assembly, with the same orientation as
noted in Step 4 above.
7. Hand tighten the two bolts evenly, then torque
each bolt to 20 - 30 in-lbs (2.3 - 3.4 Nm). Improper
torque may damage the gasket.
8. Slowly apply air pressure to the assembly, check-
ing for leaks.
NOTE
A small amount of air leakage from the bottom
fitting is normal.
This completes the parts replacement procedures.
5.07 Circuit Fault Isolation
WARNING
The following procedures should not be attempted
by anyone who has not had proper training or
authorized to do so.
A. Cover Removal
1. Remove the upper and lower screws which
secure the cover to the main assembly. Do not
loosen the lower screws inside the cut out slots
in the bottom of the cover.
Note
The upper screws and lower screws are not the
same. Do not mix them. The upper screws are
for threading into the plastic of the front and rear
panels. DO NOT use the finer threaded lower
screws for this.
Upper
Screws
Lower
Screws
Lower
Screws
Art # A-07947
Slots
2. Carefully pull the Cover up and away from the
unit.