)SERVICE 5-4 Manual 0-2815
B. No cutting output
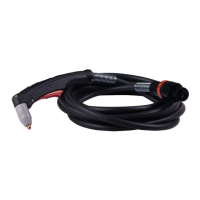
1. Torch not properly connected to power supply
a. Check that torch leads are properly attached
to power supply
2. Shield cup not properly installed on torch
a. Check that shield cup is fully seated against
torch head (do not overtighten)
3. Parts-In-Place (PIP) not satisfied.
a. Check canted coiled spring inside shield cup
4. Faulty components in torch and leads assembly
a. Inspect torch assemblies and replace if neces-
sary. Refer to Section 5.06, Torch & Leads
Troubleshooting.
5. Faulty components in power supply system components
a. Return for repair or have qualified technician
repair per Service Manual.
C. Limited output with no control
1. Poor input or output connections to power supply
a. Check all input and output connections.
2. Faulty components in torch and leads assembly
a. Inspect torch assemblies and replace if neces-
sary. Refer to Section 5.06, Torch & Leads
Troubleshooting.
3. Faulty components in power supply system components
a. Return for repair or have qualified technician
repair per Service Manual.
D. Erractic or improper cutting output
1. Poor input or output connections to power supply
a. Check all input and output connections.
2. Current set too low at power supply
a. Increase current setting.
3. Torch is being moved too fast across workpiece
a. Reduce cutting speed (refer to Appendix Page
for the Power Supply being used).
4. Excessive oil or moisture in torch
a. Hold torch 1/8 inch (3.2 mm) from clean sur-
face while purging and observe oil or moisture
buildup (do not activate torch).
5. Torch tip contacts workpiece
a. When the tip is contacts the workpiece, the
amperage automatically cuts back to 35 amps .
E. No gas flow
1. Gas not connected or pressure too low
a. Check source for at least 70 psi (4.8 bar).
2. Faulty components in torch and leads assembly
a. Inspect torch assemblies and replace if neces-
sary. Refer to Section 5.06, Torch & Leads
Troubleshooting.
3. Faulty components in power supply system components
a. Return for repair or have qualified technician
repair per Service Manual.
F. Torch cuts but not adequately
1. Current set too low at power supply
a. Increase current setting
2. Torch is being moved too fast across workpiece
a. Reduce cutting speed (refer to Appendix Page
for the Power Supply being used).
3. Excessive oil or moisture in torch
a. Hold torch 1/8 inch (3.2 mm) from clean sur-
face while purging and observe oil or moisture
buildup (do not activate torch)
5.06 Torch & Leads Troubleshooting
A. General Information
Failures in the Torch and Leads can be isolated to the Torch
Head or Torch Lead components. To properly isolate the
failed part requires the use of an ohmmeter and a Hi-Pot
Tester.
WARNING
The use of a Hi-Pot Tester should be performed only
by a qualified electronic technician.
In the Torch Head the center insulator separates the nega-
tive and positive charged sections of the torch. If the cen-
ter insulator does not provide adequate resistance, cur-
rent which is intended for the pilot arc may be dissipated
into the torch head, resulting in torch failure.
In the Torch Leads the negative and positive leads are
isolated from each other. If there is not adequate resis-
tance between the leads then torch failure may occur.
 Loading...