)SERVICE 5-6 Manual 0-2815
• If the voltage drops to 0VAC or leakage cur-
rent is detected, then the insulation between the
Torch Leads is breaking down and the Torch
Leads must be replaced.
• If the Torch Leads passes the test, then proceed
to Step 3.
3. Visually check that the PIP wires, pilot lead con-
nection, and negative lead connections are prop-
erly connected and in good condition (no shorts
or arcing).
• If problems are evident, repair or replace as re-
quired.
• If there are no visual problems, then proceed
to Step 4.
4. Check the pilot lead, negative lead and PIP wires
for opens from one end of the torch leads to the
other.
• If open, replace leads or open component of
the Torch Leads Assembly.
• If not open, then proceed to Step 5.
5. Check the pilot and PIP wires for shorts to other
components in the Torch Leads.
• If shorted, then replace Torch Leads.
• If not shorted, then proceed to Step 6.
6. Carefully reassemble the components and recheck
the completed assembly per paragraph ‘B’, Step
3 to confirm that the components have been prop-
erly assembled.
This completes the checks for the proper operation of the
Torch Head and Torch Leads.
5.07 Servicing Machine Torch (PCM)
Components
WARNINGS
Disconnect primary power to the system before
disassembling the torch or torch leads.
DO NOT touch any internal torch parts while the
AC indicator light of the Power Supply is ON.
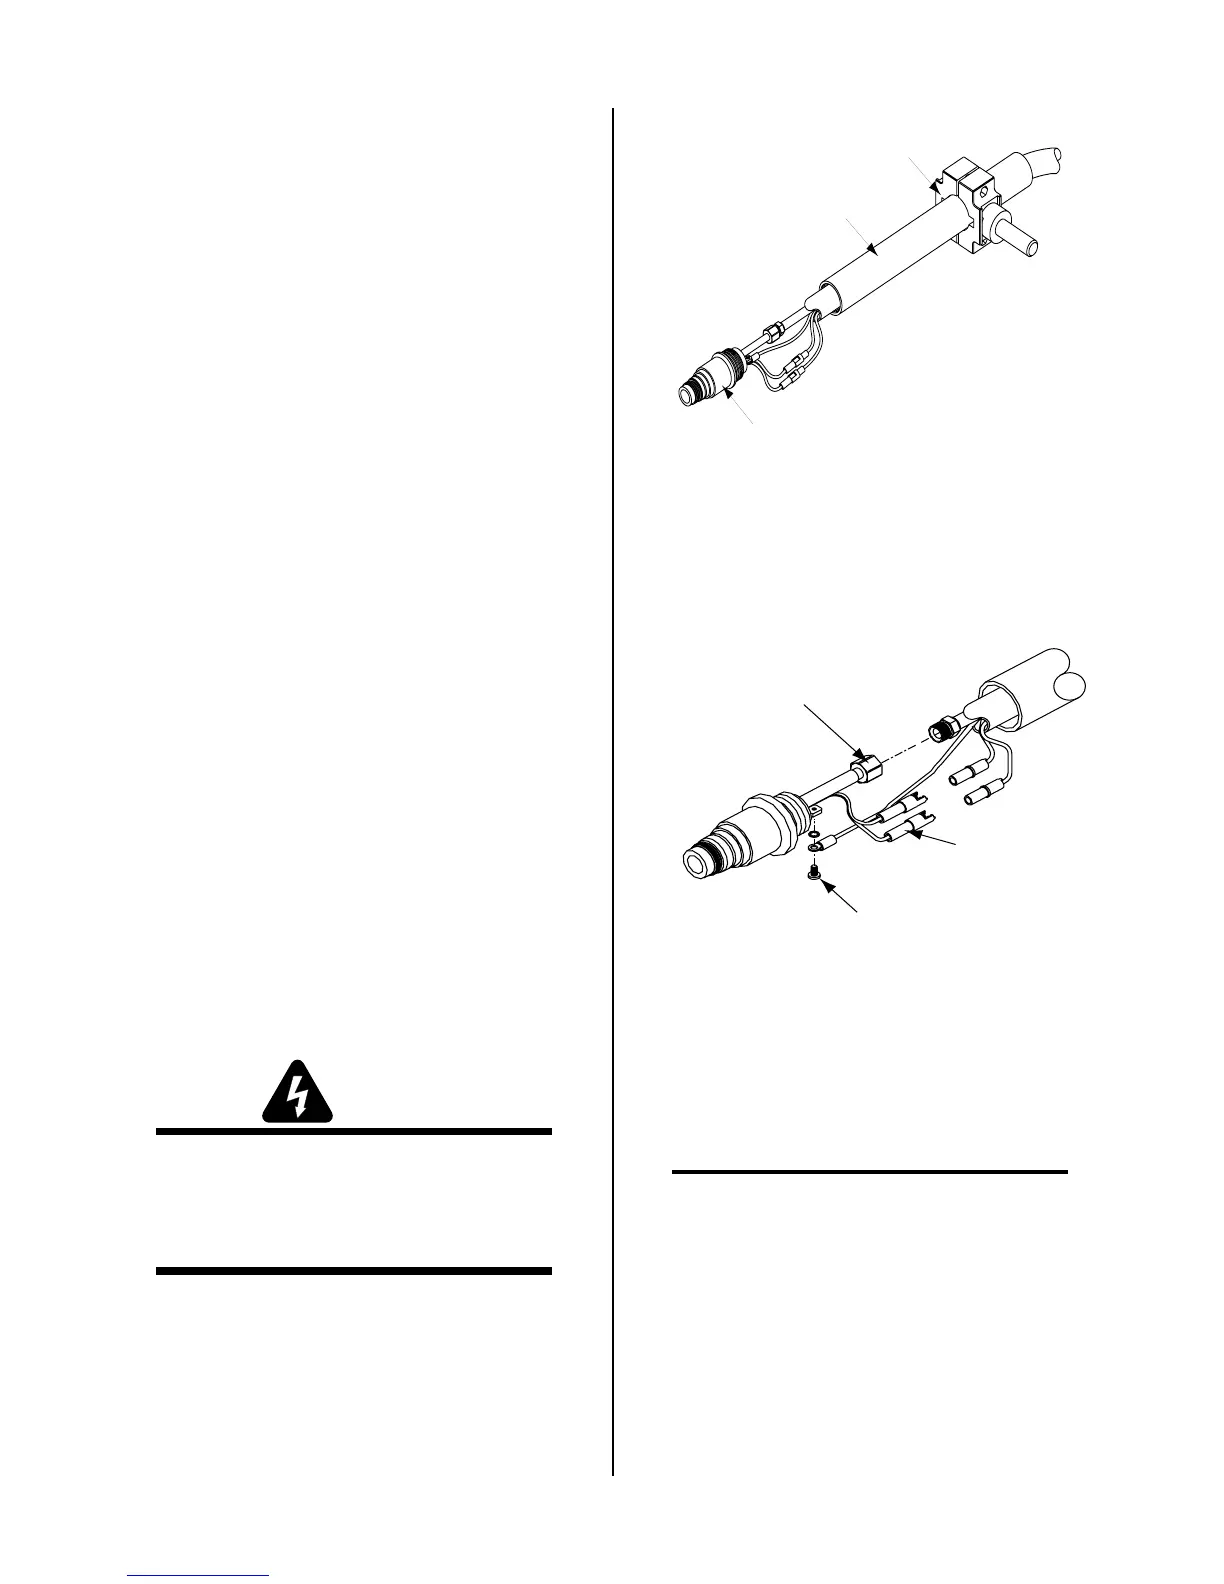
A. Removing Machine Torch Head
1. Unscrew the positioning tube from the torch head.
2. Slide the positioning tube back over the leads to
expose the negative/plasma lead connection, pi-
lot lead connection, and two PIP (parts-in-place
circuit) connectors.
Machine Torch Head
Pinch Block Assembly
Positioning
Tube
A-02587
Figure 5-4 Torch Mounting Assembly
3. Disconnect the negative/plasma and pilot leads
and the PIP connectors to allow removal of the
torch head.
Pilot Lead
Connection
Parts-in-Place
Wires
Negative/Plasma
Lead Connection
A-02581
Figure 5-5 Torch Head Removal
B. Reassembling Machine Torch Assembly
1. Connect the two PIP lead connectors, the nega-
tive/plasma and pilot leads.
NOTE
Tape the PIP lead connectors to the leads covering.
2. Screw the positioning tube tightly onto the torch
head.
 Loading...