© 2015 Thorlabs
4 Maintenance and Service
21
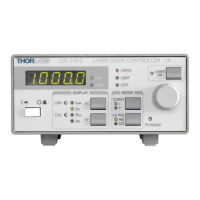
4.2 Replacing Mains Fuses
The two power input fuses are externally accessible. If they blew due to line distortions,
incorrect line voltage or other causes, they can be replaced from the rear without opening the
unit.
Attention
To avoid risk of fire only the appropriate fuses for the corresponding line voltage must be used
1. Turn off the LDC2xxC and disconnect the mains cable.
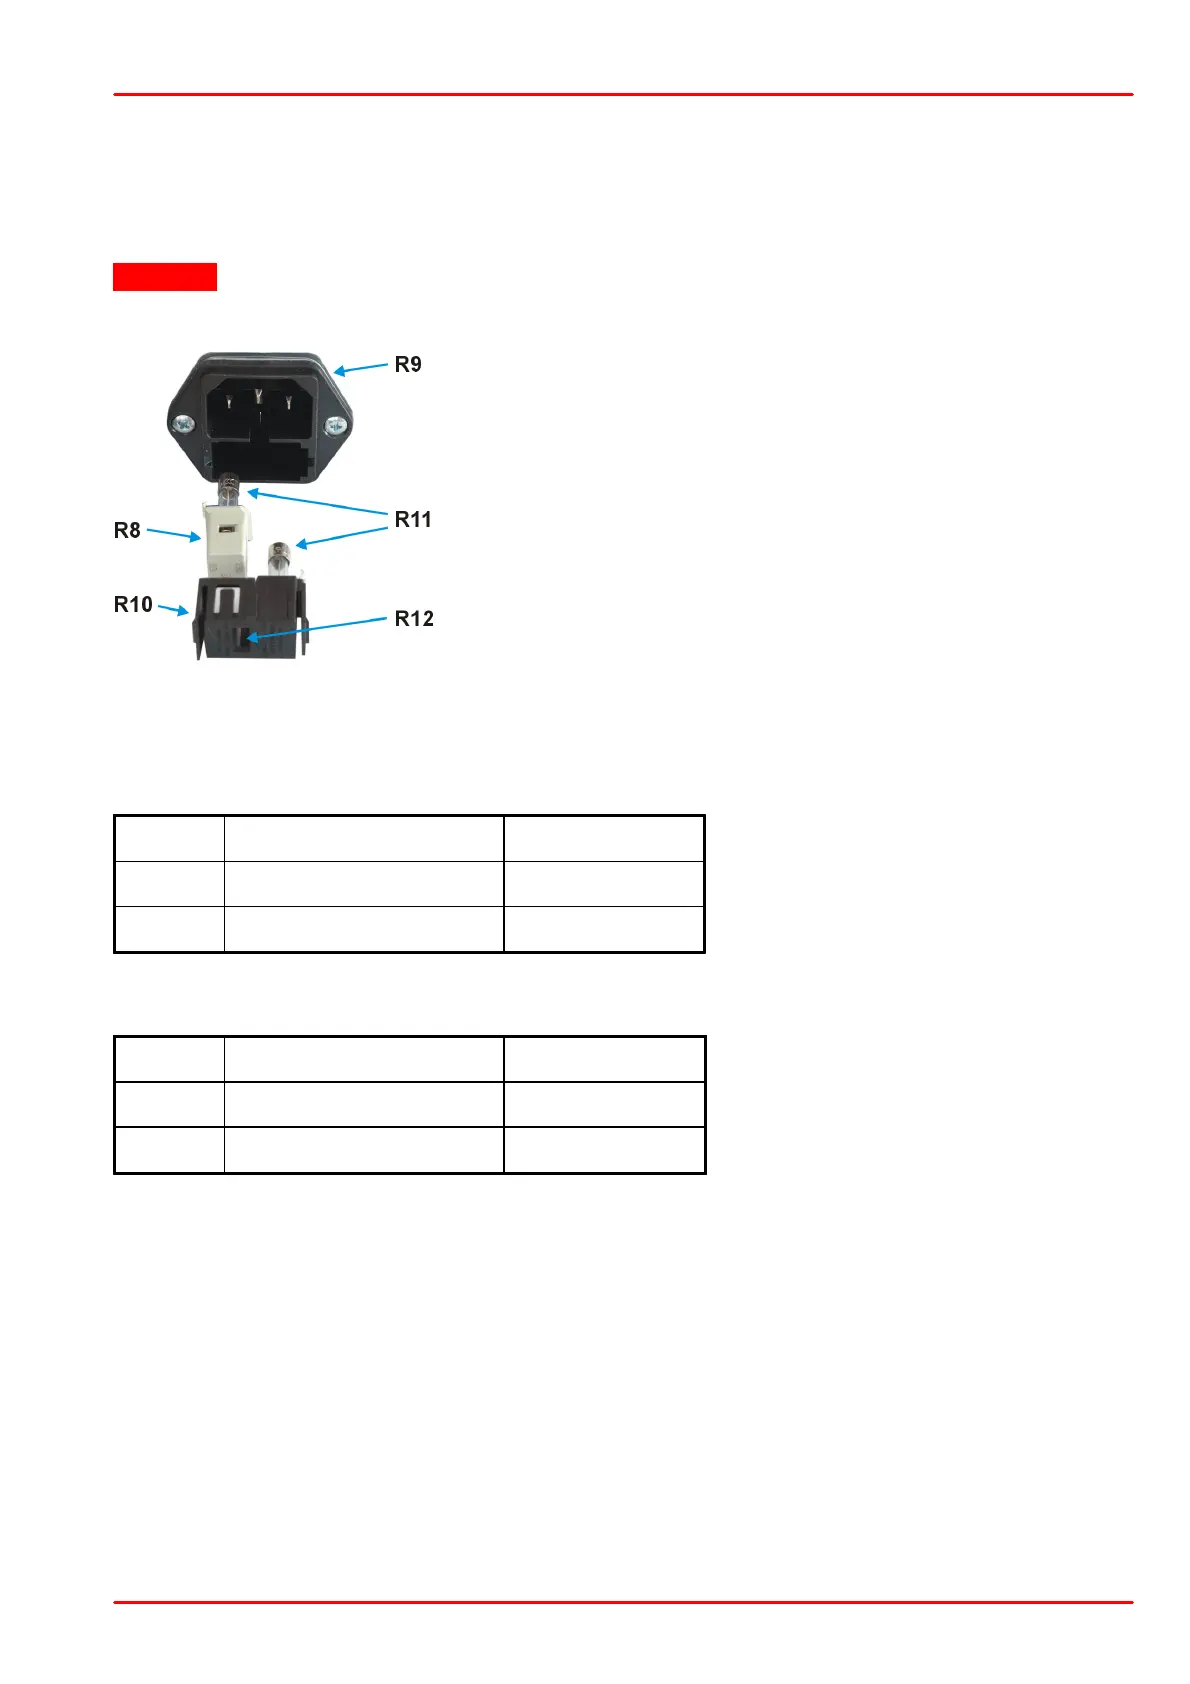
2. The fuse holder (R10) is located below the 3-pole power
connector of the mains jack (R9). Release the fuse holder by
pressing its plastic retainers using a small screwdriver. The
retainers are located on the right and left side of the holder
and must be pressed towards the center.
3. Replace the defective fuses (R11) and press in the fuse
holder until locked on both sides. Take care to maintain the
correct rotation of the white line voltage indicator / switch (R8)
which contains the left fuse and is plugged into the fuse
holder. The appropriate line voltage marking must be visible in
the cutout (R12) of the fuse holder.
Fuse types
LDC200VC, LDC201CU, LDC202C, LDC205C, LDC210C, and LDC220C:
LDC240C:
All fuses must meet IEC specification 60127-2/III, time characteristic: time-lag (T), 250V AC,
size 5 x 20 mm.
 Loading...