45
Laser Menu
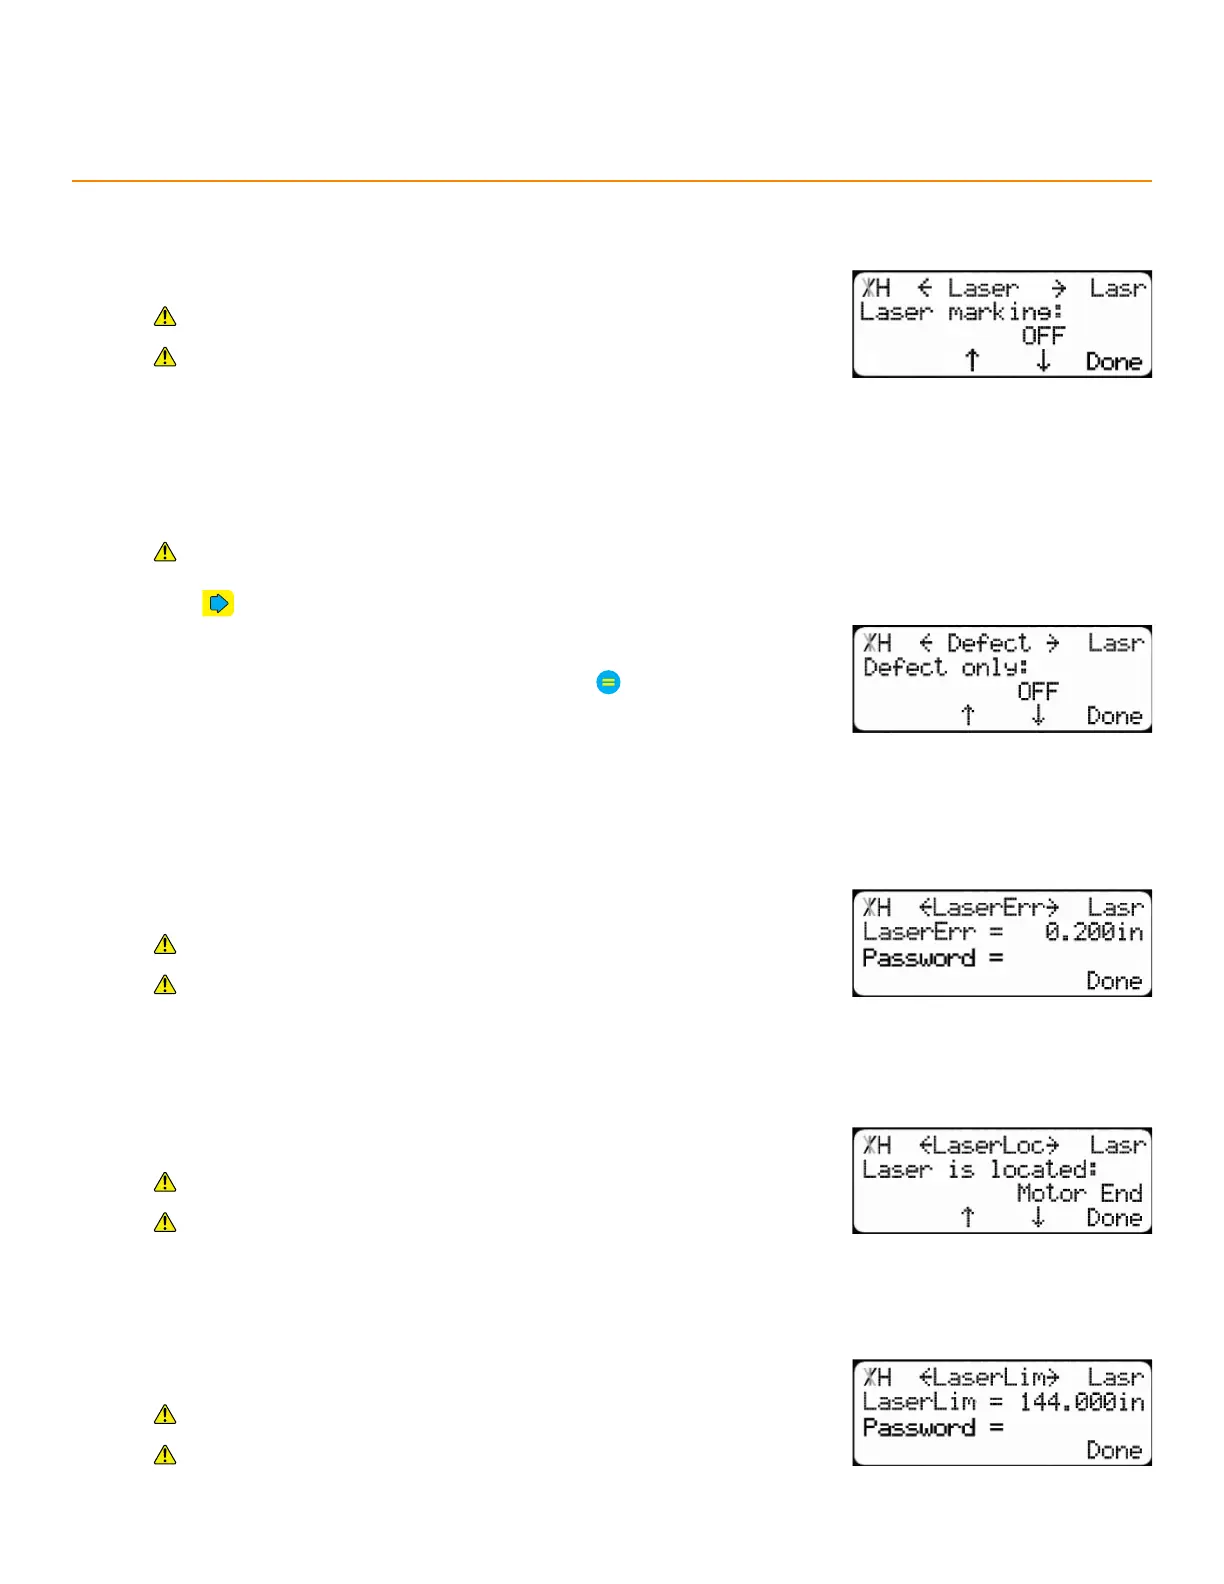
laSeR maRking
Enable/Disable the laser defecting system.
Requires either a Scanning and Defecting Pusher Foot or a UV
Scanning Pusher Foot.
Contact TigerStop
®
Customer Service before adjusting this setting.
deFect only
Enable to cut defects from the material, only.
Requires a TigerSaw system and either a Scanning and Defecting Pusher Foot or a UV Scanning Pusher
Foot.
1. Press until reaching the Defect screen.
2. Press the [↓] or [↑] soft key.
3. Enter the TigerStop
®
’s password and then press
• By default, the TigerStop
®
’s password is the serial number.
4. Press the [↓] or [↑] soft key to turn on or o.
laSeR eRRoR
The minimum distance between defects to count as a separate scan.
Requires either a Scanning and Defecting Pusher Foot or a UV
Scanning Pusher Foot.
Contact TigerStop
®
Customer Service before adjusting this setting.
laSeR location
On which end of the TigerStop
®
the laser is mounted.
Requires either a Scanning and Defecting Pusher Foot or a UV
Scanning Pusher Foot.
Contact TigerStop
®
Customer Service before adjusting this setting.
laSeR limit
The maximum range of the laser scanner.
Requires either a Scanning and Defecting Pusher Foot or a UV
Scanning Pusher Foot.
Contact TigerStop
®
Customer Service before adjusting this setting.