3-6
Chapter 3
INSTALLATION AND SETTING PROCEDURES (HARDWARE)
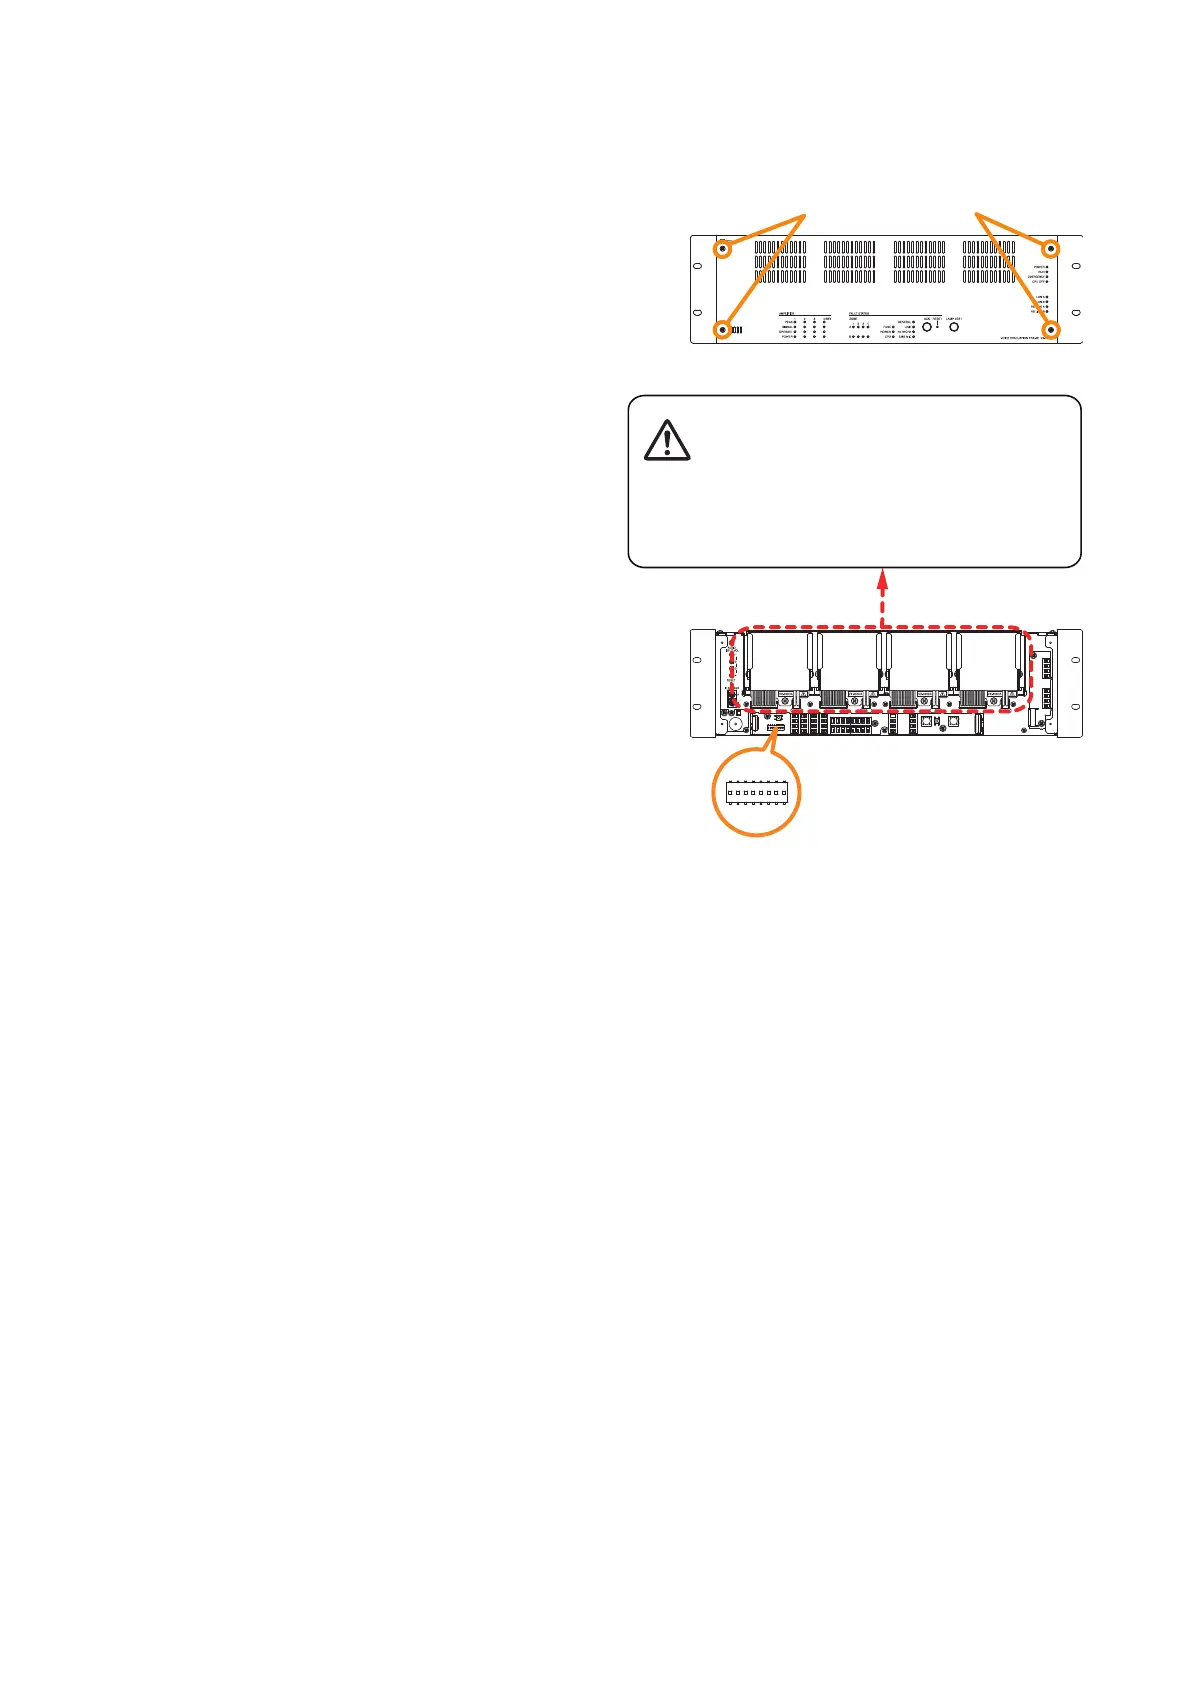
Step 1. Detach the front panel.
Remove4xingscrewsforfrontpanelanddetach
the front panel.
Step 2. Set the DIP switch.
SettheDIPswitchsothatpowerampliermodules
andZonecongurationsareobtainedasintended.
Step 3. Replace the front panel.
Secureitusing4xingscrewsforfrontpanel.
VX-3000F front
Fixing screws for front panel
1
2
VX-3000F front
(Front panel detached)
DIP switch
There is a high voltage section inside the power
amplifier's filter. Never insert your finger or
metallic objects inside the unit.
[DIP Switch setting]