3-9
Chapter 3
INSTALLATION AND SETTING PROCEDURES (HARDWARE)
3. RM-200SF AND RM-300X MICROPHONES
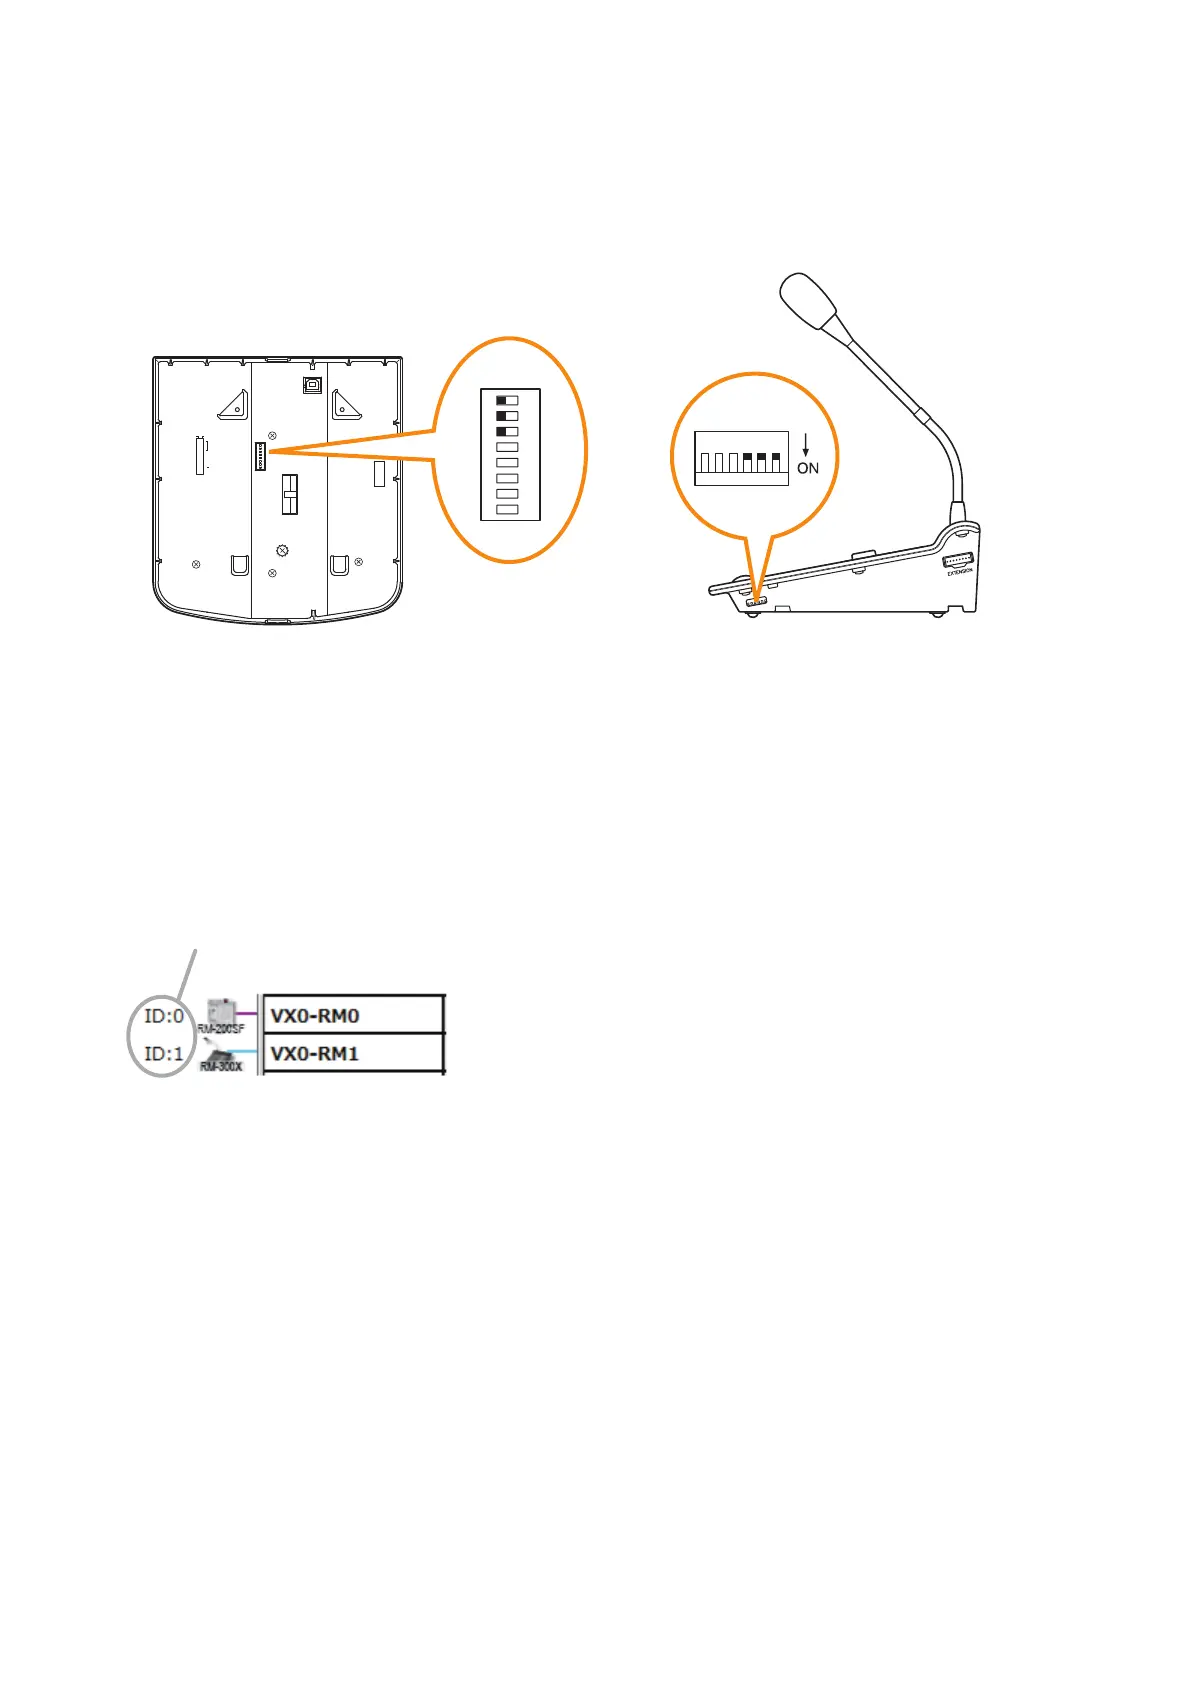
3.1. TheIDNumberSettings(Switches1–3operation)
Set ID numbers (device numbers) using switches 1 – 3 of the DIP switch located on the rear panel of the RM-
200SF and the side panel of the RM-300X.
8
7
6
5
4
3
2
1
TERMINATION
CPU OFF
LEVEL METER
COMMUNICATION
UNIT ID
OnOff
DIP SWITCH
RM-200SF rear RM-300X side
1
2
ON
3
4
5
6
7
8
123456
• Atotalofupto8RM-200SFandRM-300Xmicrophonescanbeconnectedpersystem.However,connections
to individual units are limited to the following:
Designated for Emergency use: Up to 2 units in a total of the RM-200SFs and RM-300Xs
Designated for General use: Up to 8 units of RM-300Xs only
• AnIDNumbermustbesetforeachconnectedRemotemicrophone.TheIDNumbermustbeidenticalto
that which is set by the PC software. On the PC screen, the ID Number appears at the left of the Remote
microphone symbol.
[Remote microphone on the PC screen]
ID Number
• TheIDNumberisfactory-presetto"0."