4-2
Chapter 4
APPENDIX
Step 1. Detach the front panel.
Remove4xingscrewsforfrontpanelanddetach
the front panel.
Step 2. Set the switch 7 of the DIP switch to ON.
Step 3. Replace the front panel.
Secureitusing4xingscrewsforfrontpanel.
Step 4. Conrm the rmware version by checking the
indicators on the front panel.(See p. 4-3.)
Step 5. Detach the front panel again, and return the
switch 7 of the DIP switch to OFF, restoring the
unit to the original state.
VX-3000F front
Fixing screws for front panel
1
2
VX-3000F front
(Front panel detached)
Switch 7
There is a high voltage section inside the power
amplifier's filter. Never insert your finger or
metallic objects inside the unit.
ON
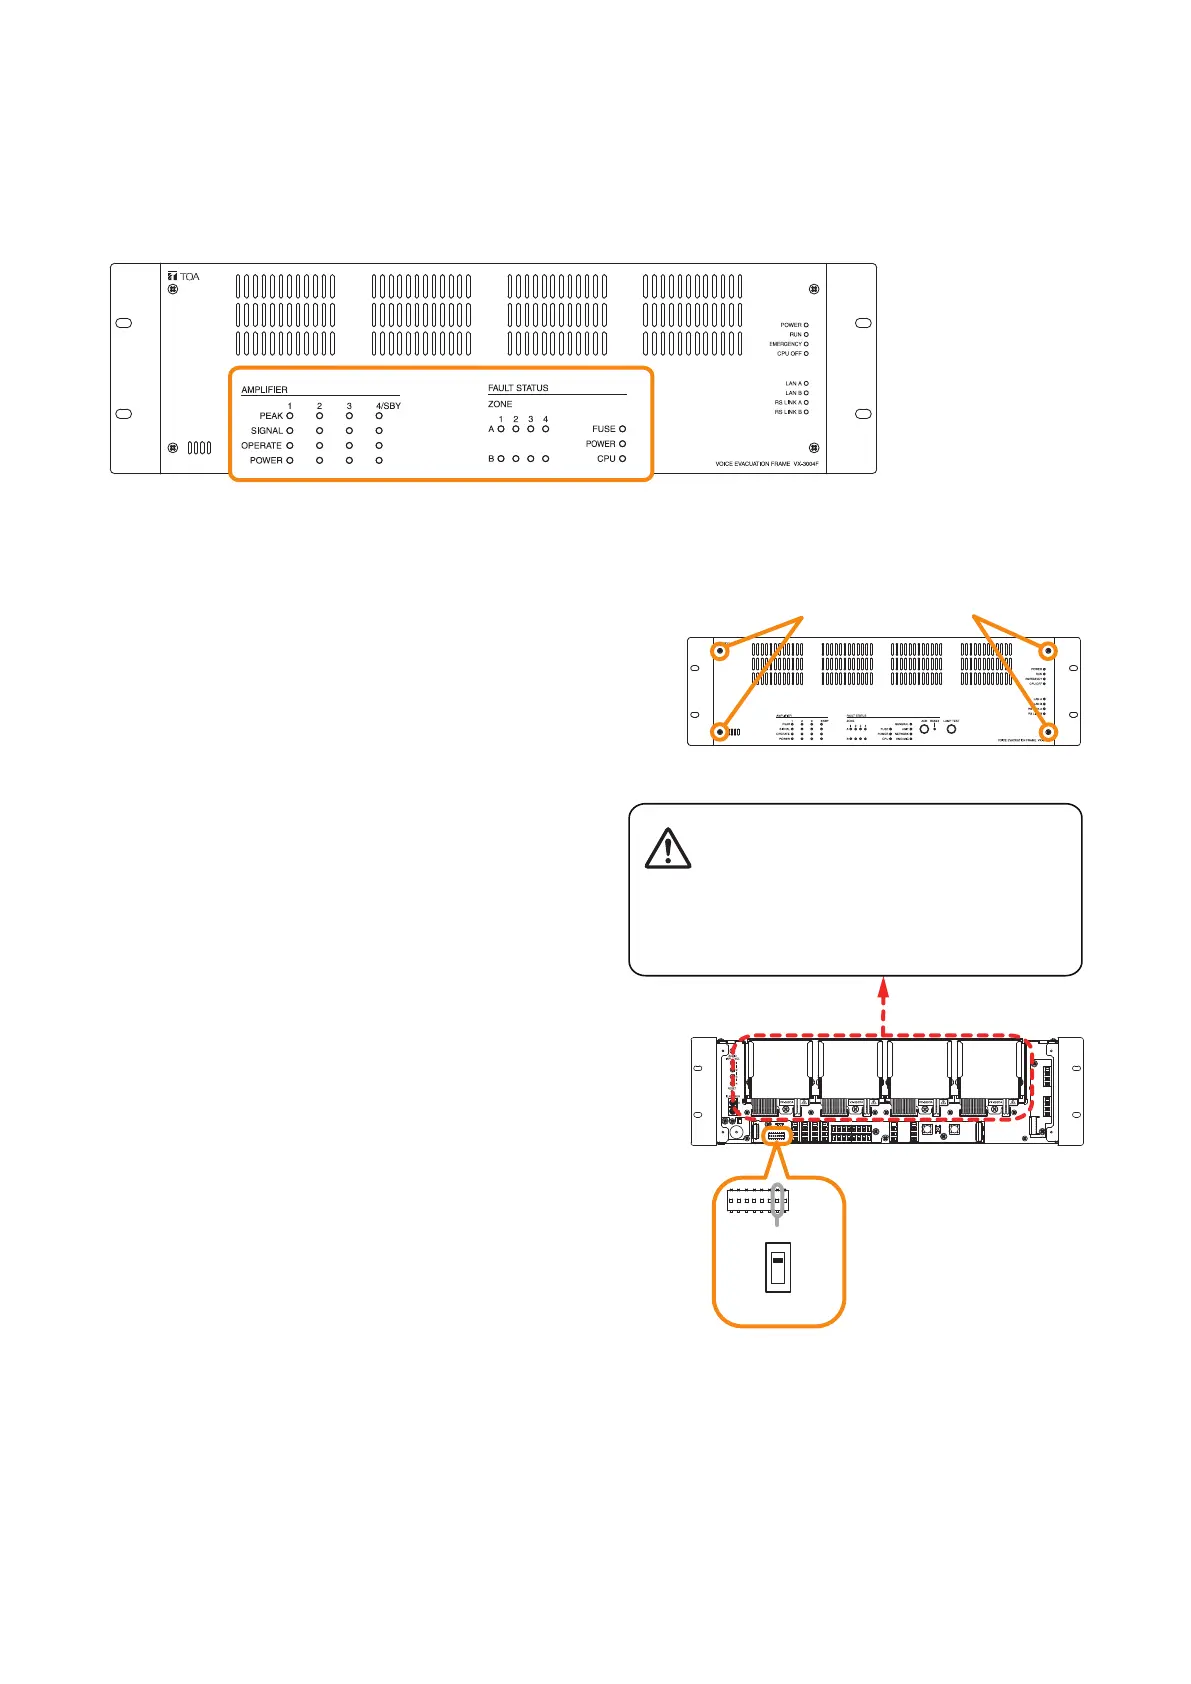
1. THE FIRMWARE VERSION CONFIRMATION
Youcanconrmthermwareversionwiththefront-mountedindicatorsbysettingtheDIPswitchinsidethe
VX-3000F's front panel.
[Front-mounted indicators]
This gure shows VX-3004F.