21
PREPARATIONS
INITIAL SETTINGS
In the initial setting, settings such as patient No., instrument No., refractory power shift, ON
LINE, auto print, etc. can be done.
PREPARATION FOR INITIAL SETTING
1 Make sure of the connection of power cable.
For connection, see “CONNECTING POWER CABLE” on page 20.
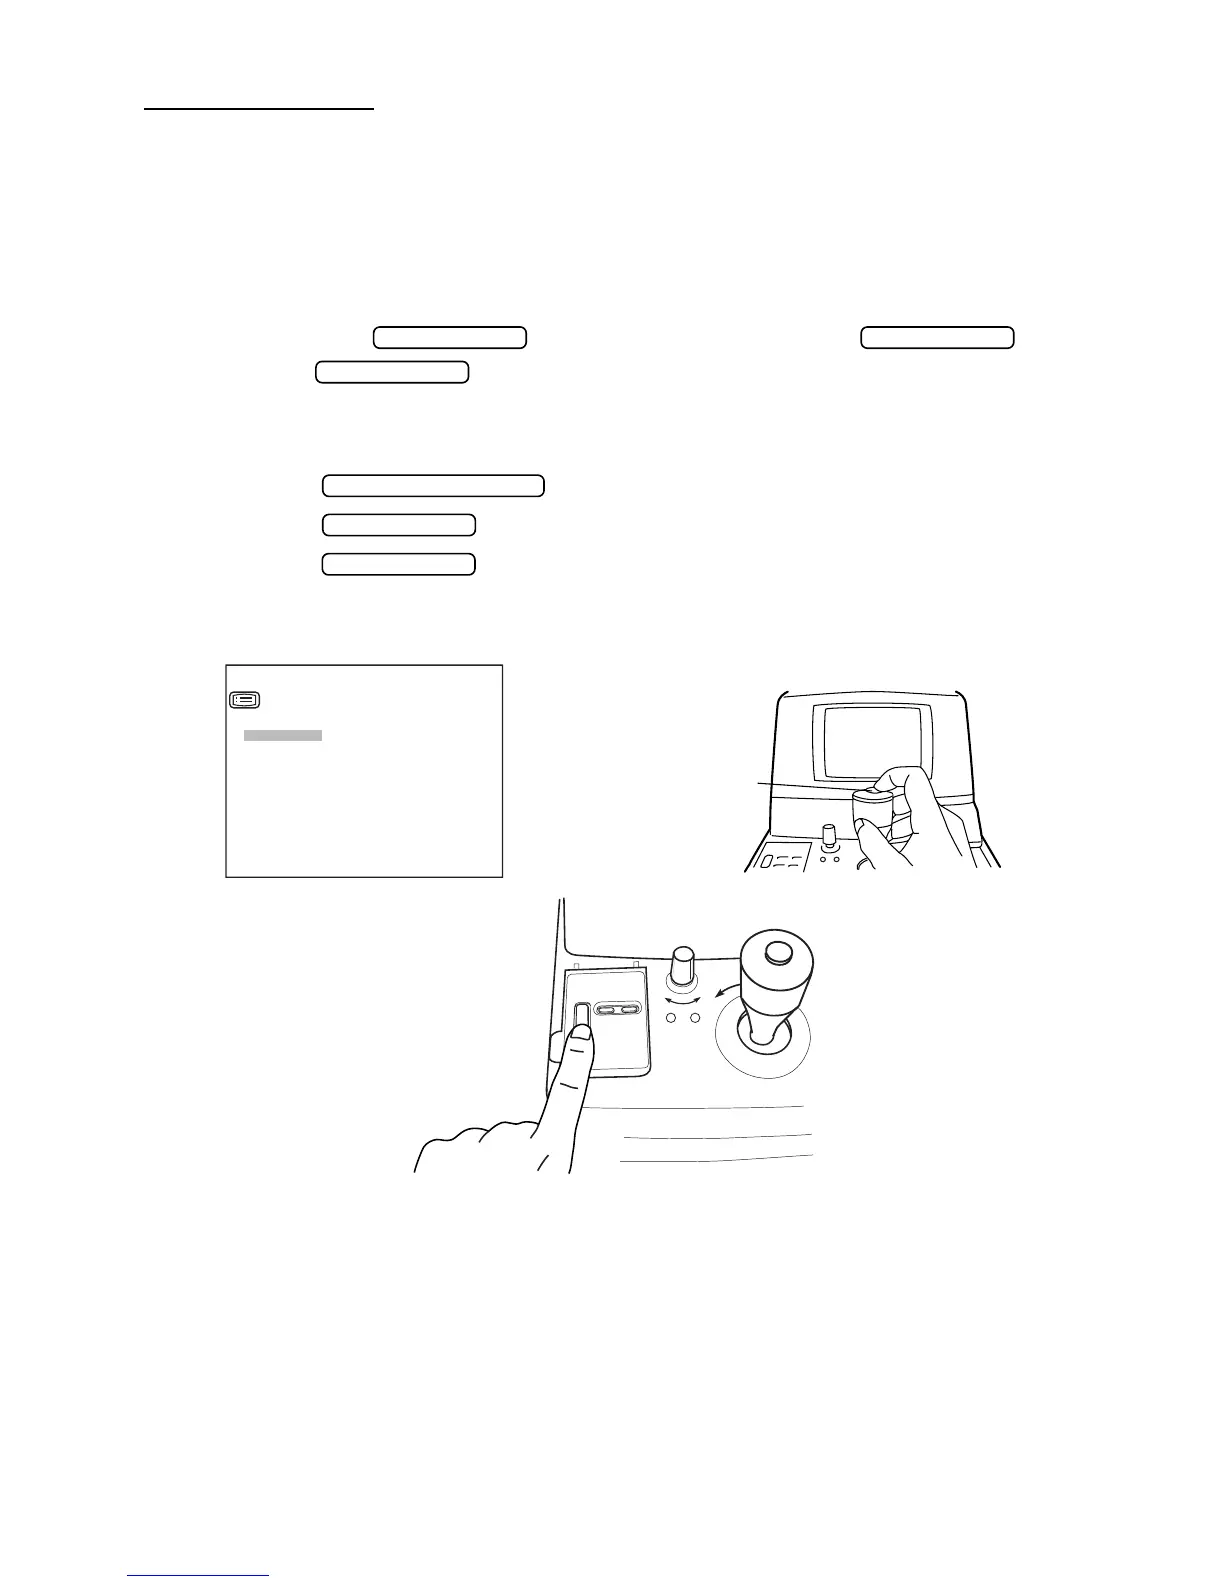
2 While pressing of the control panel, press on the .
Hold the till the buzzer sounds. The POWER lamp lights and the initial
menu screen is displayed.
RETURNING TO THE MEASUREMENT SCREEN
1 Press the switch and move the cursor to “EXIT”.
2 Press the . (EXIT OK is displayed.)
3 Press the again. (The measurement screen is returned and the set items
are printed out.)
MENU SWITCH
MENU SWITCH
MEASUREMENT SWITCH
PRINT SWITCH
PRINT SWITCH
INITIAL SET
NUMBER SET
PRINT OUT
ON-LINE
EXIT
INITIAL MENU
Measurement switch