6. Re-securethedrawbarelectricalhousingtotheZaxis
motorconneconboxcoverplate).
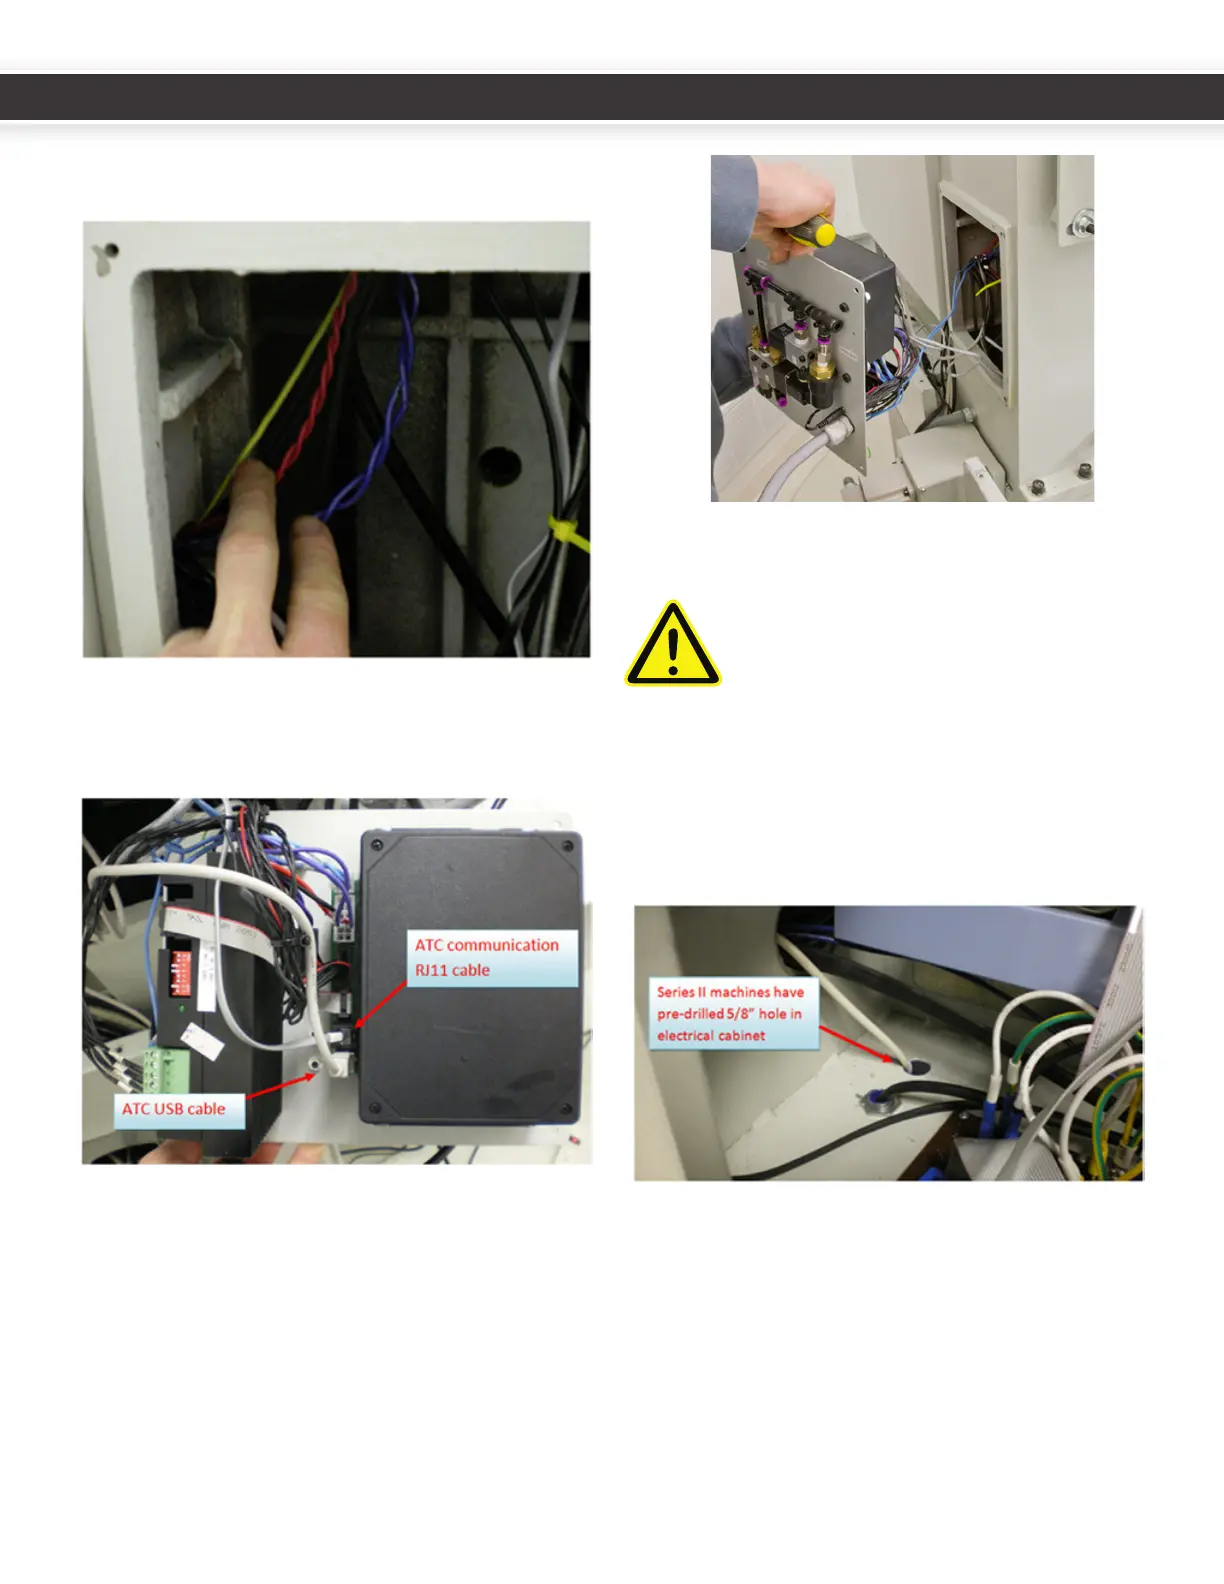
7. ConnecttheATCcommunicaonRJ11cable(fromthe
DB3connectoronthepowerdrawbarcircuitboard)
andtheUSBcabletotheATCcontrolboard.
8. DropanyslackwiresfromtheATCcontrolmoduleinto
theZcolumn,andsecuretheATCcontrolmoduleto
thebackofthemillusingthesavedM5screwsand
intoexisngcolumnholes.Besurethatextrawire
slackdoesnotcontacttheYaxisballscrew.
9. RoutetheUSBcablethroughtheboomholeofthe
electriccabinetintoanyPCUSBport.
CAUTION! DO NOT CONNECT THE USB
CABLE TO THE COMPUTER UNTIL AFTER
THE SOFTWARE INSTALLATION IS
COMPLETE.
your electrical cabinet to route the USB cable to your
control computer.
10.RuntheblueATCcontrolboardpowerleads(503,504)
andthepowerdrawbarcircuitboardpowerleads
(501,502)throughthewirechannelsfromtheholeto
thebusboardatthetopofthecabinet.
11.Series31100machinescomewiththecorrectDCBus
BoardforusewiththeATC.Series3ownerscanskip
steps12-13.Domakesuretoinstallthe5x20mmfuses
intheDCBusBoardATCandPDBfuseholders.This
appliestoallmodelmachines.
8
9
UM10081_TTS_ATC_PCNC1100_1013A UM10081_TTS_ATC_PCNC1100_1013A