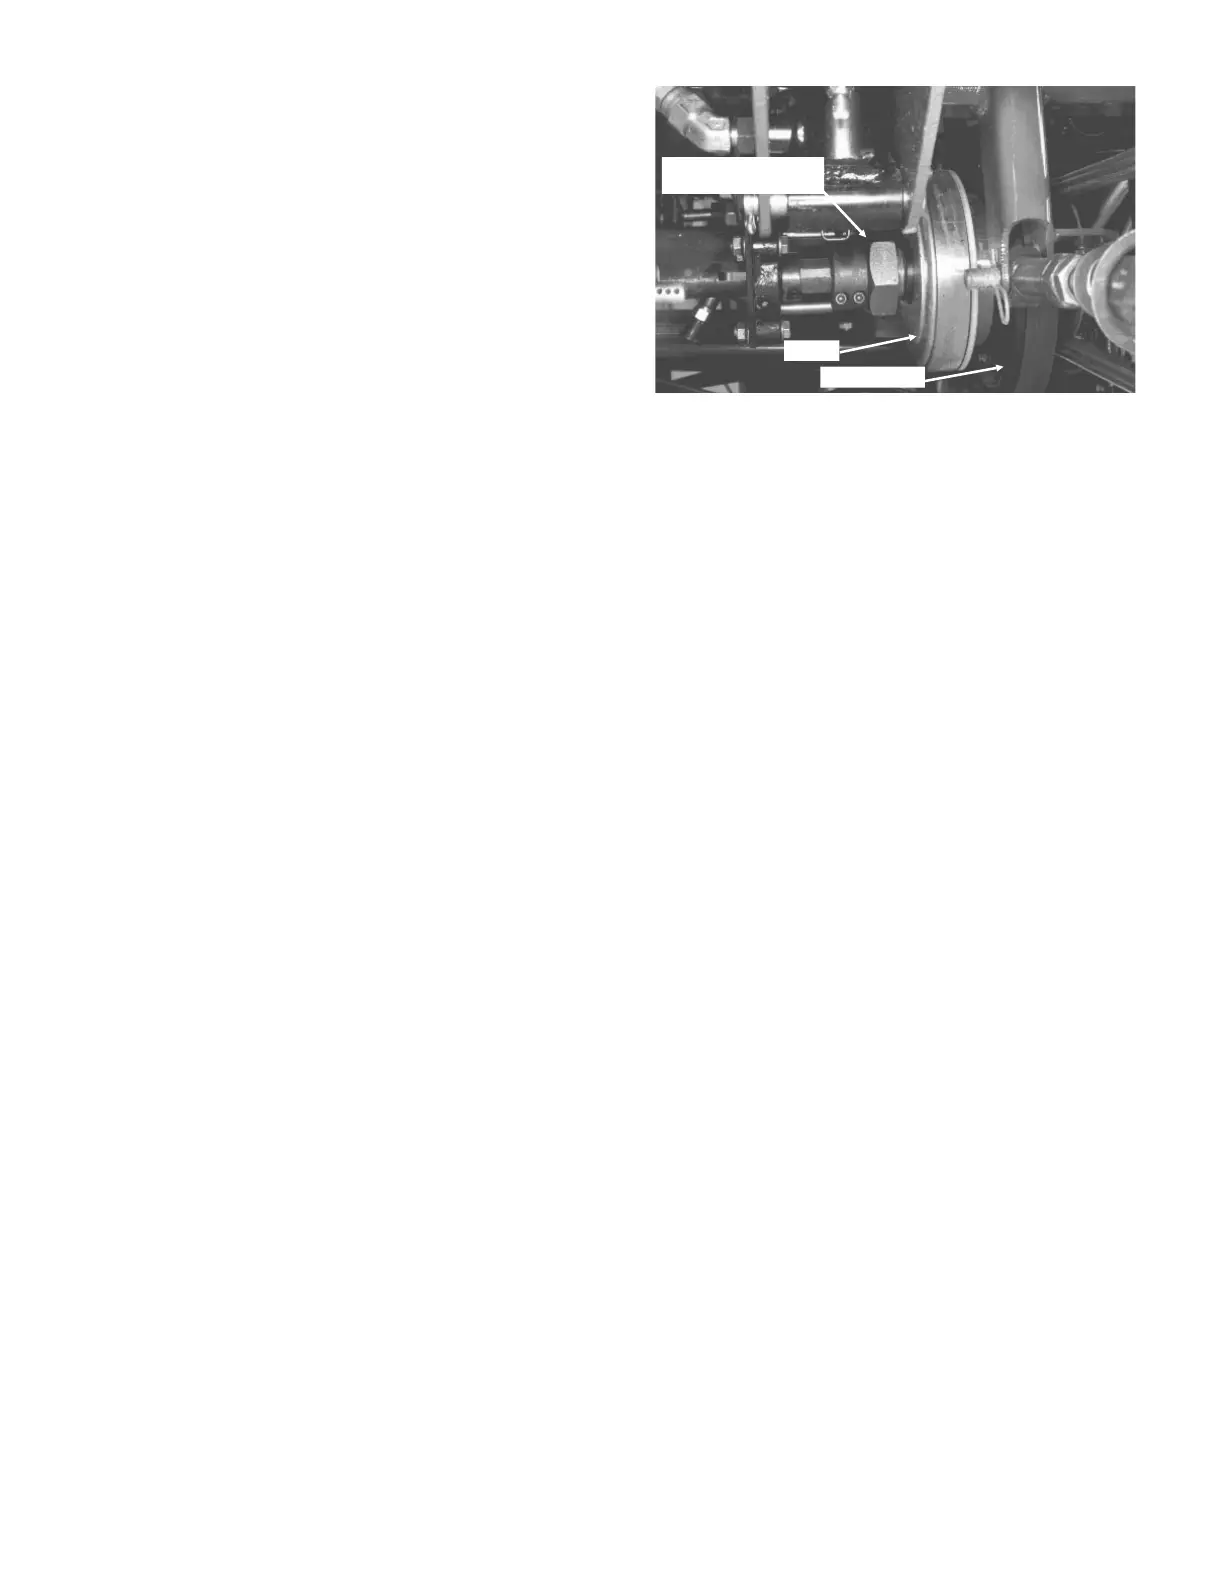
10. Align clutch pulley with engine pulley so a straight
edge laid across engine pulley face will not have more
than a 0.30 in. gap with flanges on clutch pulley, then
tighten collars (Item 11) to secure clutch and pulley in
position. Tighten nut (Item 12) against collar (Item 11)
to a torque of 60 - 70 ft-lb.
11. Install screw (Item 29) and nut (Item 14) to secure
clutch to clutch retainer.
12. Align cutting unit pulleys and tighten setscrews.
13. Slip jackshaft drive belt onto engine pulley. Install
cutting unit drive belts to cutting unit pulleys. Adjust
tension of jackshaft drive belt and cutting unit drive belts.
14. Operate machine and observe pulleys and belts in
operation to check for proper alignment. Make sure
jackshaft drive belt has no tendency to jump grooves
when engine is run at full speed. Stop engine and
re-adjust pulley alignment if necessary.
Tighten nut against
collar to 60 - 70 ft-lb
Clutch pulley
Clutch
Figure 10
Reelmaster
®
216/216-D Page 8 - 7 Repairs
 Loading...