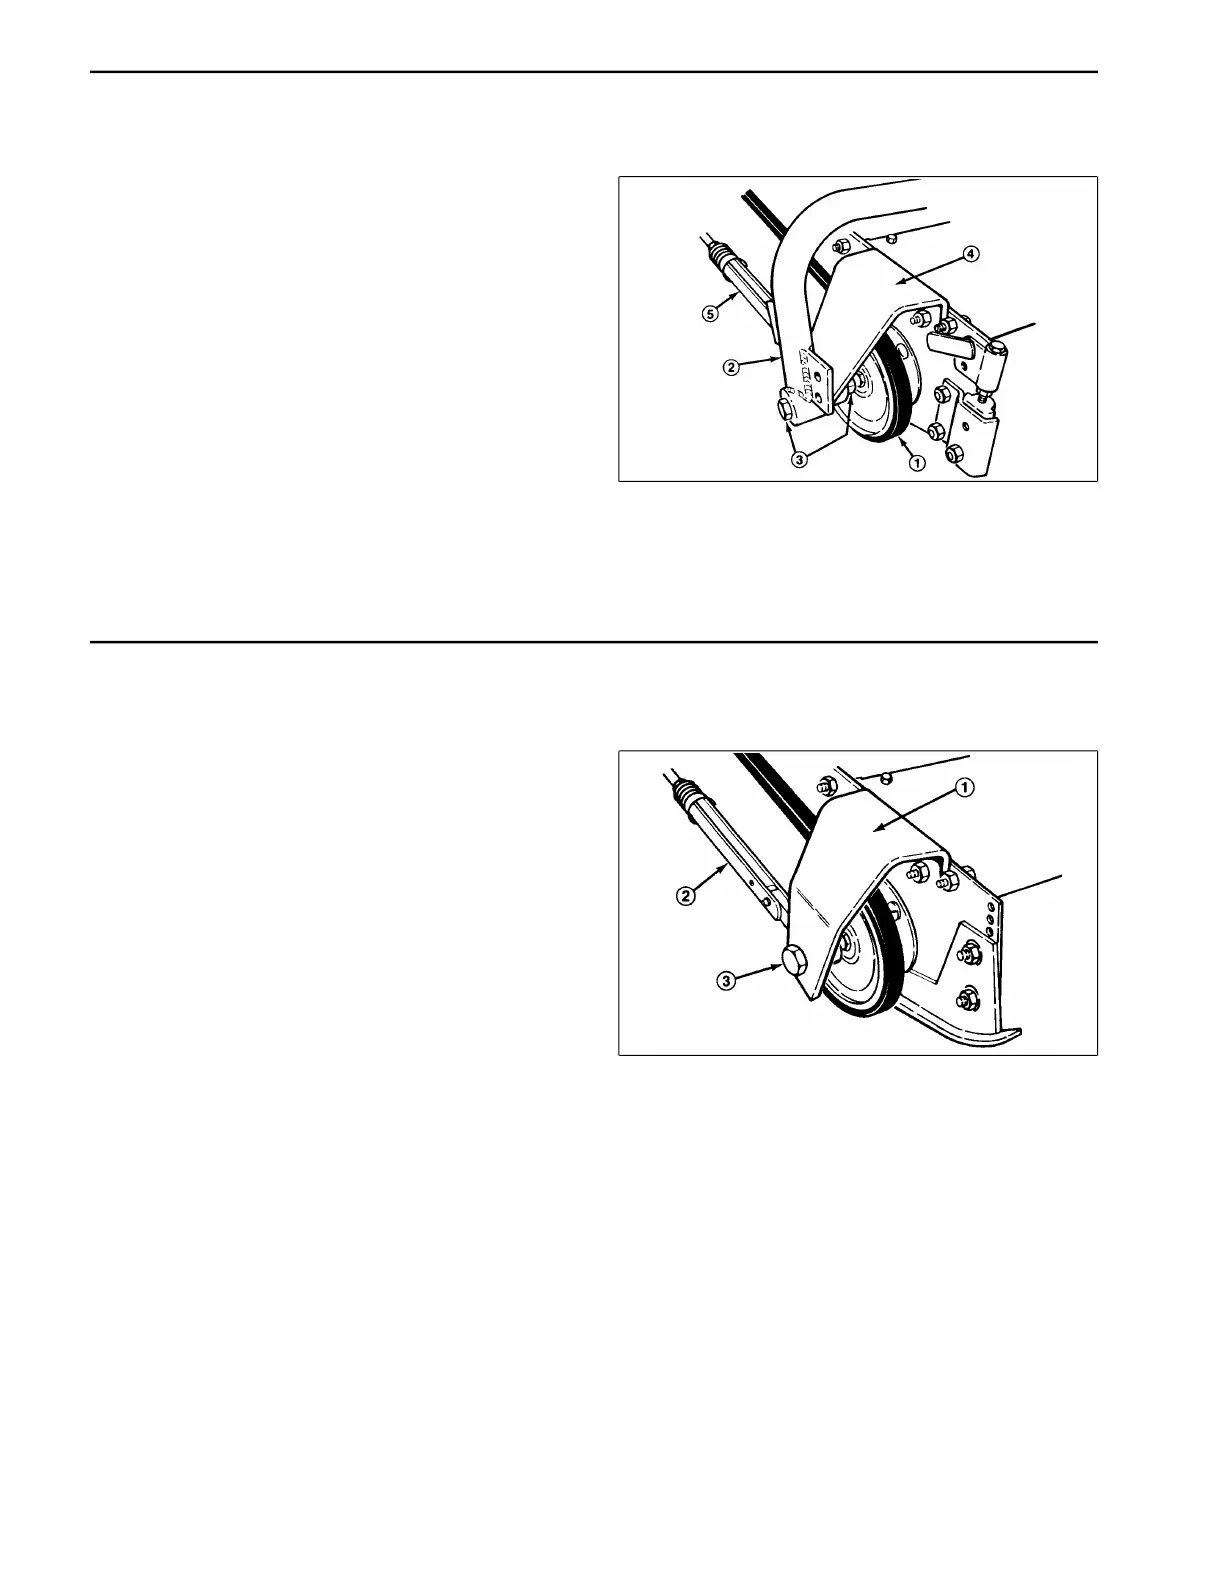
Drive Belt and Belt Tensioner Installation (Fig. 14)
(Floating Cutting Units)
1. Route V-belts around jackshaft pulleys and reel
pulleys.
2. On pulley end of front cutting units and both ends of
rear cutting unit, remove nut from bolt securing carrier
frame to tensioner bracket.
3. Install a spacer,belt tension rod and washer onto
capscrew.
NOTE: Belt tension rods to be in locked position when
installing. Loosen jam nut and rotate rod to adjust rod
length for installation.
4. Reinstall nut previously removed.
Figure 14
1. Cutting unit drive belt 4. Tensioner bracket
2. Carrier frame 5. Belt tensioner
3. Shoulder bolt, (2) flatwashers, nut
Drive Belt and Belt Tensioner Installation (Fig. 15)
(Fixed Cutting Units)
1. Route V-belts around jackshaft pulleys and reel
pulleys.
2. On pulley end of front cutting units and both ends of
rear cutting unit, install a washer, spacer, belt tension
rod and spacer on capscrew.
NOTE: Belt tension rods to be in locked position when
installing. Loosen jam nut and rotate rod to adjust rod
length for installation.
3. Secure with nut.
Figure 15
1. Tensioner bracket
2. Belt tensioner
3. Capscrew, (2) flat washers, nut
Service and Repairs Page 9 - 14 Reelmaster
®
216/216-D
 Loading...