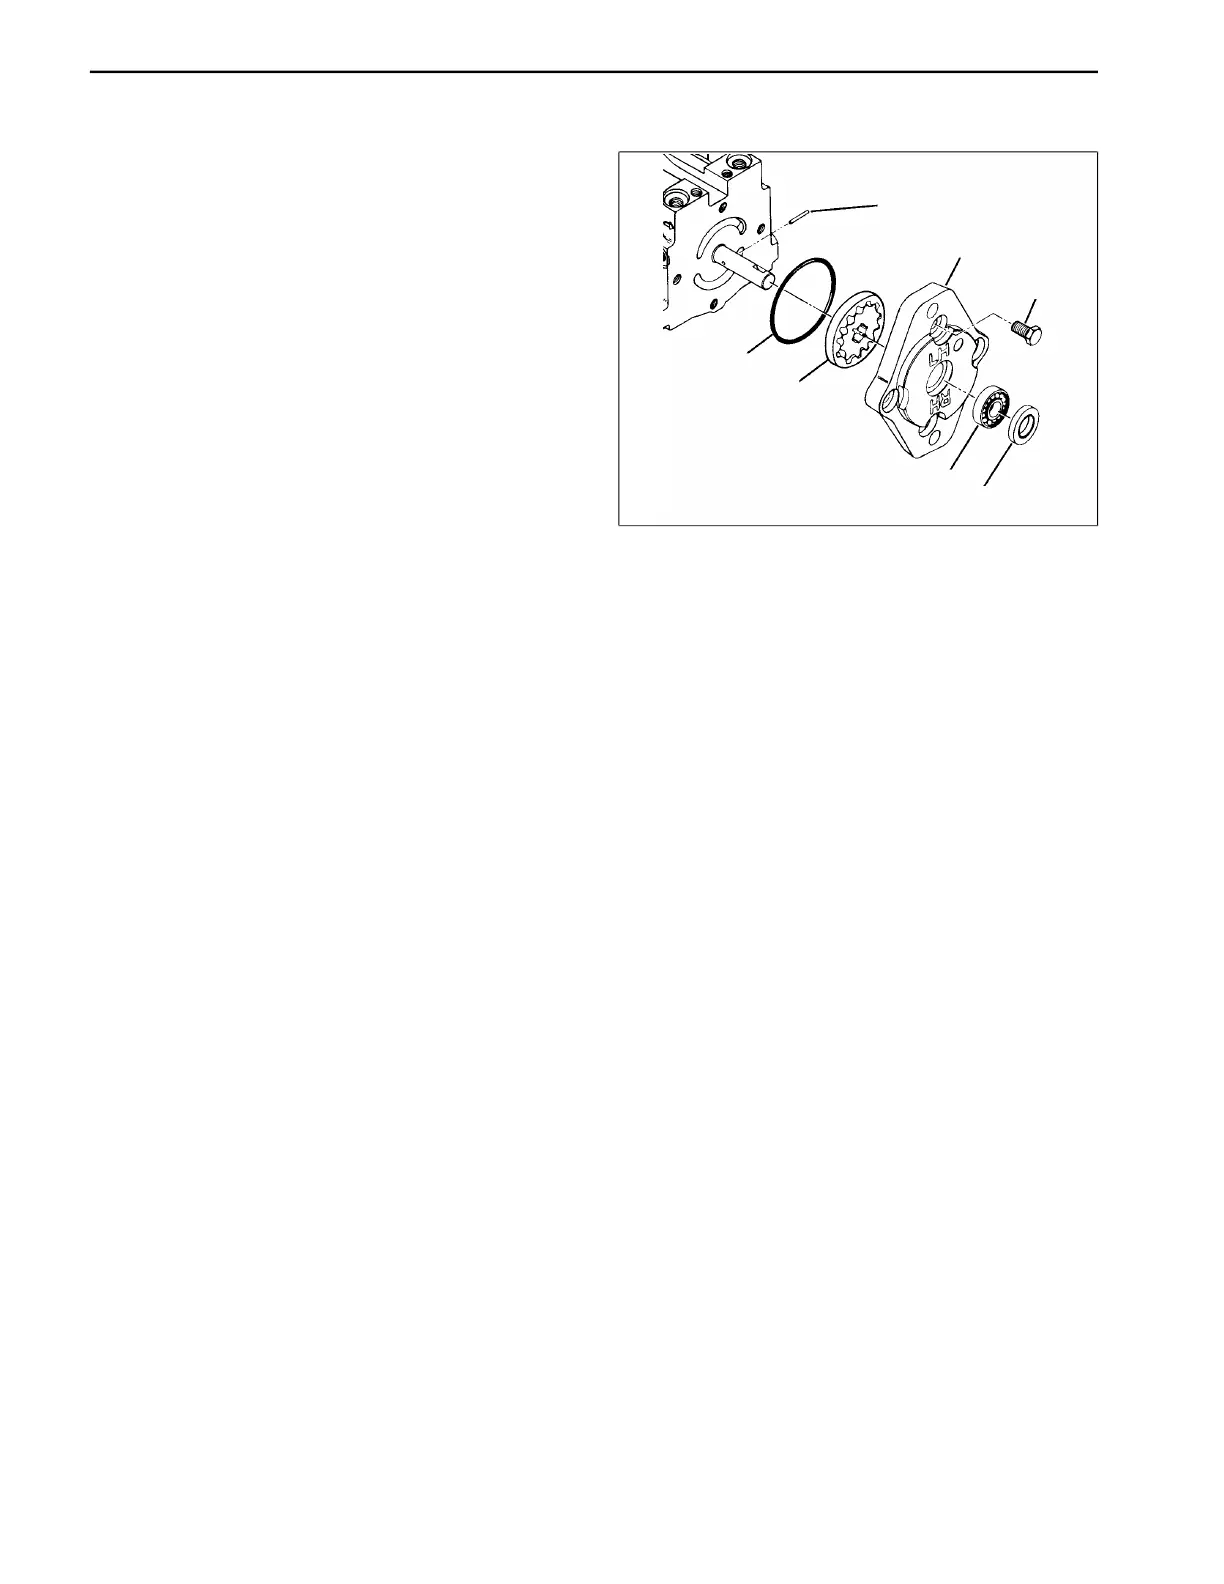
Charge Pump (Fig. 31)
1. Note orientation of charge pump housing to adjacent
housing. Scribe a line or make punch marks to assure
proper re-installation.
2. Clean the shaft extension to remove all sharp edges,
burrs and abrasive residue to prevent shaft seal dam-
age.
3. Remove hex head screws (Item 24) and slide the
housing assembly (Item 21, 22, & 23) over shaft holding
the charge pump (gerotor) cartridge and remove drive
pin (Item 26 ).
4. Remove the shaft seal (Item 23) and bearing
(Item 22) from housing only if replacement is necessary.
5. Examine the wear surfaces of pump cartridge for
excessive scratching or heavy wear patterns. Replace
both parts of this cartridge, if necessary. Do not replace
or interchange individual parts within the cartridge. The
drive pin should always be replaced.
6. Visually inspect bearing (Item 22), O-ring (Item 27),
and shaft seal (Item 23) and replace as required.
7. Coat both sides of pump cartridge (Item 25) and
housing face with hydraulic oil. Install drive pin (Item 26)
into hole in shaft, then slide pump cartridge (Item 25)
into place.
8. Wrap the shaft extension with plastic and then coat
with hydraulic oil to prevent damage to shaft seal.
9. Place O-ring into housing assembly (Item 21, 22, &
23), then slide assembly into position over shaft. Line
up location marks, then insert torque screws (Item 24).
27
21
22
23
24
Figure 31
Repairs Page 5 - 30 Reelmaster
®
216/216-D
 Loading...