AdjustingtheTineDrive
Chain
1.Shutofftheengine,engagetheparkingbrake,
removethekey,andwaitforallmovingpartsto
stopbeforeleavingtheoperatingposition.
2.Removetherearcover;refertostep3of
CheckingtheTines(page58).
3.Checkthechainsonbothsidesofthemachine
forpropertension.
Note:Thechainsshouldmoveupanddown6
to12mm(1/4to1/2inch).
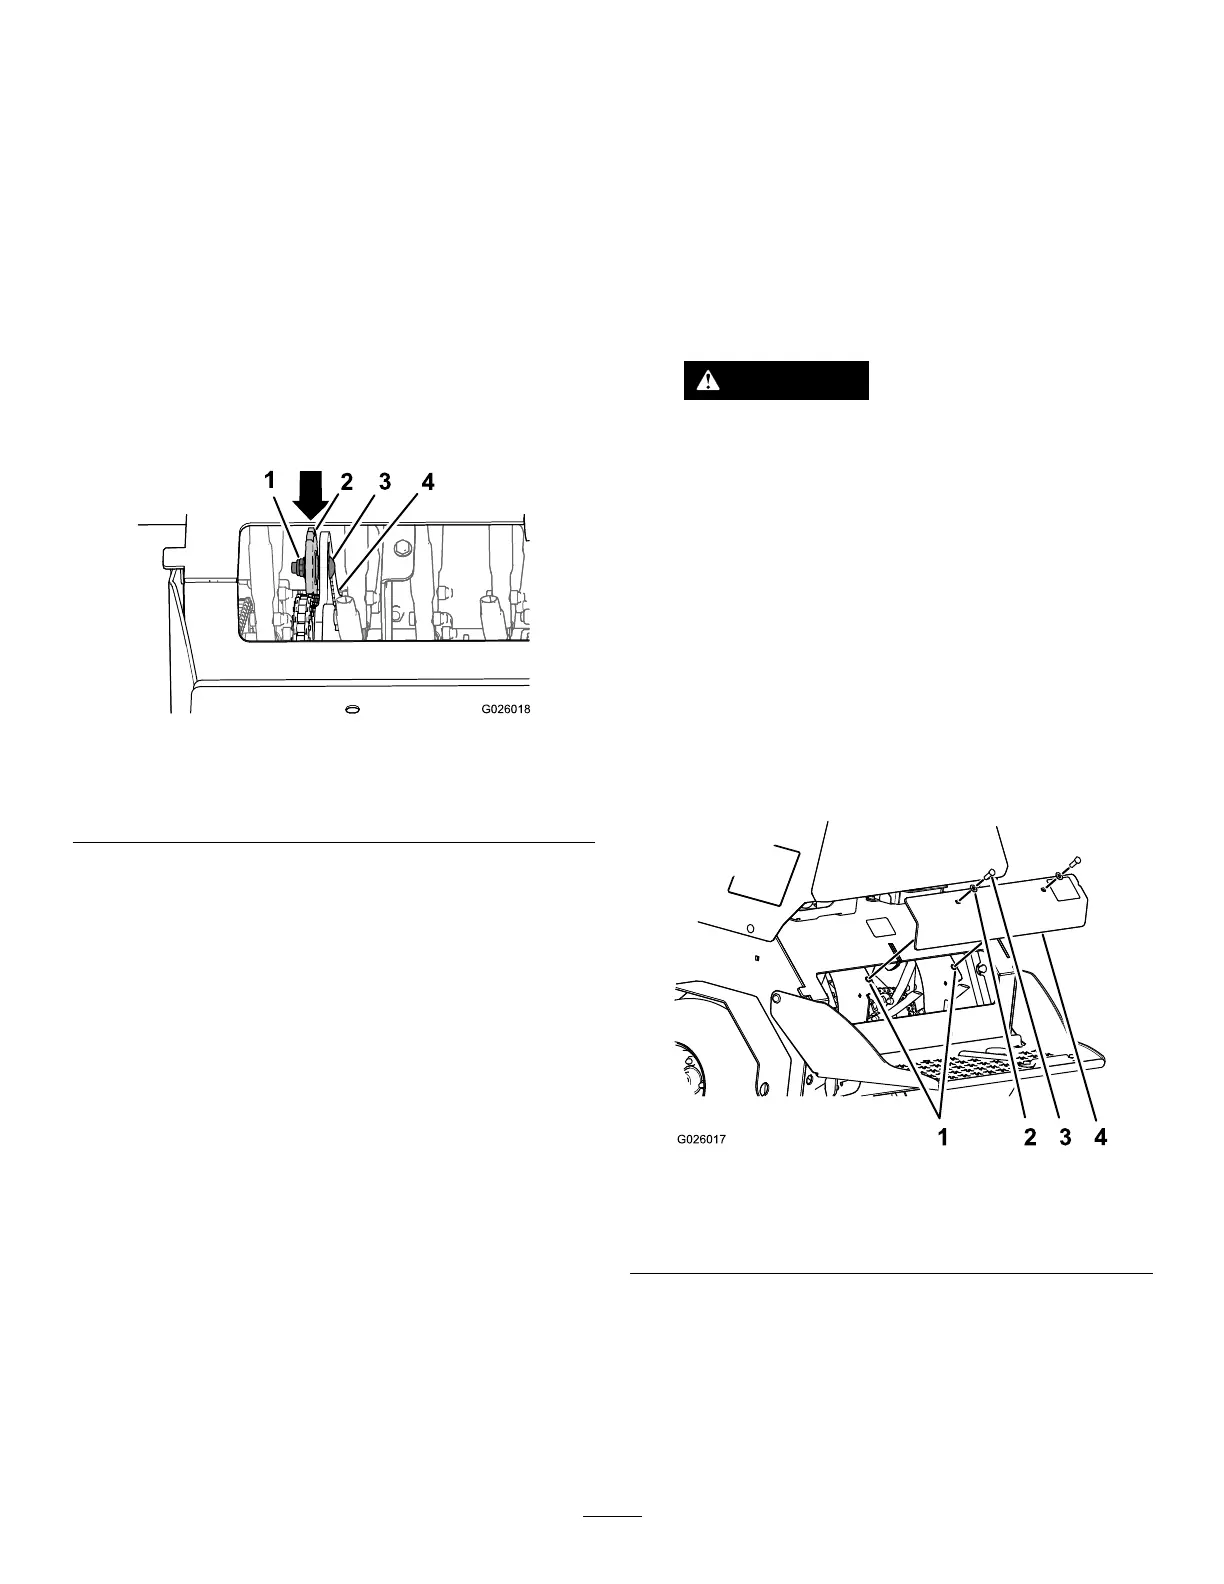
4.Loosenthelocknutandcarriageboltthatsecure
theidlersprocket(Figure73).
g026018
Figure73
1.Locknut
3.Carriagebolt
2.Idlersprocket
4.Slot(trailplate)
5.Increaseordecreasechaintensionby
performingthefollowing:
•Pushdownandforwardonthesprocket
toincreasethechaintensionasshownin
Figure73.
•Liftupandbackonthesprockettodecrease
thechaintension.
6.T orquethelocknutto91to113N∙m(67to83
ft-lb).
7.Checkthechaintensionandifnecessaryrepeat
steps4through6untilyoucanmovethechain
upanddown6to12mm(1/4to1/2inch).
8.Installtherearpanel;refertosteps6and7of
CheckingtheTines(page58).
TineMaintenance
CheckingtheTines
ServiceInterval:Beforeeachuseordaily
1.Shutofftheengine,engagetheparkingbrake,
removethekey,andwaitforallmovingpartsto
stopbeforeleavingtheoperatingposition.
2.Raisethemachineandsupportitwithjack
standswitha460kg(1,015lb)capacity.
CAUTION
Raisingthemachineforservice
ormaintenancerelyingsolelyon
mechanicalorhydraulicjackscouldbe
dangerous.Themechanicalorhydraulic
jacksmaynotbeenoughsupportormay
malfunctionallowingthemachinetofall,
whichcouldcauseinjury.
Donotrelysolelyonmechanical
orhydraulicjacksforsupport.Use
adequatejackstandsorequivalent
support.
3.Removethe2bolts(3/8x1inch)and2washers
(3/8inch)thatsecuretherear-coverpaneltothe
chassis,andremovethepanel(Figure74).
g026017
Figure74
1.Chassisholes3.Bolt(3/8x1inch)
2.Washer(3/8inch)
4.Rearpanel
4.Removerocksandotherdebrisfromthetines.
5.Inspectthetinesforwearanddamage.
Note:Replaceanytinesthatarewornor
damaged.
6.Aligntheholesintherear-coverpaneltothe
holesinthechassis(Figure74).
58