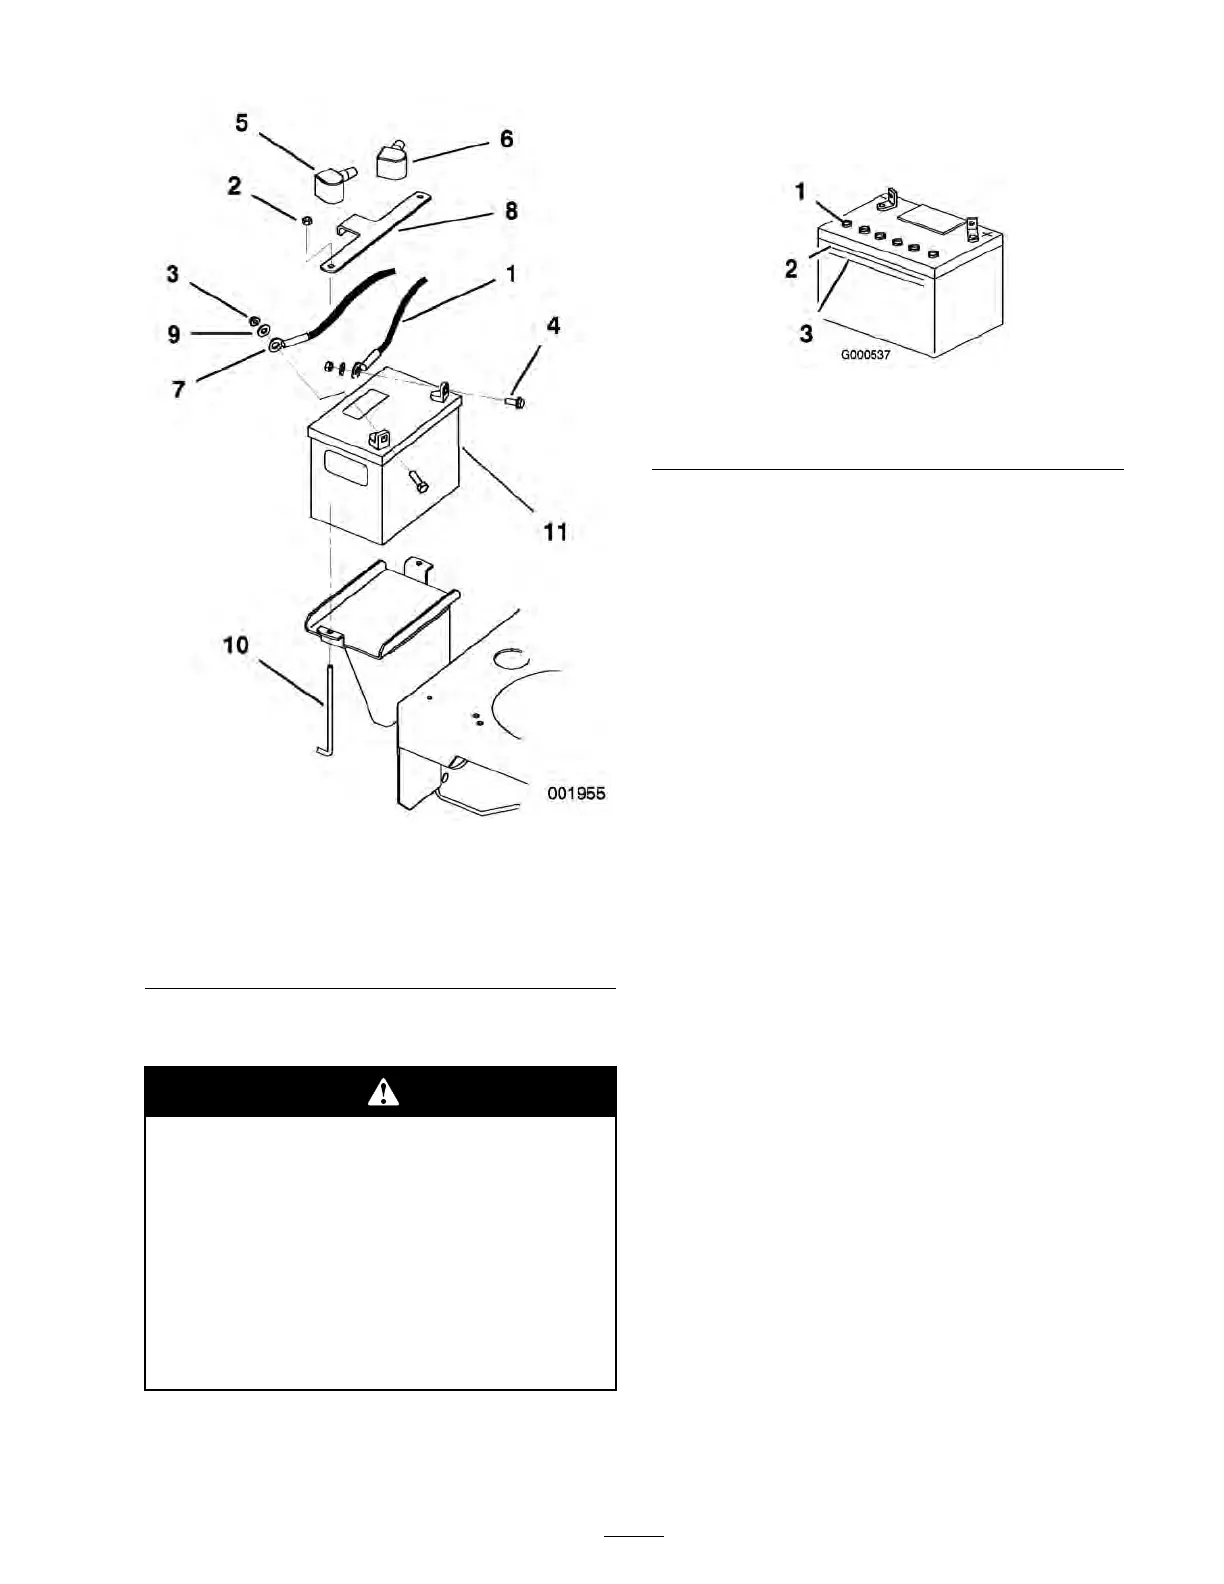
Figure 40
1. Negative cable 7. Positive cable
2. Nut (1/4 in.)
8. Battery hold down plate
3. Nut (5/16 in.)
9. Washer
4. Bolt 10. Battery hold down
5. Rubber cover (red)
11. Battery
6. Rubber cover (black)
Checking the Battery Electrolyte Level
Batter y electr ol yte contains sulfuric acid
which is a deadl y poison and causes sev er e
bur ns.
• Do not drink electr ol yte and a v oid
contact with skin, ey es or clothing . W ear
safety g lasses to shield y our ey es and
r ub ber g lo v es to pr otect y our hands.
• Fill the batter y wher e clean w ater is
al w ays a v aila ble f or flushing the skin.
1. Look at the side of the batter y . T he electrolyte
m ust be up to the upper line ( Figure 41 ).
Do not allo w the electrolyte to fall belo w the
Lo w er line ( Figure 41 ).
Figure 41
1. Vent caps
3. Lower line
2. Upper line
2. If the electrolyte is lo w , add the required amount
of distilled w ater; refer to Adding W ater to
the Batter y in Electrical System Maintenance ,
pag e 33 .
Adding Water to the Battery
T he best time to add distilled w ater to the batter y is
just before y ou operate the mac hine . T his lets the
w ater mix thoroughly with the electrolyte solution.
1. R emo v e the batter y from the mac hine;
refer to R emo ving the Batter y in
Electrical System Maintenance , pag e 33 .
Important: Nev er fill the batter y with
distilled w ater while the batter y is installed
in the machine. Electr ol yte could be
spilled on other par ts and cause cor r osion.
2. Clean the top of the batter y with a paper to w el.
3. R emo v e the v ent caps from the batter y
( Figure 41 ).
4. Slo wly pour distilled w ater into eac h batter y
cell until the electrolyte lev el is up to the Upper
line ( Figure 41 ) on the batter y case .
Important: Do not o v erfill the batter y
because electr ol yte (sulfuric acid) can
cause sev er e cor r osion and dama ge to the
chassis.
5. W ait fiv e to ten min utes after filling the batter y
cells . Add distilled w ater , if necessar y , until
the electrolyte lev el is up to the Upper line
( Figure 41 ) on the batter y case .
6. R einstall the batter y v ent caps .
35