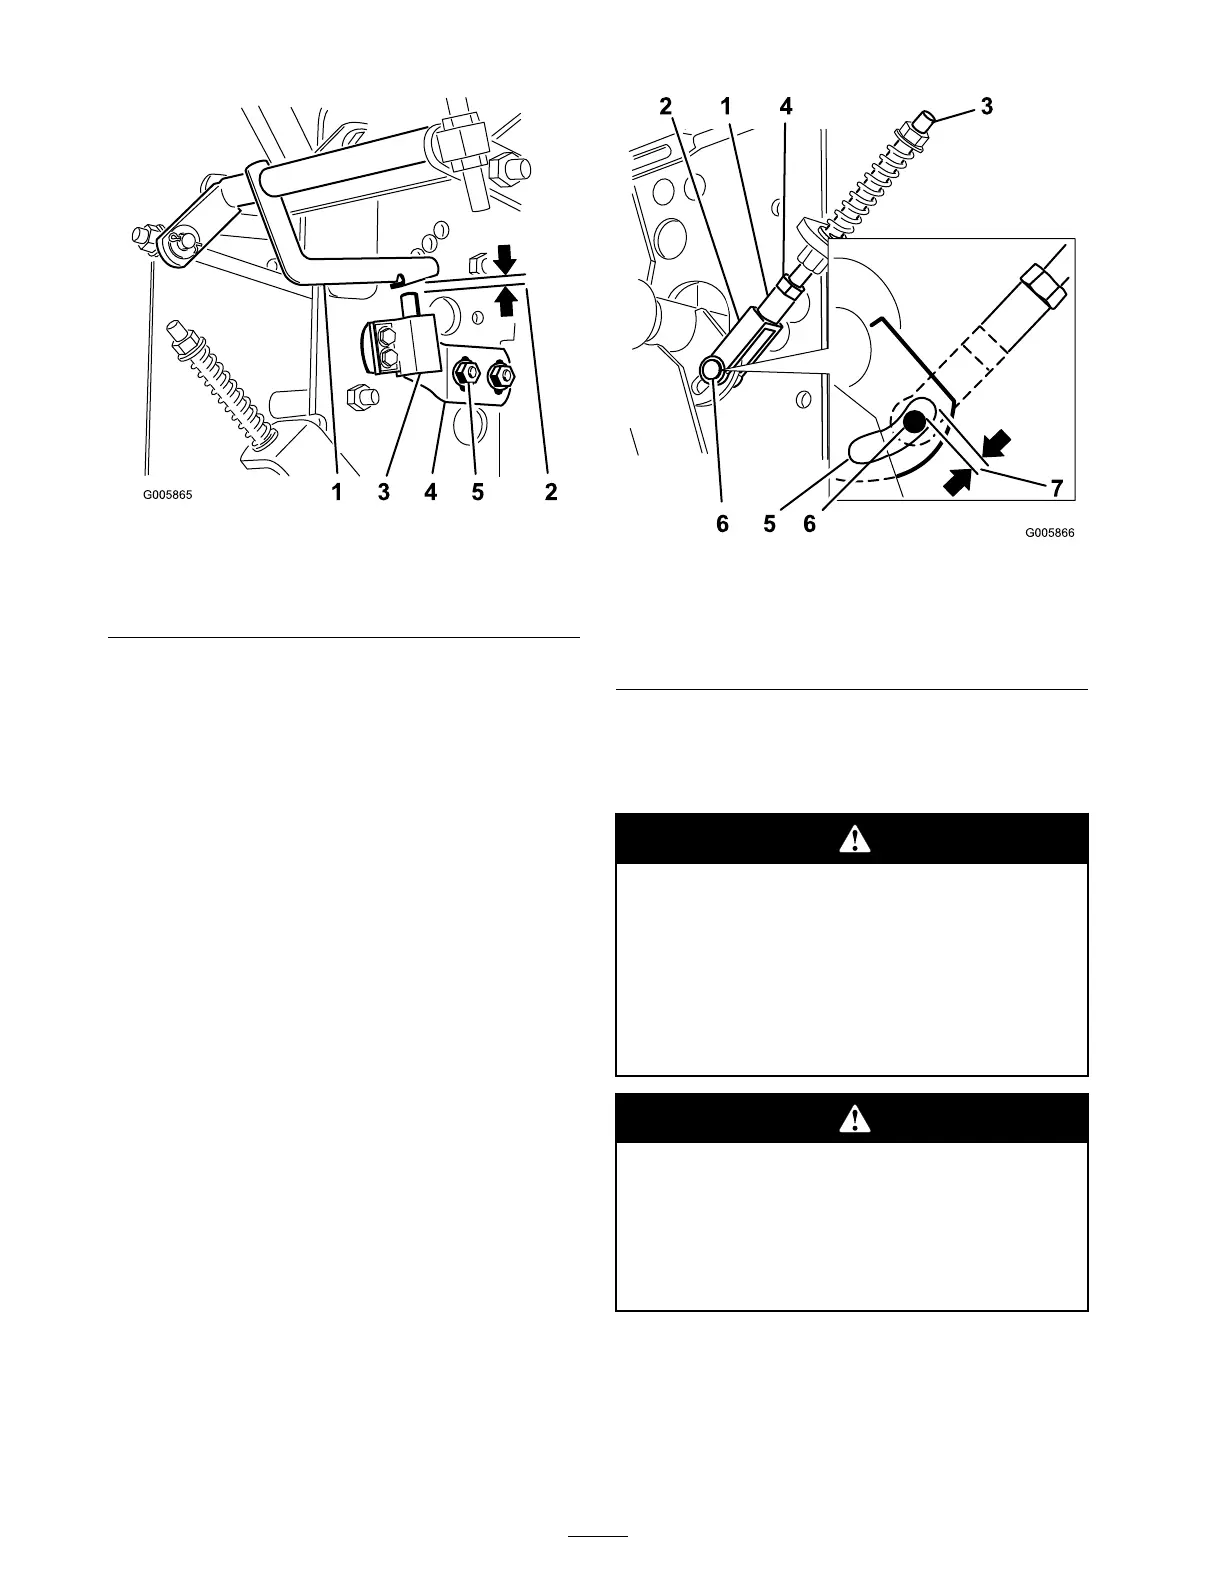
Figure 46
1. Actuating tab 4. Neutral bracket
2. 1/8 to 1/4 inch (3 to 6 mm)
space
5. Neutral bracket bolts
3. Safety switch
13. T o adjust the switc h location, loosen the tw o
neutral brac k et bolts holding the switc h plate
to the frame ( Figure 46 ).
14. Adjust the switc h up or do wn to obtain an 1/8
to 1/4 inc h (3 to 6 mm) space ( Figure 46 ).
15. Tighten the tw o neutral brac k et screws holding
the switc h plate ( Figure 46 ).
Temporary Neutral Stud
Adjustment
Note: P erfor m the follo wing procedures on both
the left and right sides .
1. Mo v e the left and right hand neutral loc k
latc hes to the unlatc hed position.
2. Mo v e the speed control lev er to the neutral
position ( Figure 44 ).
3. Loosen the n ut ag ainst the y ok e Figure 47 ).
4. Adjust the length of the neutral stud and y ok e
assembly so the clevis pin does not contact
the bac k of the slot in the control ar m brac k et
Figure 47 ).
5. Tighten the n ut ag ainst the y ok e Figure 47 ).
Figure 47
1. Neutral control linkage 5. Slot in control arm bracket
2. Yoke 6. Clevis pin
3. Neutral stud 7. Clevis pin does not contact
the back of slot
4. Nut against yoke
Adjusting the Hydro Control
Linkages
Engine must be r unning so contr ol linka ge
adjustments can be perf or med. Contact
with mo ving par ts or hot surf aces may cause
per sonal injur y .
K eep hands, feet, f ace, clothing and other
body par ts a w ay fr om r otating par ts, muf fler
and other hot surf aces.
Mechanical or h y draulic jacks may f ail to
suppor t machine and cause a serious injur y .
• Use jack stands when suppor ting
machine.
• Do not use h y draulic jacks.
Adjusting the Left Side Linkage
1. Diseng ag e the PTO and set the parking brak e .
2. Stop the engine and w ait for all mo ving par ts
to stop before lea ving the operating position.
38