Charging the Battery
Charging the batter y pr oduces gasses that
can explode.
Nev er smok e near the batter y and k eep
spar ks and flames a w ay fr om batter y .
Important: Al w ays k eep the batter y
full y charged (1.265 specific g ra vity). T his
is especiall y impor tant to pr ev ent batter y
dama ge when the temperatur e is belo w 32°F
(0°C).
1. R emo v e the batter y from the c hassis; refer to
R emo ving the Batter y .
2. Chec k the electrolyte lev el; refer to Chec king
the Electrolyte Lev el.
3. Mak e sure the filler caps are installed in batter y .
Charg e batter y for 1 hour at 25 to 30 amps or
6 hours at 4 to 6 amps .
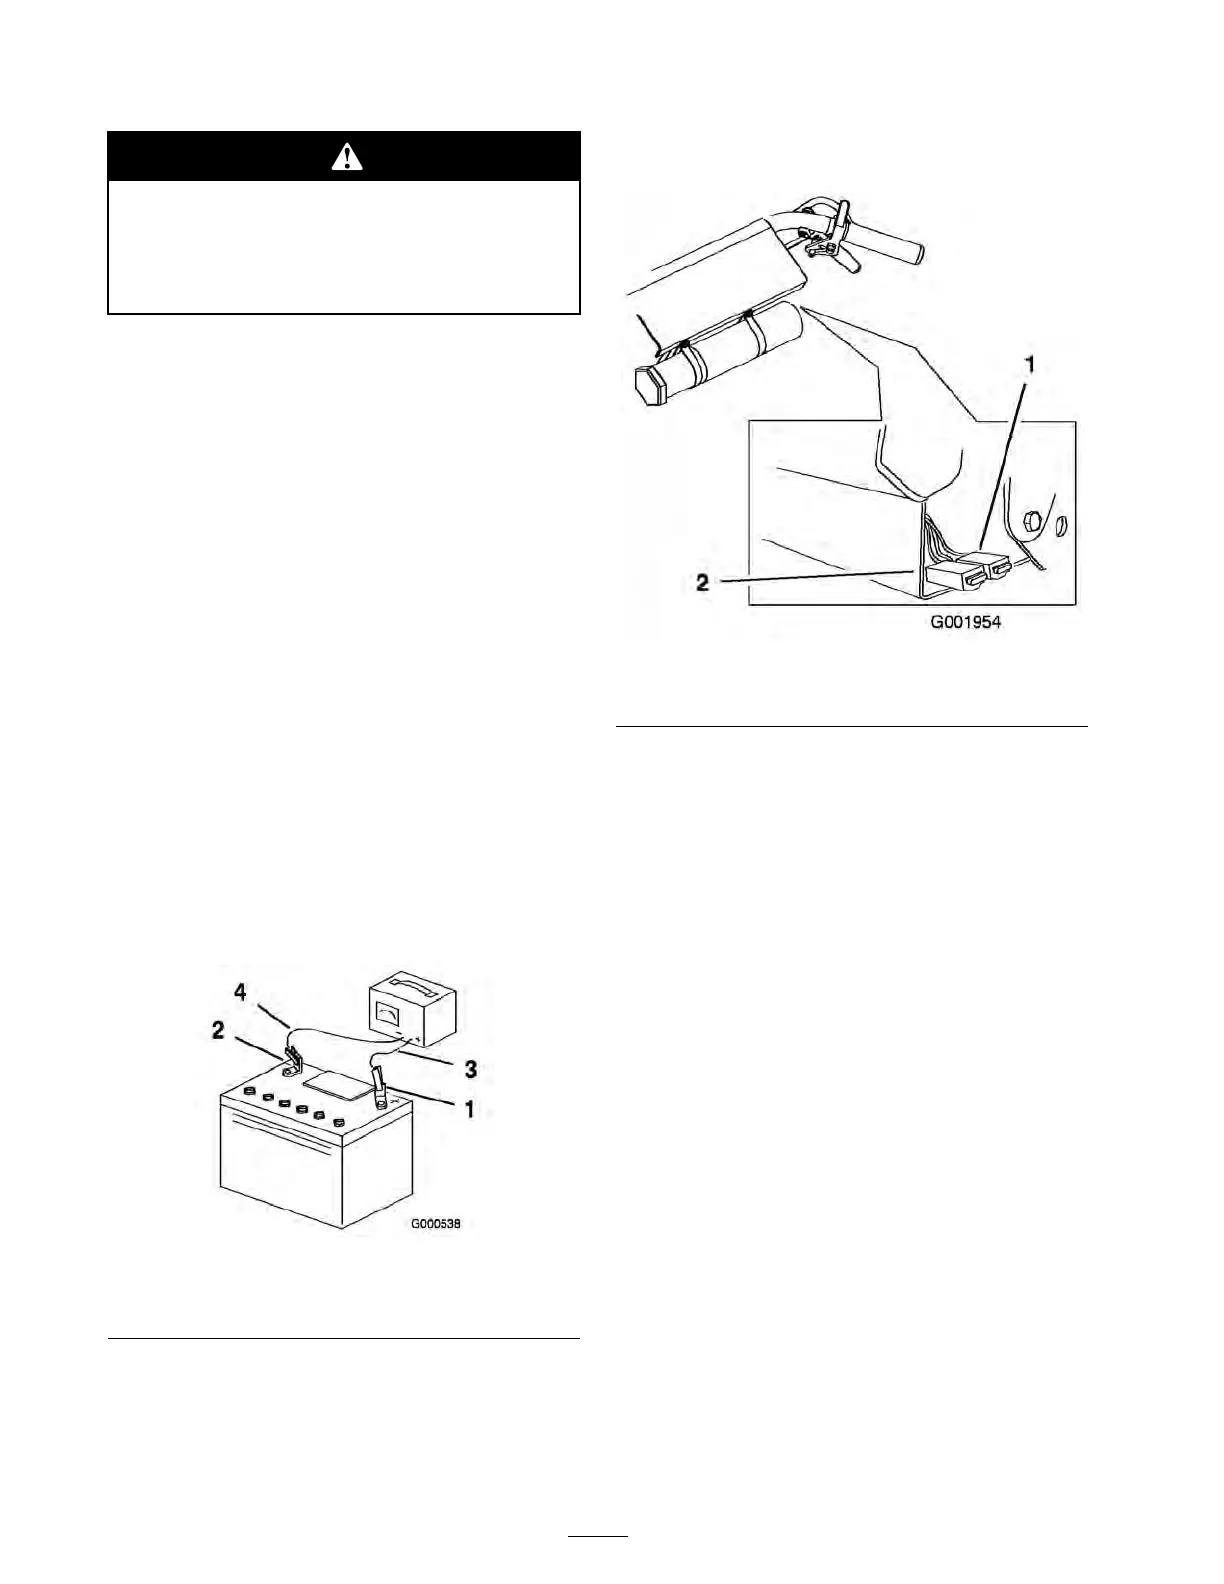
4. W hen the batter y is fully c harg ed, unplug
the c harg er from the electrical outlet, then
disconnect the c harg er leads from the batter y
posts ( Figure 42 ).
5. Install the batter y onto the mac hine and
connect the batter y cables , refer to Installing
the Batter y .
Note: Do not r un the mac hine with the
batter y disconnected, electrical damag e ma y
occur .
Figure 42
1. Positive Battery Post
3. Red (+) Charger Lead
2. Negative Battery Post
4. Black (-) Charger Lead
Servicing the Fuses
T he electrical system is protected b y fuses . It
requires no maintenance . If a fuse blo ws , c hec k
the component or circuit for a malfunction or
shor t. Pull out on the fuse to remo v e or re place
it ( Figure 43 ).
Figure 43
1. Fuse, 25 amp, blade type 2. Fuse, 30 amp, blade type
Drive System
Maintenance
P erfor m the follo wing linkag e adjustments when
the mac hine needs maintenance . P erfor m ste ps
Adjust the Speed Control Linkag e through
Adjusting the T rac king . If and adjustment is
needed , do them in the order that they are listed.
Adjusting the Speed Control
Linkage
1. Diseng ag e the PTO and set the parking brak e .
2. Stop the engine and w ait for all mo ving par ts
to stop before lea ving the operating position.
3. Chec k the adjustment of the speed control
crank ar m. It m ust matc h the handle bar height
setting . R efer to Adjusting the Handle Bar
Height.
4. Mo v e the speed control lev er (located on
the console) to the full forw ard position
( Figure 44 ).
36