Adjusting the Electric Clutch
T he clutc h is adjustable to ensure proper
eng ag ement and proper braking . Chec k
adjustment after ev er y 100 hours of operation.
1. Inser t a 0.015–0.021 inc h (0.381–0.533 mm)
feeler g aug e through one inspection slot in the
side of the assembly . Mak e sure it is betw een
the ar mature and the rotor friction surfaces .
2. Tighten the loc k n uts until there is slight
binding on the feeler g aug e but it can be
mo v ed easily within the air g ap ( Figure 58 ).
3. R e peat this for the remaining slots .
4. Chec k eac h slot ag ain and mak e slight
adjustments until the feeler g aug e betw een the
rotor and ar mature with v er y slight contact
betw een them.
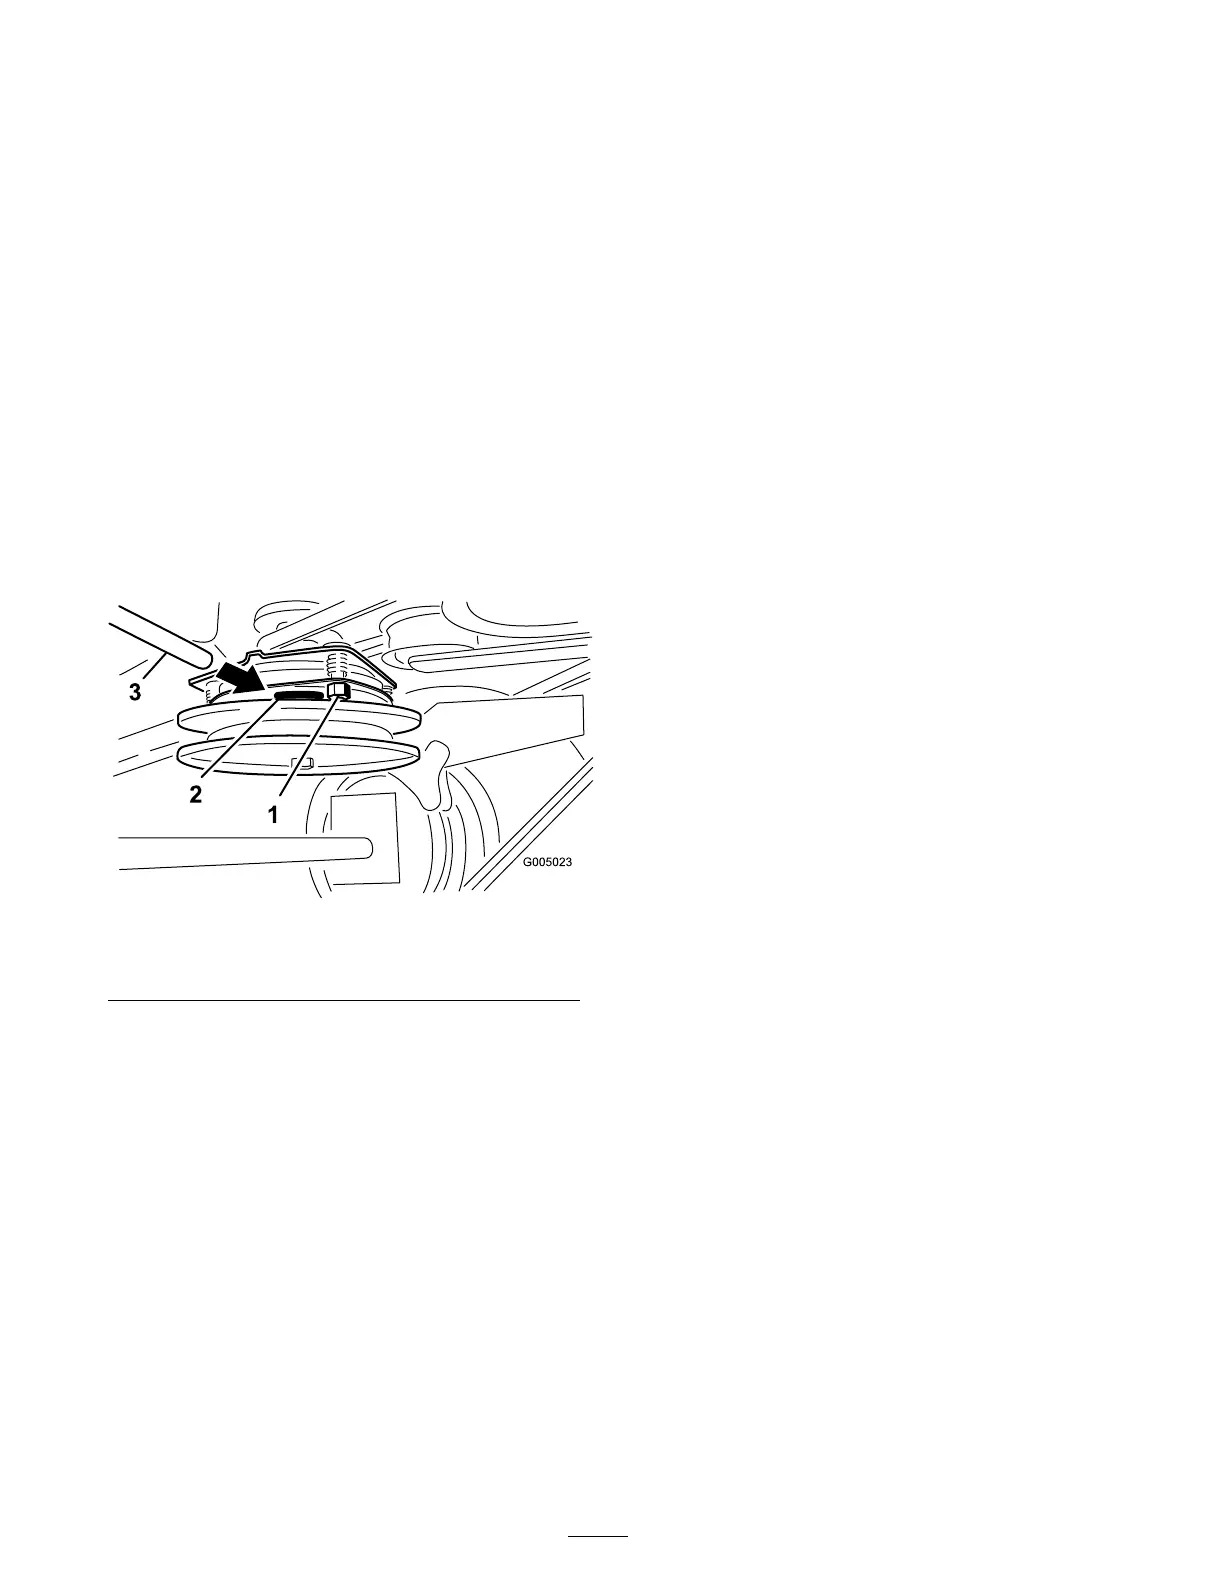
Figure 58
1. Adjusting nut 3. Feeler gauge
2. Slot
Cooling System
Maintenance
Cleaning the Air Intake
Screen
Before eac h use remo v e any build-up of g rass , dir t
or other debris from the cylinder and cylinder head
cooling fins , air intak e screen on flywheel end, and
carburetor -g o v er nor lev ers and linkag e . T his will
help insure adequate cooling and cor rect engine
speed and will reduce the possibility of o v erheating
and mec hanical damag e to the engine .
Brake Maintenance
Servicing the Brake
Before eac h use , c hec k brak es on both a lev el
surface and slope .
Alw a ys set the parking brak e when y ou stop the
mac hine or lea v e it unattended. If the parking
brak e does not hold securely , an adjustment is
required.
Checking the Parking Brake
1. P ark the mac hine on a lev el surface , diseng ag e
the PTO .
2. Stop the engine , remo v e the k ey , and w ait for
all mo ving par ts to stop before lea ving the
operating position.
3. Apply the parking brak e . Setting the parking
brak e should tak e a reasonable amount of
force . If the parking brak e does not hold
securely , an adjustment is required. R efer to
Adjusting the P arking Brak e .
Note: W hen the brak e is eng ag ed, the brak e
handle should be in the 1 o’cloc k position.
Adjusting the Brakes
T he brak e lev er is on the upper control bar . If
the parking brak e does not hold securely , an
adjustment is required.
1. P ark the mac hine on a lev el surface , diseng ag e
the PTO , and set the parking brak e .
2. Stop the engine , remo v e the k ey , and w ait for
all mo ving par ts to stop before lea ving the
operating position.
3. Chec k the brak e before y ou adjust it; refer to
Chec king the Brak es .
4. R elease the parking brak e; refer to R eleasing
the P arking Brak e in Operation , pag e 14 .
5. Loosen the top and bottom jam n uts
( Figure 59 ).
6. T o adjust the brak e , remo v e the hair pin cotter
and clevis pin from the lo w er brak e lev er
( Figure 59 ).
7. R otate the brak e rod in the y ok es . T o tighten
the brak e , lengthen the rod betw een the y ok es .
T o loosen the brak e , shor ten the rod betw een
the y ok es ( Figure 59 ).
44