Hy draulic fluid escaping under pr essur e
can penetrate skin and cause injur y .
• If h y draulic fluid is injected into the
skin it must be surgicall y r emo v ed
within a few hour s by a doctor f amiliar
with this type of injur y . Gang r ene
may r esult if this is not done.
• K eep body and hands a w ay fr om pin
hole leaks or nozzles that eject high
pr essur e h y draulic fluid.
• Use cardboard or paper to find
h y draulic leaks.
• Safel y r eliev e all pr essur e in the
h y draulic system bef or e perf or ming
an y w or k on the h y draulic system.
• Mak e sur e all h y draulic fluid hoses
and lines ar e in good condition and
all h y draulic connections and fittings
ar e tight bef or e appl ying pr essur e to
h y draulic system.
Replacing the Hydraulic Filter
Hot h y draulic fluid can cause sev er e bur ns.
Allo w the h y draulic fluid to cool bef or e
perf or ming an y maintenance to the
h y draulic system.
Chang e the h y draulic filter as follo ws:
• After the first 8 operating hours .
• After ev er y 200 operating hours or yearly
before storag e .
1. Diseng ag e the PTO and set the parking brak e .
2. Stop the engine and w ait for all mo ving par ts
to stop before lea ving the operating position.
Important: Do not substitute automoti v e
oil filter or sev er e h y draulic system dama ge
may r esult.
3. R emo v e h y draulic reser v oir cap and
temporarily co v er opening with a plastic bag
and r ubber band to prev ent all h y dro fluid
from draining out.
4. Locate the filter under the fuel tank and place
drain pan under filter ( Figure 65 ).
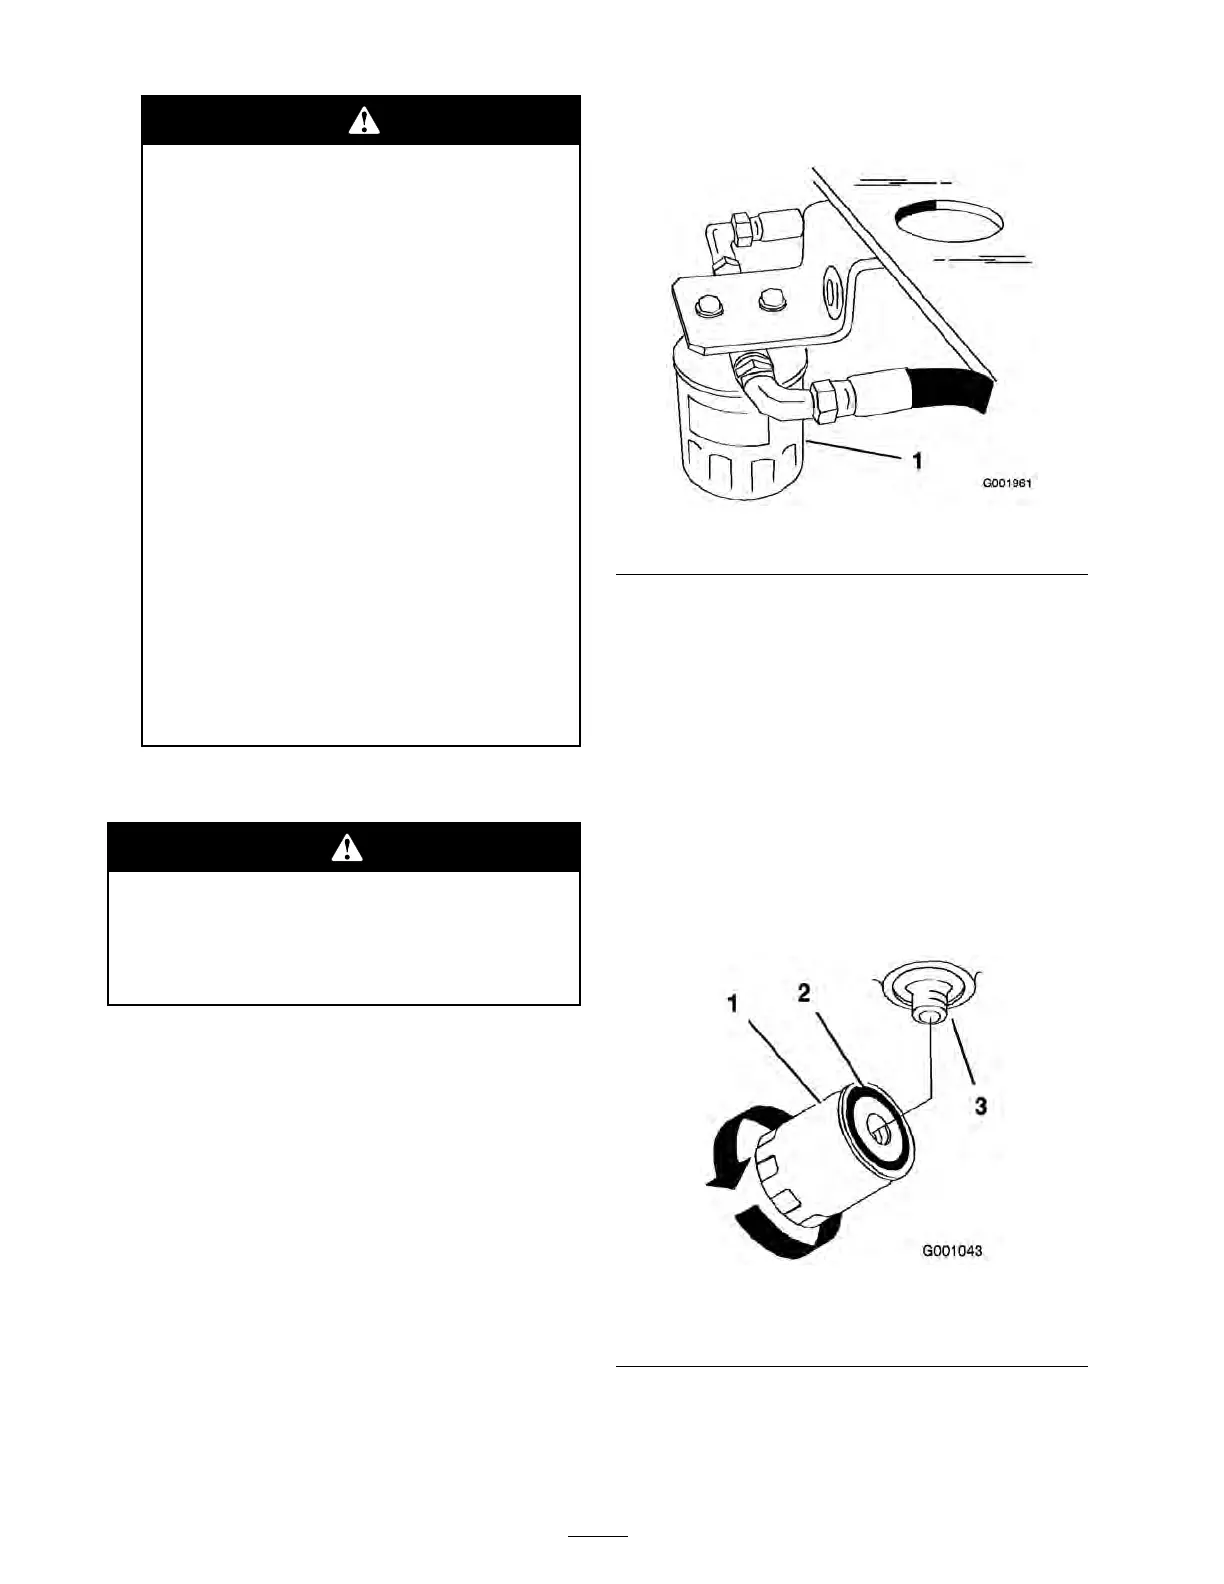
Figure 65
5. R emo v e the old filter and wipe the filter
adapter g ask et surface clean ( Figure 66 ).
6. Apply a thin coat h y dro fluid to the r ubber
g ask et on the re placement filter .
7. Install re placement h y draulic filter onto the
filter adapter . Do not tighten.
8. R emo v e plastic bag from reser v oir opening
and allo w filter to fill with h y draulic fluid.
9. W hen the h y draulic filter is full, tur n the oil
filter cloc kwise until the r ubber g ask et contacts
the filter adapter , then tighten the filter an
additional 1/2 tur n ( Figure 66 ).
Figure 66
1. Hydraulic lter 3. Adapter
2. Gasket
10. Clean up any spilled fluid.
11. Chec k the fluid in the reser v oir , add fluid to the
tank until it reac hes the cold baffle of the tank.
48