Important: A v oid using high pr essur e
air which could f orce dir t thr ough the filter
into the intak e tract.
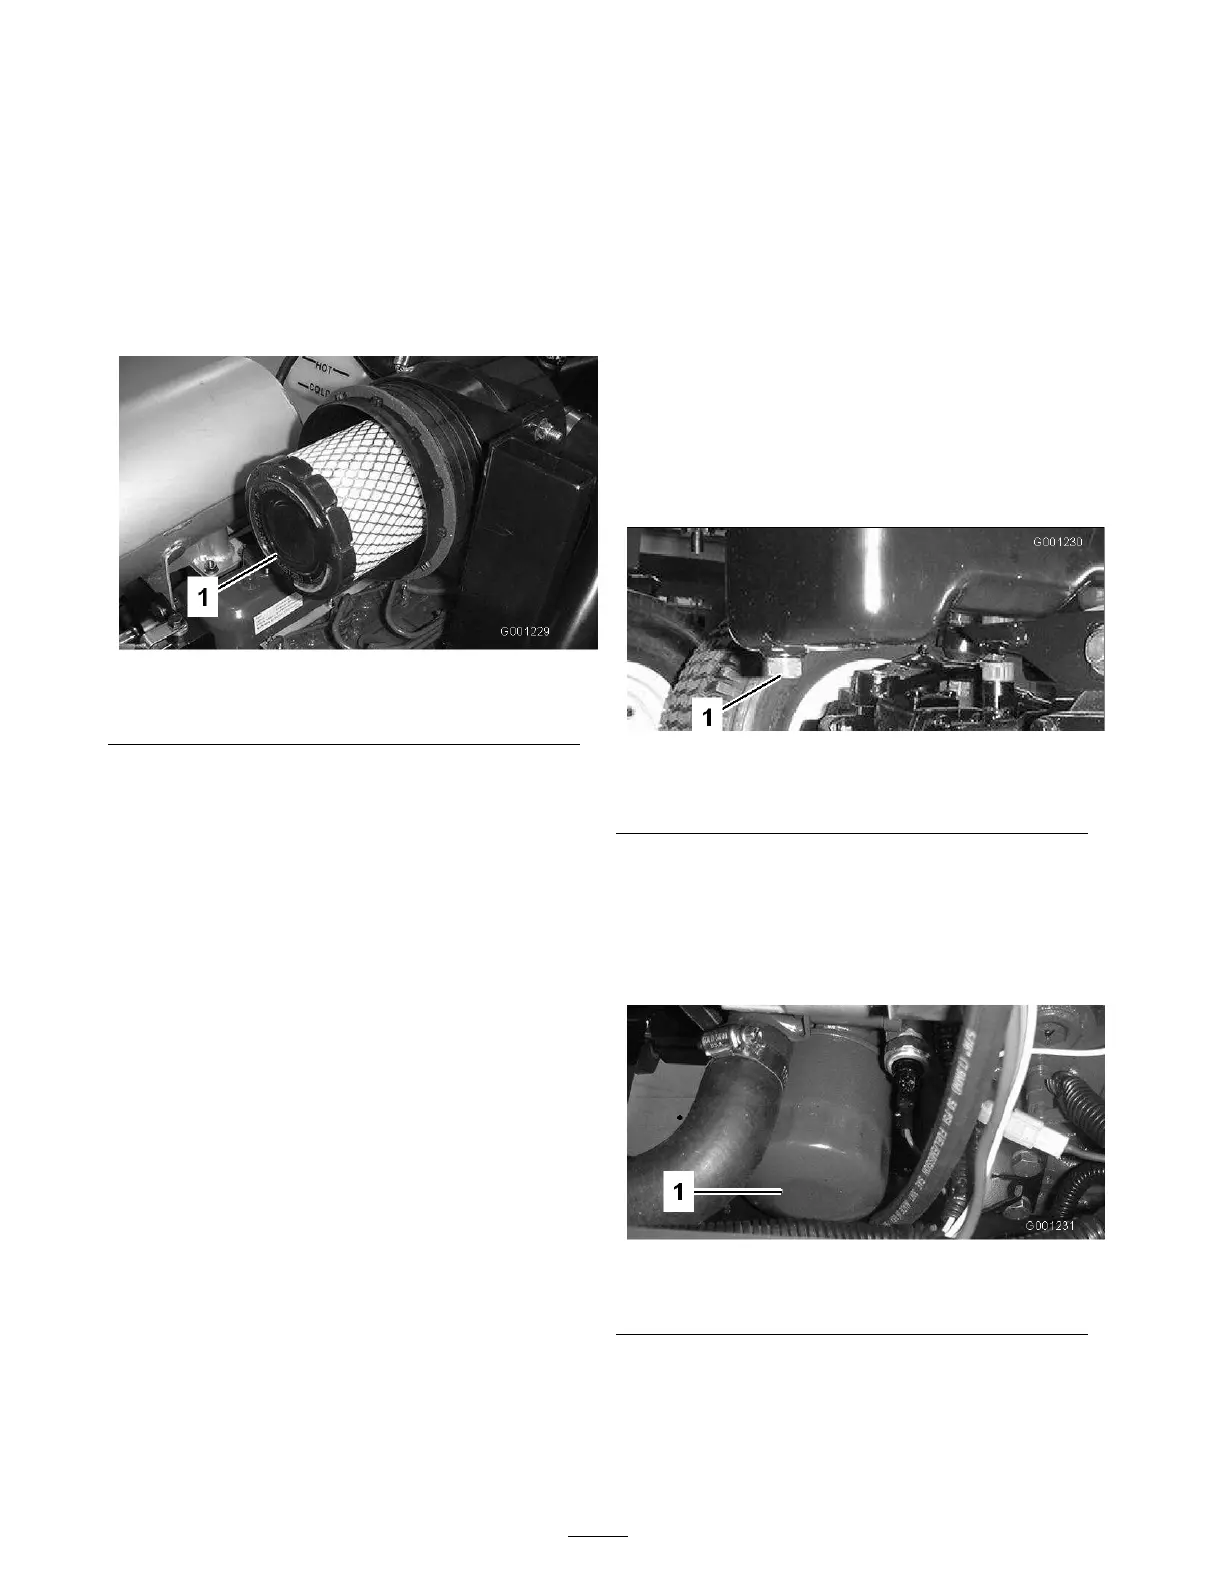
4. R emo v e and re place the primar y filter
( Figure 45 ).
Important: Do not clean the used
element to a v oid dama ge to the filter
media.
Figure 45
1. Filter
5. Inspect the new filter for shipping damag e ,
c hec king the sealing end of the filter and the
body .
Important: Do not use a dama ged
element.
6. Inser t the new filter b y applying pressure to
the outer rim of the element to seat it in the
canister .
Important: Do not appl y pr essur e to the
flexible center of the filter .
7. Clean the dir t ejection por t located in the
remo v able co v er , as follo ws:
A. R emo v e the r ubber outlet v alv e from the
co v er .
B . Clean the ca vity .
C . R e place the outlet v alv e .
8. Install the co v er orienting the r ubber outlet
v alv e in a do wnw ard position—betw een
appro ximately 5:00 to 7:00 when view ed from
the end ( Figure 44 ).
9. R eset the indicator ( Figure 43 ) if sho wing red.
Changing the Engine Oil
And Filter
Chec k oil lev el after eac h da y’ s operation or eac h
time mac hine is used. Chang e oil and filter initially
after first 50 hours of operation; c hang e oil and
filter after ev er y 150 hours of operation thereafter .
If possible , r un engine just before c hanging oil
because w ar m oil flo ws better and car ries more
contaminants than cold oil.
1. P osition the mac hine on a lev el surface .
2. Open the hood.
3. Set a drain pan under the oil pan and in line
with the drain plug ( Figure 46 ).
Figure 46
1. Drain plug
4. Clean the area around the drain plug .
5. R emo v e the drain plug and allo w oil to flo w
into drain pan.
6. R emo v e and re place the oil filter ( Figure 47 ).
Figure 47
1. Oil lter
7. After the oil is drained, install the drain plug
and wipe up any oil that is spilled.
8. Fill the crankcase with oil; refer to Chec king
the Engine Oil Lev el in Operation , pag e 29 .
44