Figure 6
1. Seat belt latch
Step
5
Installing the Manual Tube
Parts needed for this step:
1
Manual tube
2
R-clamp
Procedure
1. R emo v e the man ual tube and R-clamps secured
to the seat plate , Discard the 2 mounting bolts
and flat w ashers .
2. R emo v e the 2 n uts and vinyl caps (if previously
installed) securing the upper seat brac k et to the
left side of the seat suspension ( Figure 7 ).
3. Loosely mount the R-clamps to the seat
brac k et studs with the 2 n uts previously
remo v ed. ( Figure 7 ). T he R-clamps are to be
positioned under the seat suspension tabs .
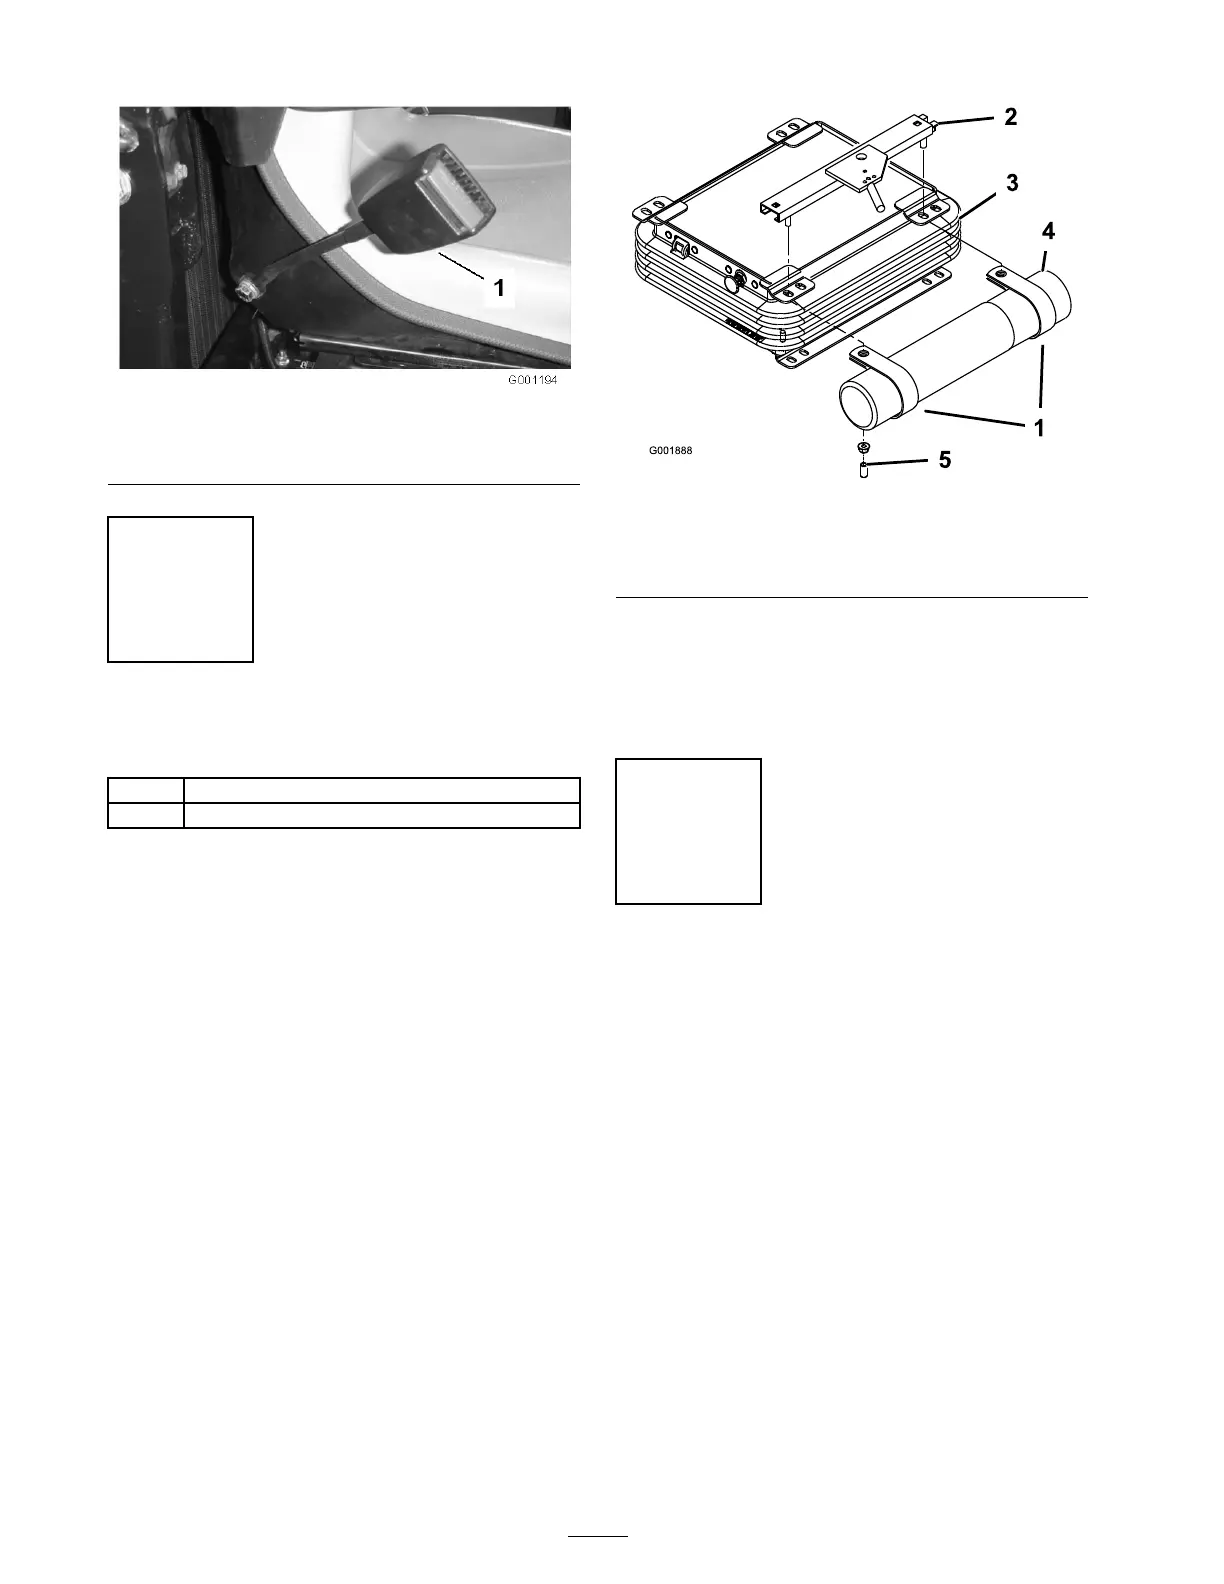
Figure 7
1. R-clamps 4. Manual tube
2. Upper seat bracket 5. Vinyl cap
3. Seat suspension
4. Install the man ual tube into the R-clamps and
tighten the n uts ( Figure 7 ).
5. Inser t the vinyl caps onto the seat brac k et
studs .
Step
6
Activating and Charging the
Battery
No Parts Required
Procedure
Use only electrolyte (1.265 Specific Gra vity) to fill
batter y initially .
1. R emo v e the batter y from the mac hine .
Important: Do not add electr ol yte while
the batter y is in the machine. Y ou could
spill it, causing cor r osion.
2. Clean the top of the batter y and remo v e the
v ent caps ( Figure 8 ).
18