© 2005 - 2007 TOSHIBA TEC CORPORATION All rights reserved e-STUDIO520/523/600/603/720/723/850/853
ADJUSTMENT
3 - 61
3
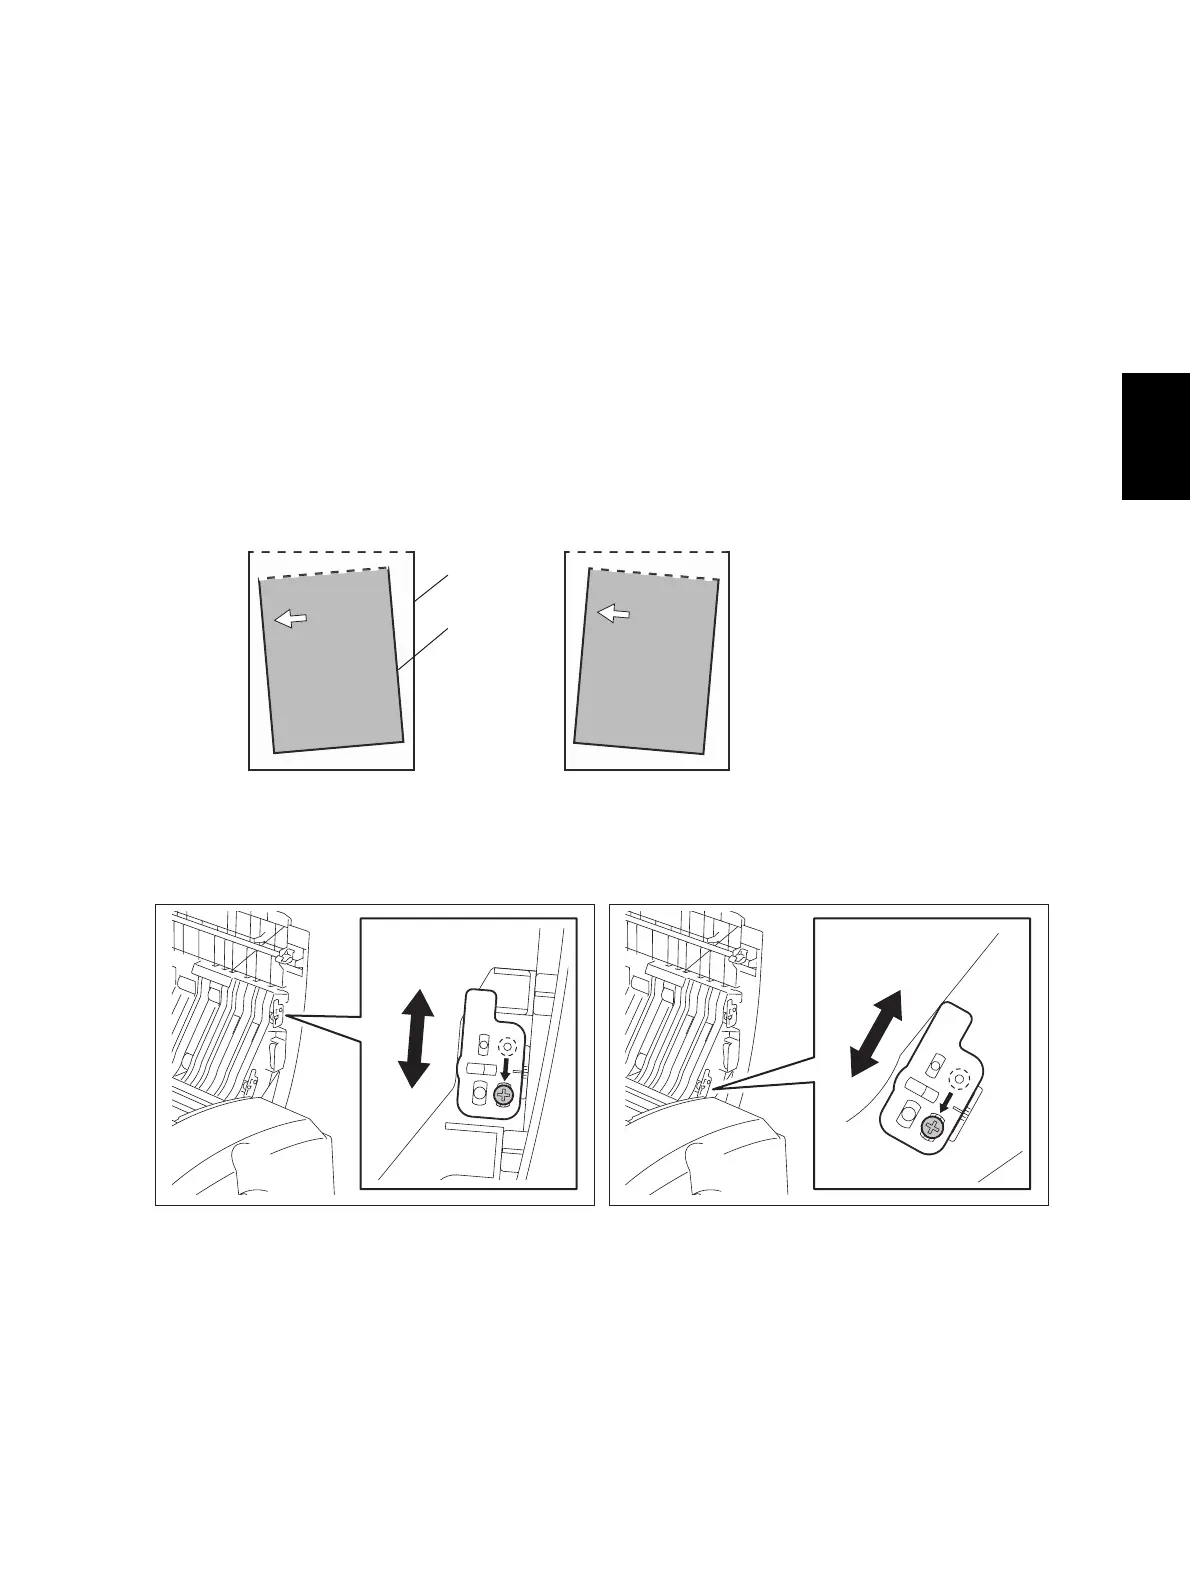
3.11.3 Skew adjustment
When an image skew occurs, adjust it according to the following steps, Step 1 Step 2 Step 3.
Note: Note:
Perform this adjustment after confirming that the equipment has been adjusted properly.
Prior to this adjustment, of RADF position and height are needed to be adjusted.
(1) Step 1
Case A:
Shift the screw to an oblong hole, and then move the plate towards the side A to adjust the image
skew.
Case B:
Shift the screw to an oblong hole, and then move the plate towards the side B to adjust the image
skew.
Fig. 3-65
Simplex
Fig. 3-66
Duplex (reverse)
Fig. 3-67
AB
Paper
Original
White arrow: feeding direction
(
A
)
(
B
)
(
A
)
(
B
)

 Loading...


