64
Chapter 4
Advanced Functions on Web Management Page
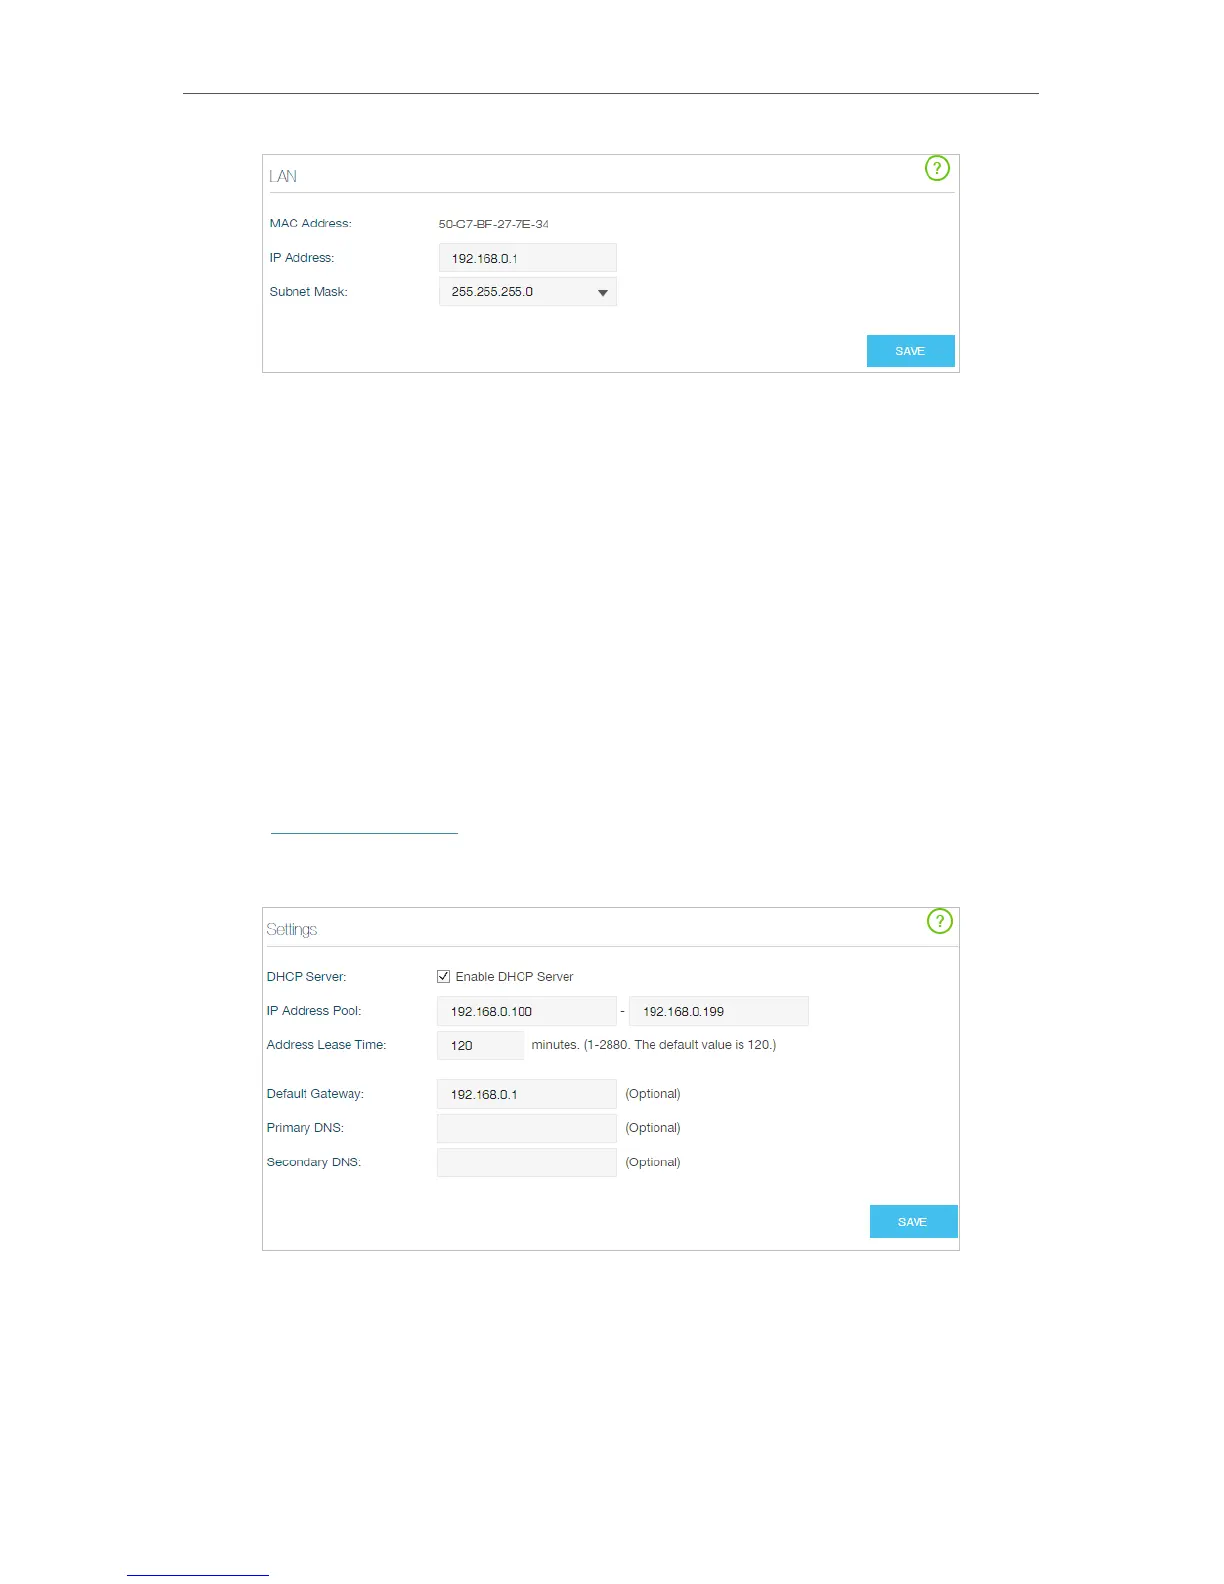
3. Type in a new IP Address appropriate to your needs, and you can use this address
to access to the web management page next time.
4. Select the Subnet Mask from the drop-down list. The subnet mask together with
the IP address identifies the local IP subnet.
5. Click SAVE to make the settings effective.
4.10. 1.2. Use the Router as a DHCP Server
You can configure the router to act as a DHCP server to assign IP addresses to its clients.
To use the DHCP server function of the router, you must configure all computers on the
LAN to obtain an IP Address automatically.
Follow the steps below to configure DHCP server.
1. Visit http://tplinkwifi.net, and log in with your Kasa account.
2. Go to Advanced > Network > DHCP Server page and enable DHCP Server.
3. Specify the IP Address Pool, the start address and end address must be on the
same subnet with LAN IP. The router will assign addresses within this specified
range to its clients. It is from 192.168.0.100 to 192.168.0.199 by default.
4. Enter a value for the Address Lease Time. The Address Lease Time is the amount
of time in which a DHCP client can lease its current dynamic IP address assigned